Changing a bike fork might sound difficult, but it is a task many riders can do at home with the right tools and a clear guide. Whether you want to upgrade your suspension for a smoother ride, replace a damaged fork, or switch from a rigid fork to a suspension fork, understanding each step is key.
A bike’s fork is more than just a part that holds the front wheel; it affects handling, comfort, and safety. Replacing it correctly keeps your bike running smoothly and safely. This article will give you a complete guide to changing a bike fork, with practical advice and expert insights, so you can do the job with confidence.
Understanding Your Bike Fork
Before you start, it’s important to know what type of fork your bike has and what you want to replace it with. There are two main types: rigid forks and suspension forks. Rigid forks are common on road bikes and some mountain bikes, while suspension forks are found on most mountain bikes for shock absorption.
Forks also have different steerer tube sizes and lengths. The most common steerer tube diameters are 1″, 1 1/8″, and tapered (1 1/8″ to 1.5″). The material—aluminum, steel, or carbon—also matters for weight and ride feel. Check your bike’s frame and headset compatibility before buying a new fork.
One insight many beginners miss: not all forks fit all bikes, even if the wheel size looks the same. Always double-check the steerer tube length, diameter, and axle type (quick release or thru-axle).
Tools And Parts Needed
Having the right tools and parts makes the job much easier. Here’s what you need:
- Allen keys (usually 4mm, 5mm, 6mm)
- Torque wrench (for precise bolt tightening)
- Crown race setting tool or a soft mallet
- Grease (for headset bearings)
- New fork
- Headset spacers (in case you need to adjust handlebar height)
- Cutting tool (if you need to shorten the steerer tube, like a pipe cutter or hacksaw)
- Star nut and star nut setter (for threadless setups)
- Headset press (if replacing headset bearings)
- Measuring tape or ruler
Not all tools are required for every fork swap, but having them ready prevents surprises.

Credit: mbaction.com
Preparing The Bike
Start by placing your bike in a work stand if possible. This keeps the bike stable and makes the work much easier. Shift to the smallest chainring and rear cog to reduce tension on the cables.
Remove the front wheel. If your bike has rim brakes, open the brake caliper or release the cable. For disc brakes, simply slide the wheel out after loosening the axle.
Take photos of the headset and spacer arrangement before you remove anything. This small step saves confusion when reassembling the cockpit.
Removing The Old Fork
Follow these steps carefully:
- Remove brake calipers from the fork. For disc brakes, unscrew the caliper from the fork leg. For rim brakes, loosen the mounting bolts and slide the brake arms off.
- Remove the front wheel if you haven’t already.
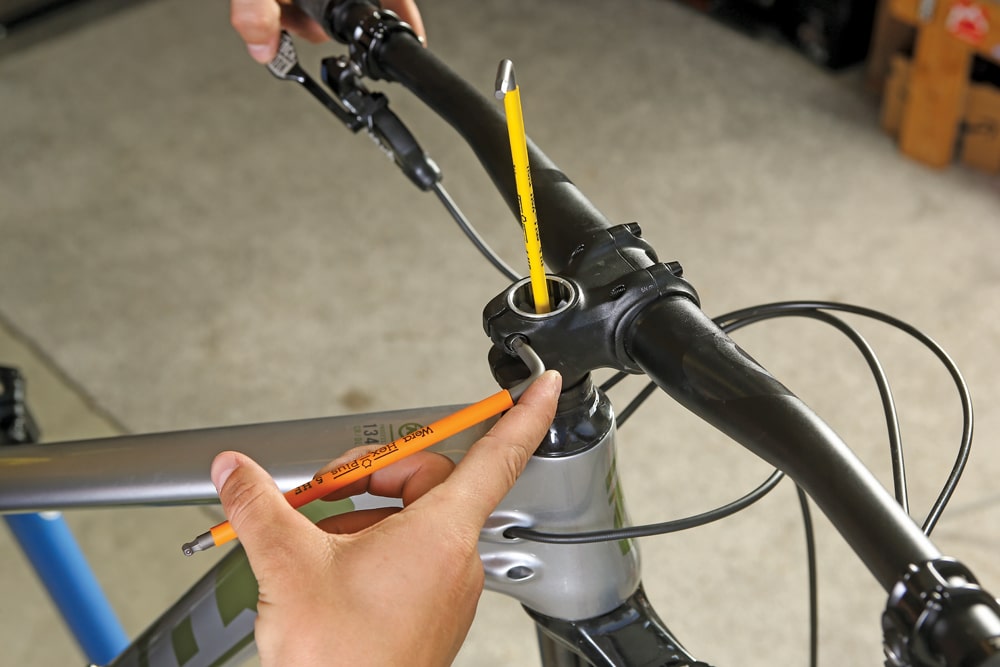
- Loosen the stem bolts that clamp the stem to the steerer tube (usually 4mm or 5mm Allen key).
- Remove the top cap from the stem using an Allen key. The fork should now be free, but hold the fork so it doesn’t fall out.
- Slide the fork downward, removing it from the head tube. Be careful—headset bearings may fall out. Catch them and note their orientation.
A beginner mistake is letting the headset bearings drop or get dirty. Set them on a clean cloth in the order you removed them.
Credit: mbaction.com
Preparing The New Fork
Now it’s time to prepare your new fork for installation. This step is crucial for a safe, proper fit.
Cutting The Steerer Tube
Most new forks come with a longer steerer tube than needed. You must cut it to match your old fork or desired handlebar height. Place the new and old forks side by side and mark the cut. Always cut a little longer than you think, as you can remove more but cannot add length back.
Use a pipe cutter or hacksaw with a guide for a straight cut. Smooth the edges with a file to avoid sharp burrs. Always wear safety glasses during this step.
Installing The Crown Race
The crown race is a small ring at the base of the steerer tube. It sits on the fork’s “crown” and supports the bottom headset bearing. Most new forks do not come with a crown race installed. If your headset uses a split crown race, you may be able to remove it by hand. Otherwise, use a flat screwdriver or crown race puller to gently pry it off the old fork.
To install, place the crown race on the new fork and use a crown race setting tool or a soft mallet to seat it evenly. Don’t hammer directly on the crown race with metal, as this can damage it.
Star Nut Installation
For threadless setups, you need a star nut inside the steerer tube. Use a star nut setter for proper depth—usually about 10-15mm below the top of the steerer. If your fork is carbon, do not use a star nut—instead, use a special expander plug.
Installing The New Fork
With the new fork prepared, reassembly follows these steps:
- Insert the new fork up through the head tube, making sure the bearings are in place and greased.
- Add headset spacers as needed to adjust handlebar height and comfort. Match the arrangement from your earlier photos or adjust if you want a higher or lower bar.
- Slide the stem onto the steerer tube. Make sure the stem is fully seated. There should be at least 3mm of steerer tube above the stem for the top cap to press down properly.
- Install the top cap and bolt. Tighten gently—this sets preload on the headset bearings, not the final clamping force.
- Align the stem with the front wheel, then tighten the stem bolts to the torque specified by the manufacturer (usually 5-8 Nm).
Check for smooth steering with no play. If you feel looseness or hear knocking, the headset may need more preload.

Credit: www.youtube.com
Reinstalling Brakes And Wheel
Reattach your brakes to the new fork. For disc brakes, align the caliper with the rotor and tighten the bolts evenly. For rim brakes, make sure the pads contact the rim squarely and don’t rub.
Slide the front wheel into the fork dropouts. Secure the axle or quick release, and check that the wheel spins freely and straight.
Adjusting And Testing
Before riding, double-check these points:
- Steering: Should turn smoothly with no knocking or resistance.
- Brakes: Fully functional and properly aligned.
- Wheel: Properly seated and secure.
- Bolts: All stem and brake bolts tightened to spec.
Take your bike for a short test ride. Listen for any unusual noises. Apply the brakes firmly to test their function and make sure the fork doesn’t shift or creak.
Common Mistakes To Avoid
- Cutting the steerer tube too short: Once cut, you can’t add material back. Always measure twice.
- Mixing up headset bearings: Many are specific to top and bottom. Keep track during disassembly.
- Over-tightening the headset: This can cause stiff steering and wear out bearings quickly.
- Forgetting the crown race: Missing this small part can ruin the new fork and headset.
- Using a star nut in a carbon steerer: This damages carbon forks. Use an expander plug instead.
A non-obvious insight: Always keep your old fork until you’ve test-ridden the new setup for a few days. Sometimes, unexpected issues arise, and you may need to revert to the old fork.
Comparing Fork Types And Features
To help you choose the right fork, here’s a quick comparison of major types:
| Fork Type | Best For | Main Material | Typical Weight |
|---|---|---|---|
| Rigid Fork | Road, commuting | Steel, Carbon | 700-1000g |
| Suspension Fork | Mountain biking | Aluminum, Steel | 1500-2500g |
| Carbon Fork | Performance road | Carbon | 350-500g |
Another key comparison is axle type:
| Axle Type | Common Uses | Pros | Cons |
|---|---|---|---|
| Quick Release | Road, older MTB | Easy removal | Less stiff, less secure |
| Thru-Axle | Modern MTB, gravel | Stiff, secure | Needs matching frame, more weight |
When To Replace Your Fork
Not every issue means you need a new fork. Replace your fork if:
- You see visible cracks, dents, or bends in the fork legs or steerer.
- The fork creaks or shifts even after tightening bolts.
- Suspension forks leak oil or lose damping, and servicing is not possible.
- You want to change geometry (such as switching from a rigid to a suspension fork for off-road comfort).
Extra Tips For A Safe Fork Swap
- Take clear photos during each step, especially if you’re new to bike maintenance. These photos help with reassembly.
- If you’re unsure about any step, visit a professional bike shop. Improper installation can cause crashes or injuries.
- After the swap, recheck all bolts after your first ride. Sometimes, components “bed in” and need a little tightening.
Cost And Time Estimate
Swapping a fork at home usually takes 1-2 hours if you have all the tools. A local bike shop may charge $40–$100 for labor, plus parts.
Forks themselves range widely in price:
- Basic rigid fork: $40–$100
- Entry-level suspension fork: $100–$200
- High-end suspension or carbon fork: $300–$1000+
Useful Resources
If you want to learn even more about bike forks and maintenance, the Park Tool Repair Help page offers excellent step-by-step guides and videos.
Frequently Asked Questions
How Do I Know If A Fork Fits My Bike?
Check the steerer tube diameter and length, axle type, and wheel size compatibility. Compare these to your current fork or check your bike’s specifications.
Can I Switch From A Rigid Fork To A Suspension Fork?
Yes, but your frame must be designed for the extra stress and length of a suspension fork. Also, check for correct axle and brake mount compatibility.
Do I Need Special Tools To Change A Bike Fork?
Basic tools like Allen keys and grease are enough for most swaps. But cutting the steerer tube or installing a crown race may need special tools.
Is It Safe To Cut A Carbon Steerer Tube At Home?
It is possible with a carbon-specific saw blade and proper guide, but mistakes can be expensive. If unsure, have a bike shop do it.
What Are The Signs My Fork Is Damaged?
Look for cracks, dents, or bent tubes. Creaking, visible flex, or oil leaks (for suspension) are also warnings that it’s time to replace the fork.
Changing a bike fork is a rewarding project that can improve your ride and teach you more about your bike. With careful preparation and attention to detail, you can complete the job confidently and safely.