Changing your bike stem might sound technical, but it’s a skill every cyclist can learn. The stem connects your handlebars to the steering tube, and its length and angle affect how your bike feels and fits. Maybe you want to make your ride more comfortable, or you need a new stem after a crash.
Whatever the reason, swapping stems is not only possible at home—it’s also a great way to understand your bike better. With a few tools and some basic steps, you can adjust your riding position, improve control, and even avoid pain during long rides.
In this guide, you’ll learn the full process of how to change a bike stem, what mistakes to avoid, and how to choose the right new stem for your needs. Even if you’re new to bike maintenance, this article will give you the confidence to get the job done safely.
Why Change Your Bike Stem?
The bike stem plays a major role in your riding experience. Changing it can solve problems or give your bike a new feel. Here’s why riders often swap stems:
- Better fit: If your reach feels too long or short, a new stem can help.
- Comfort: Adjusting stem height or angle can reduce wrist, back, or neck pain.
- Handling: A shorter stem gives quicker steering; a longer stem slows it down for stability.
- Upgrades: New stems are often lighter or stronger than old ones.
- Damage: If you crash, a bent or cracked stem must be replaced for safety.
Not every issue needs a new bike or expensive parts. Sometimes, a stem swap is all it takes to make cycling enjoyable again.
Understanding Bike Stem Types
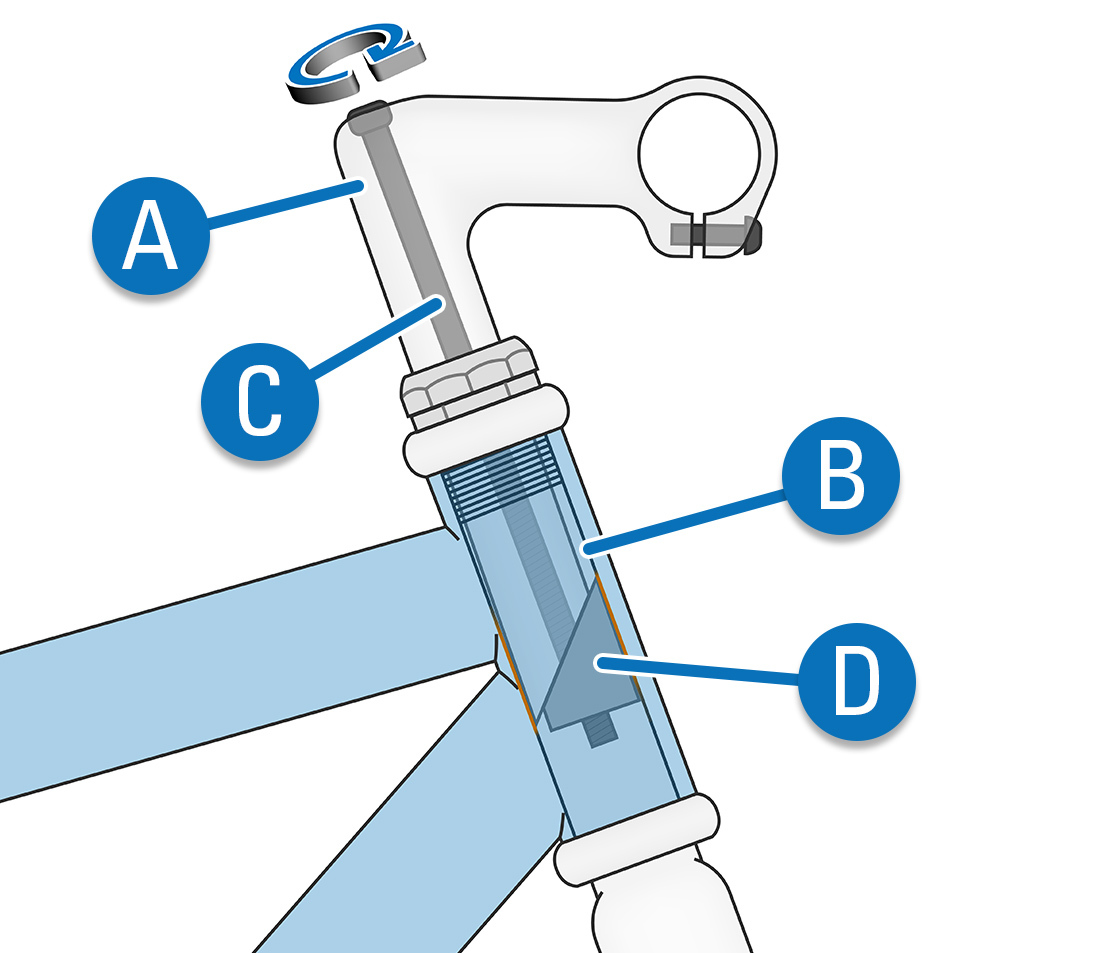
Before starting, you must know which stem type your bike uses. Most modern bikes have one of two main stem designs:
| Stem Type | How it Connects | Common on |
|---|---|---|
| Threadless | Clamps onto outside of fork steerer tube | Modern road, mountain, hybrid bikes |
| Quill | Slides inside fork steerer tube, held with bolt and wedge | Older bikes, some city bikes |
Threadless stems are the standard today. If your stem clamps around the outside of the steering tube and uses two or four bolts to hold the handlebars, you have a threadless system. If the stem goes inside the tube with a single top bolt, it’s a quill stem.
Credit: www.parktool.com
Tools And Parts You Need
Changing a stem is straightforward, but the right tools make it smooth and safe. Here’s what you’ll need:
- Allen wrenches (hex keys): Common sizes are 4mm, 5mm, and 6mm.
- Torque wrench: Ensures bolts are tight enough but not overtightened.
- Grease or anti-seize compound: Protects parts and prevents sticking.
- New stem: Make sure it fits your fork steerer tube and handlebars.
- Rag: To clean parts.
- Spacer rings: For threadless systems, if you need to adjust height.
- Bike stand (optional): Makes the job easier but not required.
If you’re replacing a quill stem, you may also need a wrench for the top bolt.
Step-by-step Guide: How To Change A Bike Stem
Follow these steps for a threadless stem, as it’s the most common setup today. If your bike uses a quill stem, see the special notes below.
1. Prepare Your Bike
Place your bike on a level surface. Shift it into a gear that keeps the chain stable. If you have a bike stand, use it to hold the bike steady. Remove any accessories on the handlebars, like lights or computers, to prevent damage.
2. Loosen The Handlebar Clamp
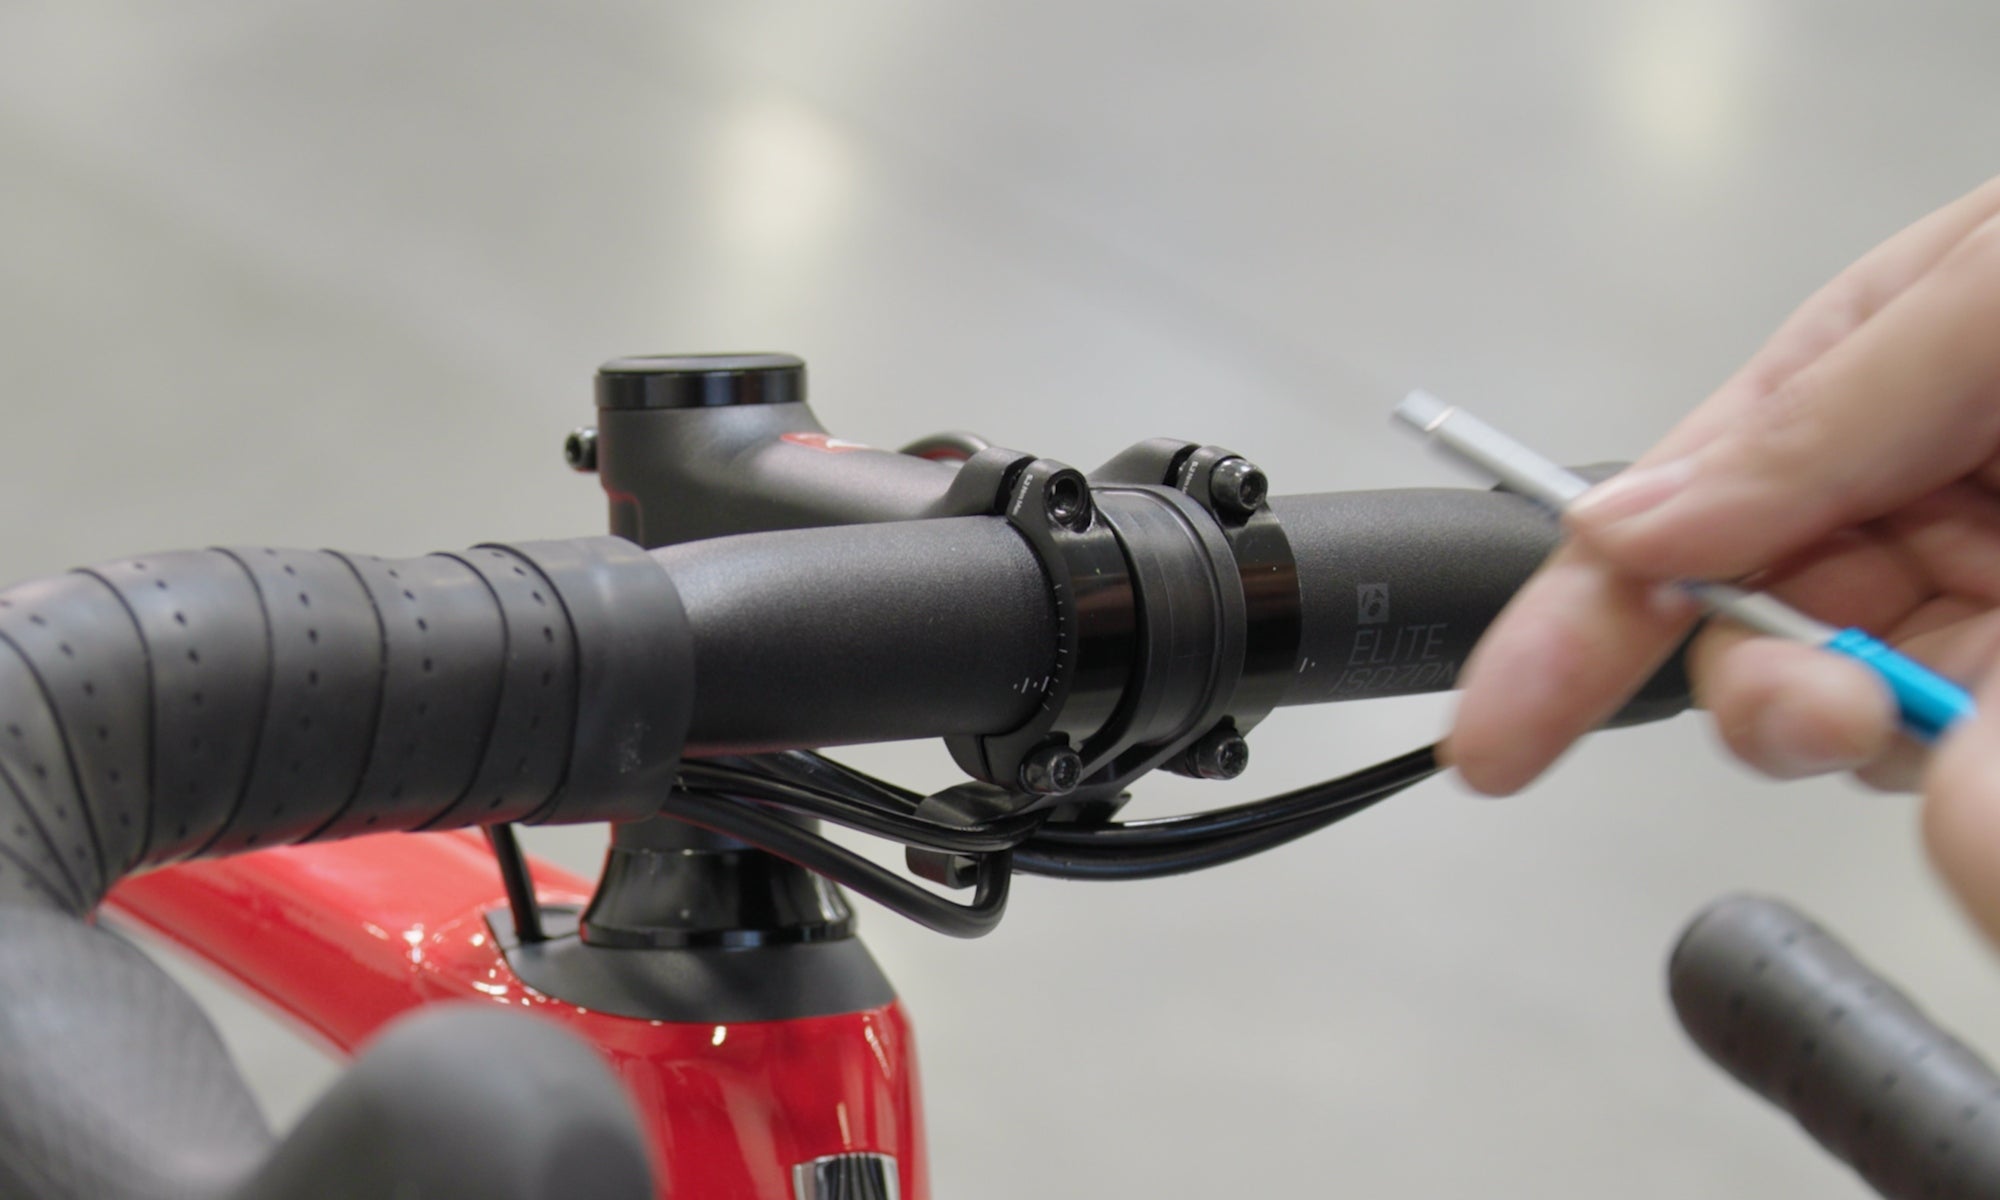
Find the bolts that hold the handlebars to the stem. Most modern stems have two or four bolts on the front (faceplate). Use the correct Allen wrench to loosen these evenly. Support the handlebars so they don’t fall or twist cables.
Non-obvious tip: If your handlebars have shifters or brake levers attached, you don’t need to remove them. Just gently let the bars hang, supported by a towel or zip tie if needed.
3. Remove The Top Cap And Stem Bolts
At the very top of the steerer tube, you’ll see a bolt in the center (the top cap). Remove this bolt with your Allen key. Next, loosen the two (sometimes one) bolts on the side of the stem that clamp it to the steerer tube.
Now, the stem should slide up and off the steerer tube. If it’s stuck, twist gently as you pull—never force it.
4. Check And Adjust Spacers
Spacers are small rings that sit above and below the stem on the steerer tube. They help set the handlebar height. When you remove the old stem, check how many spacers are above and below. You can reuse them to adjust the new stem’s position.
Beginner insight: The top cap bolt doesn’t hold the stem in place while riding; it only sets bearing tension. The side bolts clamp the stem. Always tighten the top cap first when reassembling.
5. Install The New Stem
Slide the new stem onto the steerer tube. Decide if you want to move spacers to change handlebar height. The stem should sit fully onto the tube (not half-on, half-off).
If you’re raising the bars, put more spacers under the stem. To lower, put them above. Never stack too many spacers above or below; a maximum of 30mm under the stem is a common rule.
Replace the top cap and bolt, but only tighten it gently—just enough to remove any play in the headset (steering feels solid, not loose).
6. Tighten The Stem Bolts
Align the stem with your front wheel so handlebars are straight. Tighten the stem’s side bolts evenly, using a torque wrench if possible. Most stems require 5-6 Nm of torque—check the numbers printed on your stem.
Practical detail: Tighten each bolt a little at a time in sequence, not one fully before the other. This ensures even pressure.
7. Re-attach Handlebars
Place the handlebars in the stem clamp. Replace the faceplate and bolts. Tighten each bolt a bit at a time in a cross pattern (diagonal corners if four bolts). Use a torque wrench to finish; most bars need 4-6 Nm.
Double-check that cables aren’t twisted or stretched.
8. Test And Fine-tune
Stand over the bike and check alignment. The handlebars should be straight with the wheel. If not, loosen the stem bolts and adjust. Check for any play in the headset by holding the front brake and rocking the bike—there should be no knocking.
Go for a short ride, checking steering and comfort. Make small adjustments as needed.
Quill Stem Special Notes
If you have a quill stem (common on older bikes):
- Loosen the top bolt several turns, then tap it with a rubber mallet to release the wedge inside.
- Pull the stem up and out.
- Insert the new stem to the correct height (minimum insertion mark must be hidden inside the tube).
- Tighten the top bolt to secure.

Credit: www.purecycles.com
Choosing The Right New Stem
Not all stems are the same. When buying, check these key measurements:
| Feature | What to Measure | Common Sizes |
|---|---|---|
| Steerer tube diameter | Inside diameter of fork tube | 1 1/8″ (28.6mm) is standard |
| Handlebar clamp diameter | Bar diameter at stem | 31.8mm (modern); 25.4mm (older bars) |
| Length | Center of steerer to center of bars | 60–130mm typical |
| Angle (rise) | Slope of stem | ±6°, ±17°, 0° |
A shorter stem makes steering faster, but can feel twitchy for beginners. A longer stem is stable but stretches your reach.
Real-world example: Switching from a 120mm to a 90mm stem often helps riders with back pain, but it also makes the bike steer more quickly.
Common Mistakes To Avoid
Even experienced cyclists sometimes make errors when changing stems. Here are mistakes to watch out for:
- Overtightening bolts: This can crush handlebars or damage the steerer tube. Use a torque wrench.
- Ignoring headset tension: If the top cap isn’t set right, your steering will feel loose or sticky.
- Wrong sizes: Forcing a stem onto the wrong diameter can damage parts or cause a crash.
- Stacking too many spacers: This weakens the steering and can void warranties.
- Loose bolts: Always check bolts again after your first ride.
- Not hiding minimum insertion marks: For quill stems, never ride with the mark visible.
Real-world Tips For Success
Changing a stem isn’t just about mechanics—it’s about making your bike fit you. Here’s how to get the best results:
- Test ride before final tightening. Check reach, comfort, and handling.
- Mark your old settings. Use a small piece of tape to remember your old handlebar angle.
- Take photos before starting. This helps you put everything back the same way.
- Check cable lengths. Shorter stems can cause tight cables; longer ones can make them sloppy.
- Clean all contact points. Dirt or grease can make bolts slip or parts creak.
Safety And Maintenance After Changing A Stem
Once you’ve changed your stem, safety comes first. Here’s what to do:
- Inspect all bolts after your first ride. Sometimes, parts settle and need a retighten.
- Check for cracks or play in the headset once a month.
- If you hear creaking or feel looseness, stop riding and check the stem.
Most bike shops will check your work for free or a small fee if you’re unsure.
When To Seek Professional Help
While changing a stem is a basic skill, some situations call for a pro:
- Carbon handlebars or steerer tubes: These parts are fragile and expensive. Incorrect torque can cause dangerous damage.
- Integrated handlebars and stems: Found on some high-end bikes, these require special tools.
- Unusual sizes: Vintage bikes or rare brands may need custom parts.
If you’re ever unsure, a certified bike mechanic can help you get it right.
Frequently Asked Questions
What Size Stem Do I Need For My Bike?
You need a stem with the same steerer tube diameter as your fork (usually 1 1/8″ for modern bikes) and the same handlebar clamp diameter as your bars (often 31.8mm). Measure both before buying.
How Do I Know If My Stem Is Too Long Or Short?
If you feel stretched out or get back/neck pain, your stem may be too long. If steering feels twitchy or cramped, it could be too short. A bike fit specialist can help you choose the best length.
Can I Flip My Stem Upside Down For More Height Or Lower Bars?
Yes, most threadless stems can be flipped to change the handlebar height. A stem marked ±6° can point up for more comfort or down for a lower, sportier position.
Is It Safe To Change A Bike Stem Myself?
For most bikes, yes—if you use the right tools and follow instructions. Always check bolt tightness and headset adjustment before riding. When in doubt, ask a mechanic.
Where Can I Learn More About Bike Fit And Component Compatibility?
For deeper details, you can visit Wikipedia’s page on bicycle stems for technical explanations, compatibility charts, and advanced tips.
Changing your bike stem is one of the simplest ways to improve comfort and control. With the right tools, attention to detail, and a bit of patience, you can make your bike feel new again. And every time you work on your bike, you build skills that help you ride safer and smarter.
Credit: www.theproscloset.com