Changing a bike fork is a job that can seem complex, but with the right tools and a clear approach, it’s a task many cyclists can do at home. Whether you want to upgrade to a lighter carbon fork, replace a damaged one, or switch between suspension and rigid forks, learning to do this yourself can save you time and money.
This article will guide you through every step, explain why each detail matters, and highlight practical advice that even experienced riders sometimes overlook. By the end, you’ll know not only how to change a bike fork, but also how to avoid common problems and get the best ride possible.
Understanding Your Bike Fork
A bike fork is more than just the front “legs” of your bicycle. It holds the front wheel, connects to the frame via the headset, and absorbs forces from the road or trail. Forks come in different types: rigid, suspension, carbon, aluminum, and steel. Each has its own installation needs and compatibility issues. Before you buy or install a new fork, you must know:
- The steerer tube diameter (commonly 1″, 1 1/8″, or tapered)
- The axle type (quick release or thru-axle)
- The brake type (disc or rim)
- The fork length and rake, which affect handling
Choosing the wrong fork can make your bike unsafe or uncomfortable. For example, using a fork with the wrong steerer tube size or brake mount will not work, and mismatched fork length can change your bike’s geometry.
Tools And Materials You’ll Need
Having the right tools makes this job much easier. Here’s what you’ll need for most modern bikes:
- Hex wrenches/Allen keys (4, 5, 6, and 8 mm sizes)
- Torque wrench (for correct bolt tightness)
- Headset press (optional, for some installations)
- Crown race setter (or a wide pipe)
- Hammer (rubber or plastic mallet preferred)
- Grease (bike-specific)
- Cutting tool (hacksaw or pipe cutter, if you must shorten the steerer)
- Measuring tape
- Headset spacers
- New fork (compatible with your frame and wheel)
- Star nut setter (for threadless systems)
- Headset removal tool (if replacing the headset)
- Bike stand (optional, but useful)
Two often-overlooked items: a clean rag for wiping parts and safety glasses for cutting or hammering.

Credit: www.reddit.com
Step-by-step Process To Change A Bike Fork
Let’s walk through the process in detail, with tips that help even experienced cyclists avoid mistakes.
1. Remove The Front Wheel And Brakes
First, take off the front wheel. If you have disc brakes, loosen the caliper and move it aside—do not pull the brake lever with the wheel out. For rim brakes, disconnect the brake cable. This gives clear access to the fork.
2. Loosen The Stem And Headset
Loosen the bolts on the side of the stem (the part connecting handlebars to the fork steerer). Do not fully remove them yet. Next, unscrew the top cap at the very top. This releases tension on the headset. Gently slide the stem and spacers off and keep them in order.
3. Slide Out The Old Fork
Hold the fork with one hand as you remove the last piece holding it in place. The fork may drop out fast. Remove it carefully to avoid scratching or damaging the frame. Set aside the fork, noting the order of any bearings or washers.
4. Prepare The New Fork
Inspect the new fork for any damage. Compare it to the old fork to check steerer tube length and axle-to-crown length. If the steerer tube is too long, you’ll need to cut it. Mark the correct length—always measure twice and cut once. Use a proper cutting guide or pipe cutter for a straight edge. File the cut edge smooth.
Install the crown race (the metal ring at the base of the steerer) with a crown race setter or a large socket. This part must sit perfectly flat. A tilted crown race can ruin your headset’s life and your bike’s steering feel.
5. Install The Star Nut (for Threadless Headsets)
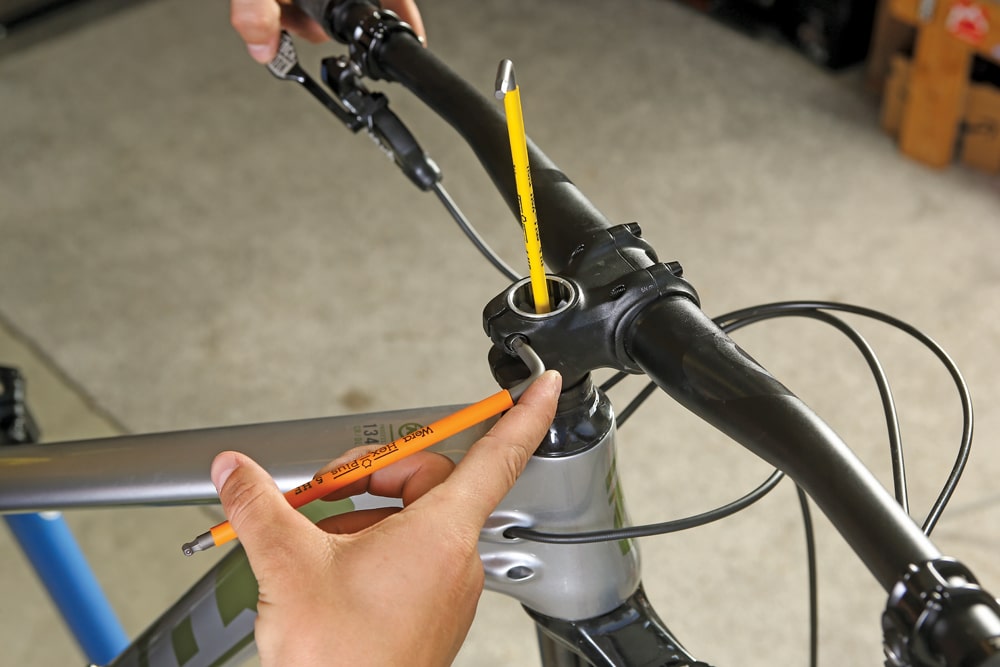
If your fork uses a threadless headset, you’ll need to install a star nut in the steerer tube. Use a star nut setter and hammer it gently until it sits at the right depth (about 15-20 mm below the top). If your fork is carbon, use a compression plug instead.
6. Grease And Install Bearings
Clean and grease the headset bearings and cups. Slide the new fork into the head tube, making sure the bearings are in the right place. Stack the spacers and stem onto the steerer.
7. Attach The Stem And Preload The Headset
Reinstall the top cap and tighten it just enough to remove play (side-to-side movement) but not so much that the steering feels stiff. Reattach the stem bolts to hold the fork in position, but don’t overtighten yet.
8. Reinstall Brakes And Front Wheel
Reattach the front wheel and brakes. For disc brakes, realign the caliper with the rotor. For rim brakes, reconnect the cable and check for rubbing.
9. Align The Handlebars And Final Tightening
Align the handlebars so they are straight with the front wheel. Tighten the stem bolts to the recommended torque setting (usually 5–8 Nm). Check that the steering is smooth and there is no play.
10. Test Ride And Fine-tuning
Before you ride far, test the steering, brakes, and overall feel in a safe area. Listen for any creaks or clicks. If you feel any looseness or stiffness, repeat the adjustment steps.
Key Compatibility Considerations
Selecting the right fork is not only about size and material. Here are some details many forget:
- Tapered vs. straight steerer tubes: Modern bikes often use a tapered steerer (1 1/8″ to 1.5″). Mixing these with straight head tubes is not possible.
- Brake mount types: Post-mount and flat-mount disc brakes are not interchangeable without adapters.
- Axle-to-crown length: A fork that’s too long or short changes the bike’s head angle, affecting handling. For example, adding a 20mm longer fork can slacken the head angle by about 1 degree, making the steering slower.
- Offset/rake: Most forks are 43–45mm offset for road bikes, but mountain bikes vary more. This affects how “quick” the steering feels.
Here’s a comparison of common fork specifications:
| Fork Type | Steerer Tube | Brake Mount | Axle Type | Material |
|---|---|---|---|---|
| Road Carbon | 1 1/8″ to 1.5″ tapered | Rim or flat-mount disc | Quick release | Carbon |
| Mountain Suspension | 1 1/8″ to 1.5″ tapered | Post-mount disc | Thru-axle | Aluminum/steel |
| Hybrid Rigid | 1 1/8″ straight | Rim or post-mount disc | Quick release | Aluminum |
Common Mistakes To Avoid
Even experienced riders make errors when changing a fork. Here are some to watch out for:
- Cutting the steerer too short: Always measure with all spacers and stem in place. You cannot “add” back material once cut.
- Forgetting the crown race: Without it, the headset will not function smoothly.
- Overtightening the top cap: This can crush bearings or a carbon steerer.
- Mixing incompatible parts: For example, using a fork designed for disc brakes on a frame built only for rim brakes.
- Neglecting torque specs: Under- or overtightening stem bolts can lead to dangerous failures.
A practical tip: If unsure about compatibility, bring your old fork to the shop when buying a replacement.
Cost And Time Estimates
Changing a fork at home saves labor costs, but you may need to buy some tools. Here’s a quick comparison:
| Option | Estimated Cost | Time Needed | Skill Level |
|---|---|---|---|
| DIY at Home | $0–$40 (if you have tools) | 1–2 hours | Intermediate |
| Bike Shop | $40–$100 (labor only) | 1–3 days (wait time) | Professional |
Note: Professional installation is a good idea if you lack confidence or tools.
Credit: mbaction.com
Upgrading: When And Why To Change A Fork
There are several good reasons to change your fork:
- Upgrading to lighter material (like carbon for road bikes) can save 300–500 grams.
- Switching to suspension on a mountain bike absorbs shock, making rough trails smoother.
- Replacing damaged forks is essential for safety—cracks or bends can lead to sudden failure.
- Changing geometry for better handling or fit, such as using a longer fork for slacker head angle.
A non-obvious insight: Even a small change in fork offset or length can transform how your bike feels. If you liked your bike’s old handling, match measurements closely.
Maintenance Tips After Installation
Once your new fork is in place, good maintenance will keep it working smoothly:
- Check headset tightness after the first few rides—bearings may “settle.”
- For suspension forks, follow the manufacturer’s service intervals (usually every 50–100 hours).
- Inspect for unusual noises, play, or stiffness.
- Clean and lightly grease the steerer tube and headset bearings annually.
If you ever feel a “clunk” when hitting bumps, recheck your installation. Forks are critical for safety, so never ignore warning signs.

Credit: www.youtube.com
Frequently Asked Questions
How Do I Know If My New Fork Is Compatible With My Bike?
Check the steerer tube diameter and type, axle size, and brake mount. Compare these with your bike’s frame and wheel specs. Measure the axle-to-crown length and offset to match your old fork. If in doubt, consult your bike’s manufacturer or a detailed resource like Wikipedia.
Can I Switch From A Suspension Fork To A Rigid Fork (or Vice Versa)?
Yes, but make sure the axle-to-crown length of the new fork is similar to your old fork. Changing this measurement can affect your bike’s handling and fit. Also, check brake and axle compatibility.
What If My Steerer Tube Is Too Long?
You can cut a metal steerer with a hacksaw or pipe cutter. Always use a cutting guide and file the edge smooth. For carbon steerers, use a special carbon blade and compression plug. Never cut a steerer too short.
Do I Need Special Grease For The Headset?
Yes, use bike-specific waterproof grease for headset bearings. This protects against water and dirt, reducing the chance of rust and wear. Avoid using thin oils or standard automotive grease.
Is It Safe To Install A New Fork At Home?
If you have the right tools and follow proper steps, changing a bike fork at home is safe. Always double-check compatibility and torque settings. If you feel unsure, have a professional check your work.
Changing your bike fork is a rewarding project that improves your skills and lets you customize your bike to your needs. With careful attention to detail, you’ll ride away with a safer and better-feeling bike.