Installing SPD cleats on your bike shoes can seem tricky the first time, but with the right guidance, anyone can do it. SPD cleats are popular for road cyclists and mountain bikers because they give a secure connection between the shoe and pedal, improving power and safety.
Getting the installation right is very important. Poorly installed cleats can cause discomfort, pain, or even injury over time. This guide explains each step in detail, so you can set up your SPD cleats correctly—even if you are new to cycling shoes.
What Are Spd Cleats And Why Do They Matter?
SPD stands for Shimano Pedaling Dynamics, a system designed by Shimano for cycling pedals and cleats. SPD cleats are small metal plates that attach to the bottom of your cycling shoes. They click into compatible pedals, creating a firm link between your foot and the bike. This system allows for more efficient pedaling and better control, especially over rough ground.
Many cyclists prefer SPD for its two-bolt design, which is easy to walk in and widely used in both mountain biking and commuting. Proper cleat position can help avoid knee pain, hot spots, or numbness during rides. It also makes it easier to release your foot from the pedal quickly when needed.
Tools And Materials You Will Need
Before you start, gather everything you need. Setting up your workspace ahead of time saves frustration.
- SPD cleats (and bolts)
- Cycling shoes with two-bolt holes (SPD compatible)
- 4mm Allen wrench (sometimes called a hex key)
- Grease (anti-seize or regular bike grease)
- Marker or chalk (optional, for marking positions)
- Paper towel or rag (for cleanup)
- Cleat shims or spacers (optional, for fine tuning)
- A hard, flat surface to work on
If your shoes or pedals are new, check if they include cleats. Not all shoes or pedals come with them, so you may need to buy them separately.
Understanding Spd Cleat Positioning
Getting the cleat position right is the most important part of the installation. There are three main things to consider:
- Fore-aft (front-back) position: This decides how far forward or backward the cleat sits on the shoe. For most people, the cleat should be just behind the ball of your foot. This gives good power and comfort.
- Side-to-side (lateral) position: This controls how close your foot sits to the crank arm. Too close or too far can cause discomfort or even accidents if your shoe touches the crank or frame.
- Angle (float): SPD cleats offer some rotational movement, called float. Setting the angle helps your natural foot position and reduces knee strain.
Some shoes have marks or grids on the sole to help with alignment. If not, you can use a marker to help guide you.
Why Is Positioning So Critical?
Incorrect positioning is a common mistake. If the cleat is too far forward, it can cause pain in the ball of your foot. Too far back, and you lose power. Poor angle setup can lead to knee pain. Take your time with this step, and make small adjustments if needed.
Step-by-step Guide: Installing Spd Cleats
Follow these steps to install your SPD cleats correctly and safely.
1. Locate The Cleat Mounting Holes
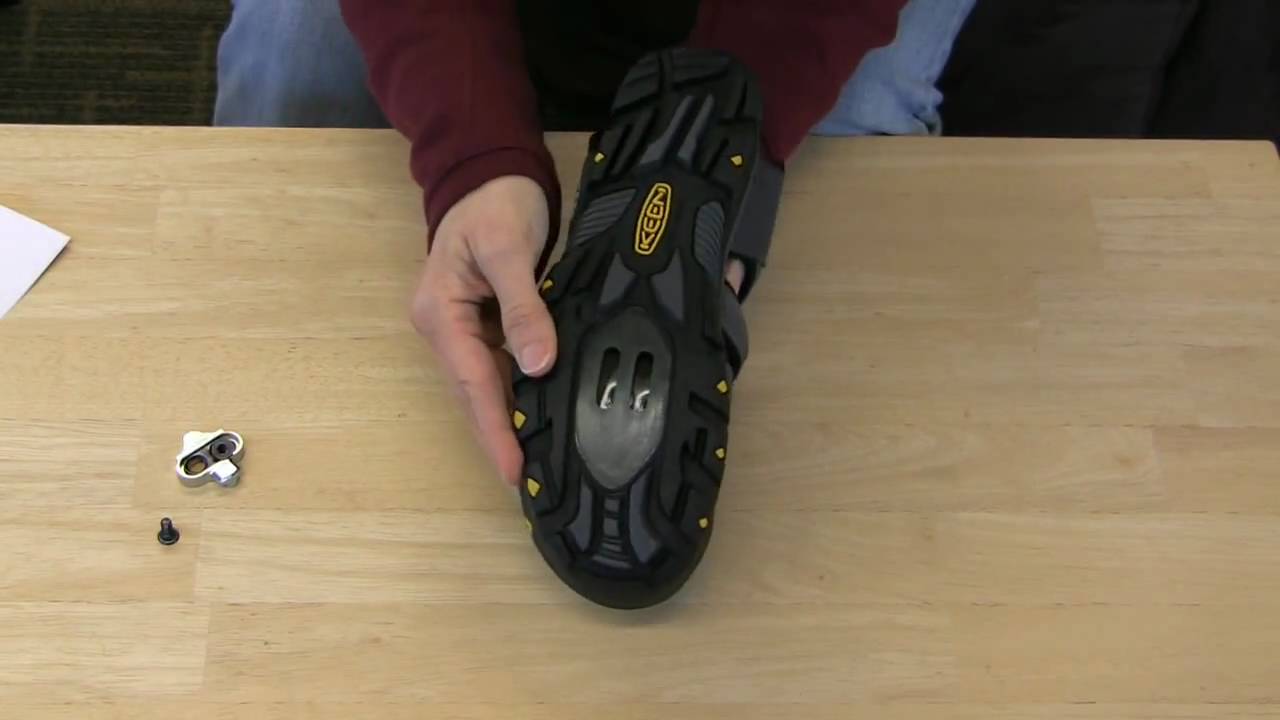
Turn your shoe over and find the two holes in the sole. These are usually under a rubber cover if the shoes are new. Remove any covering if necessary.
2. Choose The Right Cleat Position
Put on your cycling shoes and stand naturally. Try to find where the ball of your foot sits inside the shoe. You can press your thumb on the side of the shoe to feel this spot. Mark this point lightly with a marker or chalk. This will guide your fore-aft position.
3. Prepare The Cleat And Shoe
Apply a small dab of grease to the threads of the bolts. This step is often skipped, but it prevents the bolts from seizing due to sweat or moisture. It also makes future adjustments easier.
4. Align The Cleat
Place the cleat on the shoe sole, lining up the holes with the marks you made. Make sure the cleat faces the right way—most SPD cleats have a front and back, with the wider part at the toe. Set the cleat just behind the ball of your foot for most riders.
5. Insert And Tighten The Bolts
Push the bolts through the cleat holes and into the shoe threads. Use the 4mm Allen wrench to tighten them. Do not tighten fully yet; leave them a little loose so you can make small adjustments.
6. Adjust Side-to-side And Angle
With the bolts still slightly loose, move the cleat side to side to center it under your foot. Rotate the cleat slightly if needed to match your natural toe-in or toe-out position. Most beginners should start with the cleat straight and centered, then adjust later as needed.
7. Tighten Everything Securely
Once you are satisfied with the position, tighten the bolts fully. Do not overtighten—this can strip the threads or damage the shoe. Just make sure they are snug and the cleat does not move.
8. Test The Setup
Clip your shoes into your pedals while leaning against a wall or using a stationary bike. Pedal a few times and see how it feels. Try unclipping and clipping in several times. If you feel discomfort or your foot sits awkwardly, loosen the bolts and make small adjustments.
Credit: www.youtube.com
Comparing Spd Cleat Systems
SPD is just one of several cleat systems. Here is a quick comparison with two other popular types.
| System | Bolt Pattern | Best For | Walkability | Float |
|---|---|---|---|---|
| SPD | 2-bolt | MTB, Commuting | Easy | 4-6° |
| SPD-SL | 3-bolt | Road Cycling | Hard | 0-6° (varies) |
| Look Keo | 3-bolt | Road Cycling | Hard | 4.5-9° (varies) |
SPD’s two-bolt design stands out for its balance between cycling performance and ease of walking. This is why many beginners and commuters choose SPD.
Fine-tuning Cleat Position For Comfort
After your first few rides, you may notice hot spots, numbness, or knee discomfort. This usually means your cleat needs a small adjustment. Fine-tuning is normal, and even professional cyclists do it regularly.
Common Issues And Solutions
- Foot pain or numbness: Try moving the cleat slightly backward.
- Knee pain (inside or outside): Adjust the angle or lateral position so your foot sits naturally.
- Difficulty unclipping: Make sure the cleat is not too tight or worn out. Also, check the pedal release tension.
Don’t be afraid to experiment. Mark your original position so you can always return to it.
How To Know Your Cleats Are Correctly Installed
A good fit feels natural. Your knees should track straight, and you shouldn’t feel pressure points underfoot. Here are some signs of a good installation:
- Your foot clips in and out smoothly.
- You feel balanced on the pedal.
- No pain or numbness after riding 30–60 minutes.
- Your shoe sole sits flush against the pedal.
If something feels off, it’s best to adjust early. Riding long distances with a bad setup can cause injury over time.
Maintenance Tips For Spd Cleats
SPD cleats are durable, but they do wear out with use. Regular maintenance helps them last longer and keeps you safe.
- Check bolt tightness every few weeks. Vibrations and mud can loosen bolts over time.
- Clean mud and debris from the cleat and pedal regularly.
- Inspect for wear. If the cleat edges are rounded or the shoe slips out of the pedal easily, it’s time to replace them.
- Re-grease bolts when reinstalling or adjusting to prevent rust.
Here is a quick comparison of cleat lifespan based on riding style:
| Riding Style | Average Lifespan | Replacement Signs |
|---|---|---|
| Road Cycling | ~12–18 months | Difficulty clipping in, slips |
| Mountain Biking | ~8–12 months | Rounded edges, mud buildup |
| Commuting | ~18–24 months | Loose fit, visible wear |
Regular checking can prevent surprises on your rides.
Two Non-obvious Tips Most Beginners Miss
- Use cleat shims if you have foot pain. Some people have feet that tilt inward or outward. Cleat shims are thin plastic wedges that go under the cleat to fix this. This small tweak can solve nagging knee or ankle pain.
- Mark your cleat position once it feels perfect. Use a permanent marker or tape on the shoe sole. This way, if you need to remove the cleats, you can reinstall them in exactly the same spot.
These small actions can make a big difference in comfort and performance.
Mistakes To Avoid When Installing Spd Cleats
Many beginners make the same errors when setting up their cleats. Avoid these common mistakes:
- Not greasing the bolts: Leads to seized bolts and difficult removal later.
- Overtightening: Can strip the shoe threads or crack the sole.
- Guessing the position: Always try to align the cleat with the ball of your foot.
- Ignoring pain: Any discomfort is a sign you should adjust the position.
Taking a few extra minutes to check your work can save you from bigger problems down the road.

Credit: www.youtube.com
Spd Cleats Vs. Flat Pedals: Which Is Right For You?
Some riders wonder if they should use SPD cleats or stick with flat pedals. Here are the main differences:
| Feature | SPD Cleats | Flat Pedals |
|---|---|---|
| Efficiency | High | Low |
| Learning Curve | Steep | Easy |
| Foot Security | Locked in | Loose |
| Easy to Dismount | Needs Practice | Very Easy |
| Best For | Long rides, rough terrain | Short trips, beginners |
SPD cleats offer more power and control, but require practice. Flat pedals are simpler, but less efficient. Most riders who try SPD never go back, but it’s important to choose what fits your needs best.
Frequently Asked Questions
How Tight Should I Make The Cleat Bolts?
The bolts should be snug but not overtightened. Use a 4mm Allen wrench and tighten until the cleat does not move, but do not force it. Overtightening can strip the threads or damage the shoe.
Can I Use Spd Cleats On Any Cycling Shoe?
No, you need SPD-compatible shoes with a two-bolt pattern. Road cycling shoes often use a three-bolt system, which is not compatible with SPD. Always check the shoe’s sole for the correct holes.
How Often Should I Replace My Spd Cleats?
Replace your cleats when you notice difficulty clipping in or out, or if the cleat edges look rounded and worn. For most riders, this is every 12–18 months, but mountain bikers may need to replace them sooner.
Are Spd Cleats Good For Beginners?
Yes, SPD cleats are a great choice for beginners. They are easy to walk in, work well in mud, and are widely available. The learning curve is short, but it’s a good idea to practice clipping in and out in a safe place first.
Where Can I Find More Detailed Information About Spd Systems?
You can find more details and technical guides on the official Shimano website: Shimano SPD System.
Setting up SPD cleats the right way takes a little time, but the benefits are worth it. A secure, comfortable connection between your shoes and pedals will improve your cycling experience—making every ride smoother, safer, and more enjoyable. Don’t rush the process.
If you need help, visit your local bike shop or check out detailed resources from cycling experts. With the right setup, you’ll be ready for many miles of confident riding.
Credit: www.tiemathletic.com