Installing a rim lock on your dirt bike is one of those small tasks that can make a big difference on the trail or track. If you ride off-road, you know how quickly a tire can slip on the rim during hard acceleration or braking, especially at low tire pressures.
A rim lock keeps your tire in place, preventing tube pinches, valve stem tears, and even dangerous flats. But many riders struggle with installation or skip it altogether, risking both performance and safety. If you want a complete, step-by-step guide with real-world advice, you’re in the right place.
What Is A Dirt Bike Rim Lock And Why You Need One
A rim lock is a simple but powerful device—a curved metal or composite block with a bolt and rubber pad. It sits inside your tire, clamping the bead against the rim. When you tighten the bolt, the pad presses outward, locking the tire in place.
If you run low tire pressure for better traction, a rim lock becomes essential. Without it, the tire can spin on the rim under sudden torque. This can rip the valve stem from the tube or cause a rapid loss of air.
Even at standard pressures, aggressive riding can cause slippage.
Many riders learn the hard way: a single spin can ruin your day or even cause a crash. Installing a rim lock is an investment in both confidence and control.
Tools And Materials You Will Need
Before starting, gather all the necessary tools and parts. Skipping this step is a common mistake and usually leads to frustration or damage.
| Tool/Material | Purpose |
|---|---|
| Dirt bike rim lock (correct size) | Locks tire bead to rim |
| Tire levers (2-3) | Remove and install tire |
| Wrenches or socket set | Tighten rim lock nut |
| Valve core tool | Remove valve core to deflate tire |
| Bead lubricant/soapy water | Help tire slip onto rim |
| Air pump or compressor | Inflate tire after installation |
| Rag | Clean rim and tire |
| Torque wrench (optional) | Ensure correct rim lock tension |
Choosing The Correct Rim Lock
The rim lock size must match your rim width. Common sizes are 1.60″ (front) and 2.15″ (rear), but always check your rim stamp or manual. Using the wrong size can damage your rim or fail to hold the tire securely.
Preparation: Remove The Wheel And Tire
Start by removing the wheel from your dirt bike. Place it on a clean, stable surface. Deflate the tire completely using a valve core tool—this makes bead breaking much easier.
Use your tire levers to gently break the bead all the way around the rim. Work slowly and avoid pinching the tube, especially if you plan to reuse it. Remove one side of the tire from the rim. You can leave the tube inside or remove it for better access.
Wipe the inside of the rim and tire bead. Dirt or grit can cause leaks or make bead seating difficult. Now is also a good time to inspect for rim damage or bent spokes.
Mark And Drill The Rim Lock Hole (if Needed)
Most modern dirt bike rims already have a pre-drilled hole for a rim lock. If your rim does not, you’ll need to drill one. This step requires extra care—incorrect placement can weaken the rim or cause balance issues.
- Locate the spot: The rim lock is usually placed opposite the valve stem. This helps balance the wheel.
- Mark the position: Use a marker to mark the spot between two spokes.
- Drill the hole: Use a drill bit that matches your rim lock’s bolt (usually 8-10mm). Wear safety glasses and drill slowly. Clean any sharp edges with a round file.
Drilling can introduce metal shavings—always clean thoroughly before continuing. If you’re unsure, consult your manual or ask a local mechanic for guidance.
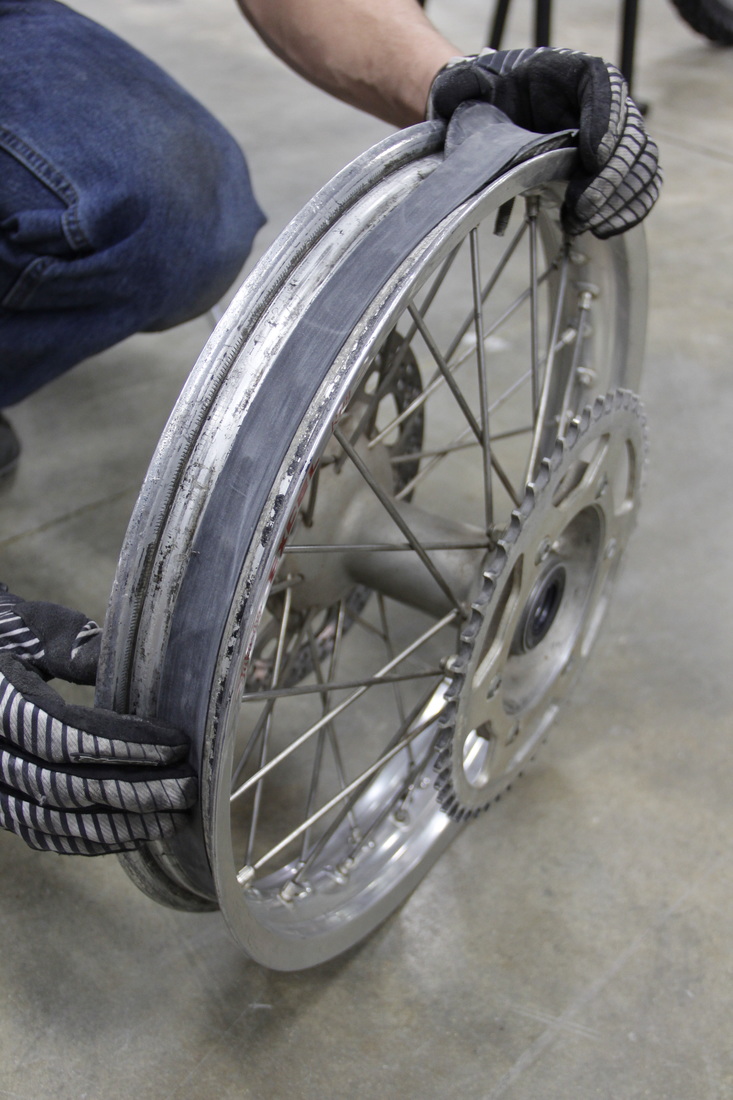
Credit: www.diymotofix.com
Installing The Rim Lock
With the rim ready, it’s time to fit the rim lock. This step can be tricky, especially if you’re doing it for the first time. Patience and proper technique go a long way.
Step 1: Insert The Rim Lock
Slide the rim lock’s curved base into the tire, aligning the bolt with the drilled hole. The rubber pad should face outward, pressing against the tire bead. Make sure it sits flat and centered.
Step 2: Fit The Tire Back Onto The Rim
Carefully work the tire bead back over the rim, starting at the side opposite the rim lock. Tire levers help, but go slowly to avoid pinching the tube. Save the section with the rim lock for last.
When you reach the rim lock, use your thumbs or a lever to push the bead over the block. This part usually takes the most force. A little bead lubricant helps a lot.
Step 3: Reinstall Or Reposition The Tube
If you removed the tube, insert it now. Push the valve stem through its hole, then tuck the tube evenly inside the tire. Take your time to avoid twists or folds.
Pro tip: Inflate the tube slightly before final bead seating. This helps it center and reduces the chance of pinching.
Step 4: Seat The Bead
Work around the rim to ensure both beads are inside the rim walls. Check carefully around the rim lock and valve stem. Any section not fully seated can cause leaks or dangerous blowouts.
Inflate the tire slowly to about 15-20 psi. Watch the bead seat smoothly. If it doesn’t, deflate and try again with more lubricant.
Step 5: Tighten The Rim Lock
Now, finger-tighten the rim lock nut, then use a wrench to snug it down. Most manufacturers recommend 10-13 ft-lbs of torque. Don’t overtighten—this can strip threads or crush the rubber pad.
Install the washer and lock nut, if provided, to keep the assembly secure. Check that the rim lock pulls the tire bead tightly against the rim.
Final Checks And Reinstallation
Before mounting the wheel back on your bike, do a thorough inspection:
- Spin the wheel to ensure the tire is seated evenly
- Check the rim lock for proper tightness
- Ensure the valve stem sits straight (not pulled or twisted)
- Inflate to your desired pressure and listen for leaks
If everything looks good, reinstall the wheel on your bike. Double-check all fasteners and torque specs, especially if you removed the axle.

Credit: www.youtube.com
Common Mistakes And How To Avoid Them
Many first-time installers struggle with a few common issues. Learning about them now can save you time and headaches later.
- Wrong rim lock size: Always measure your rim and double-check the size. Too small, and it won’t grip. Too large, and it can damage the rim or not fit at all.
- Pinching the tube: Take your time when using tire levers near the rim lock. Slightly inflating the tube helps prevent pinches.
- Overtightening the rim lock: Stop when the tire bead is snug. Cranking down too hard can strip threads or deform the rim.
- Skipping lubricant: Dry beads are difficult to seat. A light coating of soapy water or bead lube makes the process much easier.
- Incorrect hole placement: If drilling your own rim, always place the rim lock opposite the valve stem for balance.
Real-world Example: Performance Before And After Rim Lock
Riders often wonder if a rim lock is worth the effort. Consider this scenario:
A rider running 12 psi in the rear tire without a rim lock experiences frequent valve stem tears and flats after aggressive launches. After installing a proper rim lock, the same tire holds position, the tube survives, and the rider gains confidence to ride harder.
Over a season, the savings in inner tubes and time far outweighs the small cost and effort.

Credit: www.bushpigperformance.com
Rim Lock Options: Standard Vs. Lightweight Vs. Dual Rim Locks
Not all rim locks are the same. The choice depends on your riding style, wheel size, and personal preference.
| Type | Material | Weight | Best For |
|---|---|---|---|
| Standard | Aluminum/steel | Heavier | General use, all bikes |
| Lightweight | Composite or forged alloy | Lighter | Racing, performance |
| Dual rim locks | Any | Heaviest | Extreme low pressure, enduro |
Lightweight options reduce rotating mass but can cost more. Dual rim locks (one on each side) are used by riders running very low pressures or in extreme off-road conditions. Consider your needs and balance requirements.
Maintenance And Inspection Tips
Once installed, a rim lock needs very little maintenance, but regular inspection is important.
- Check rim lock nut tightness every few rides
- Inspect for cracks or corrosion
- Look for signs of bead movement or valve stem misalignment
- Replace if you see significant wear or damage
A loose or worn rim lock can fail when you need it most. Quick checks keep you riding safely.
Troubleshooting: What To Do If The Tire Still Slips
Sometimes, even with a rim lock installed, you might notice the tire creeping—usually seen as a tilted valve stem. If this happens:
- Deflate the tire, loosen the rim lock, and reposition the tire and tube
- Inspect the rim lock for wear or incorrect size
- Consider adding a second rim lock if you run very low pressures
- Always use proper torque and check after your first ride
If the problem continues, consult a mechanic or your local shop. Persistent issues can damage tubes or rims.
Safety Considerations
Installing a rim lock is a safety upgrade, but doing it incorrectly can be dangerous. Always follow torque specs and installation instructions. If you are unsure about drilling or fitting, it’s worth asking a professional for help.
Remember, a poorly installed rim lock can cause rim cracks, tube failure, or sudden flats. Your safety—and your fun—depend on careful work.
When Should You Replace A Rim Lock?
Rim locks are durable but not indestructible. Replace yours if:
- The rubber pad is cracked, hard, or missing chunks
- The bolt or nut is stripped or corroded
- The body is bent or damaged
- You notice persistent tire slippage
Most riders replace rim locks every few years, or sooner if you ride hard or in harsh conditions.
The Value Of A Properly Installed Rim Lock
A rim lock is a small, low-cost part that delivers peace of mind, performance, and safety. Many new riders skip it, only to regret it after a ruined tube or a long walk home. By following the steps above, you ensure that your tire stays put, your tube lasts longer, and your ride stays safe—no matter how hard you push.
For a more technical breakdown of rim lock types and uses, check the Wikipedia Rim Lock page.
Frequently Asked Questions
What Size Rim Lock Do I Need For My Dirt Bike?
You must match the rim lock size to your rim width. Common sizes are 1. 60″ for front wheels and 2. 15″ for rear wheels. Always check your rim’s stamp or your owner’s manual before buying.
Can I Install A Rim Lock Without Removing The Tire?
No, you need to remove at least one side of the tire to fit the rim lock inside the rim. Trying to force it without proper access can damage your tire, tube, or rim.
How Tight Should I Make The Rim Lock Nut?
Tighten the rim lock nut until the tire bead is firmly clamped. Most manufacturers recommend 10–13 ft-lbs of torque. Do not overtighten, as this can strip threads or crush the rim lock.
Do I Need A Rim Lock If I Run High Tire Pressure?
Rim locks are most important at low pressures, but aggressive riders and racers use them even at higher pressures for extra security. If you ride hard, a rim lock is a smart upgrade.
What Are The Signs Of A Failing Rim Lock?
Watch for a crooked valve stem, tire slippage, or visible damage to the rim lock itself. If the rubber pad is cracked, the nut is stripped, or the lock doesn’t hold the tire, replace it immediately.