Installing a new fork on your bike is one of the most important upgrades you can make. Whether you want better suspension for mountain biking or need to replace a damaged fork, the process can seem technical if you’ve never done it before.
But with the right guidance, tools, and patience, you can achieve professional results at home. In this guide, you’ll learn exactly how to install a fork on your bike, from start to finish, with expert tips that even seasoned mechanics sometimes forget.
Understanding The Fork And Its Role
The bike fork is more than just two tubes that hold your wheel. It connects the front wheel to your bike frame and is crucial for steering and absorbing shocks. Choosing and installing the right fork affects how your bike handles, feels, and performs.
There are two main types of forks:
- Rigid forks (no suspension, common on road and some hybrid bikes)
- Suspension forks (absorb bumps, found on mountain and some gravel bikes)
Both types require careful installation. Even a small mistake can affect safety or damage your frame.
Tools And Parts You Will Need
Gather all tools and new parts before you start. Missing something halfway can make the job much harder.
Essential Tools
- Allen wrenches (usually 4mm, 5mm, 6mm)
- Torque wrench (for correct bolt tightness)
- Crown race setting tool (or pipe for home method)
- Hammer (preferably rubber or plastic)
- Grease (bike-specific)
- Cutting tool (if steerer tube needs trimming)
- Star nut setter (for threadless forks)
- Headset press (or homemade alternative)
- Tape measure or ruler
Parts Checklist
- New fork (check it matches your bike’s wheel size and type)
- Headset parts (bearings, crown race, top cap)
- Stem
- Spacers (if needed for steerer tube adjustment)
- Front wheel and axle
Don’t forget safety gear: gloves and eye protection are smart choices.
Preparing Your Bike
Before removing the old fork, take a moment to prepare.
- Lift and support your bike. Use a bike stand if possible.
- Remove the front wheel. Open the quick-release or thru-axle and take out the wheel.
- Take off the brake caliper. For disc brakes, remove the caliper from the fork. For rim brakes, detach the brake arms or cables.
- Remove the handlebar and stem. Loosen stem bolts and slide everything off the steerer tube. Keep the parts together in order.
Many first-timers forget to take photos during disassembly. Snap a few pictures—these will help you remember the headset stack order and cable routing.
Removing The Old Fork
- Loosen the top cap. Unscrew and remove it from the steerer tube.
- Remove headset spacers and stem. Slide them up and off.
- Support the fork as you slide it out. Grasp the fork with one hand while removing the last spacer or bearing cover.
- Lift the fork out of the head tube. Be careful—bearings may fall out.
- Collect headset bearings and cups. Set aside all headset parts. Inspect them for wear. If they’re rough or rusted, replace them.
A common mistake is letting the fork drop, which can damage the frame or bearings. Always support the fork during removal.
Preparing The New Fork
Check Steerer Tube Length
Place the new fork in the head tube and slide the stem on. The steerer should extend about 3mm above the stem for correct preload. If it’s too long, mark where to cut.
Cutting The Steerer Tube (if Needed)
- Measure twice, cut once. Use your old fork as a guide, but always double-check.
- Clamp the fork securely. Use a cutting guide for a straight edge.
- Cut with a hacksaw or pipe cutter. Go slowly for a clean finish.
- File the cut end. Remove sharp edges.
- Clean inside the tube. Blow out metal shavings.
Many beginners cut the steerer too short. It’s better to cut it slightly longer—you can always trim more later.
Installing The Crown Race
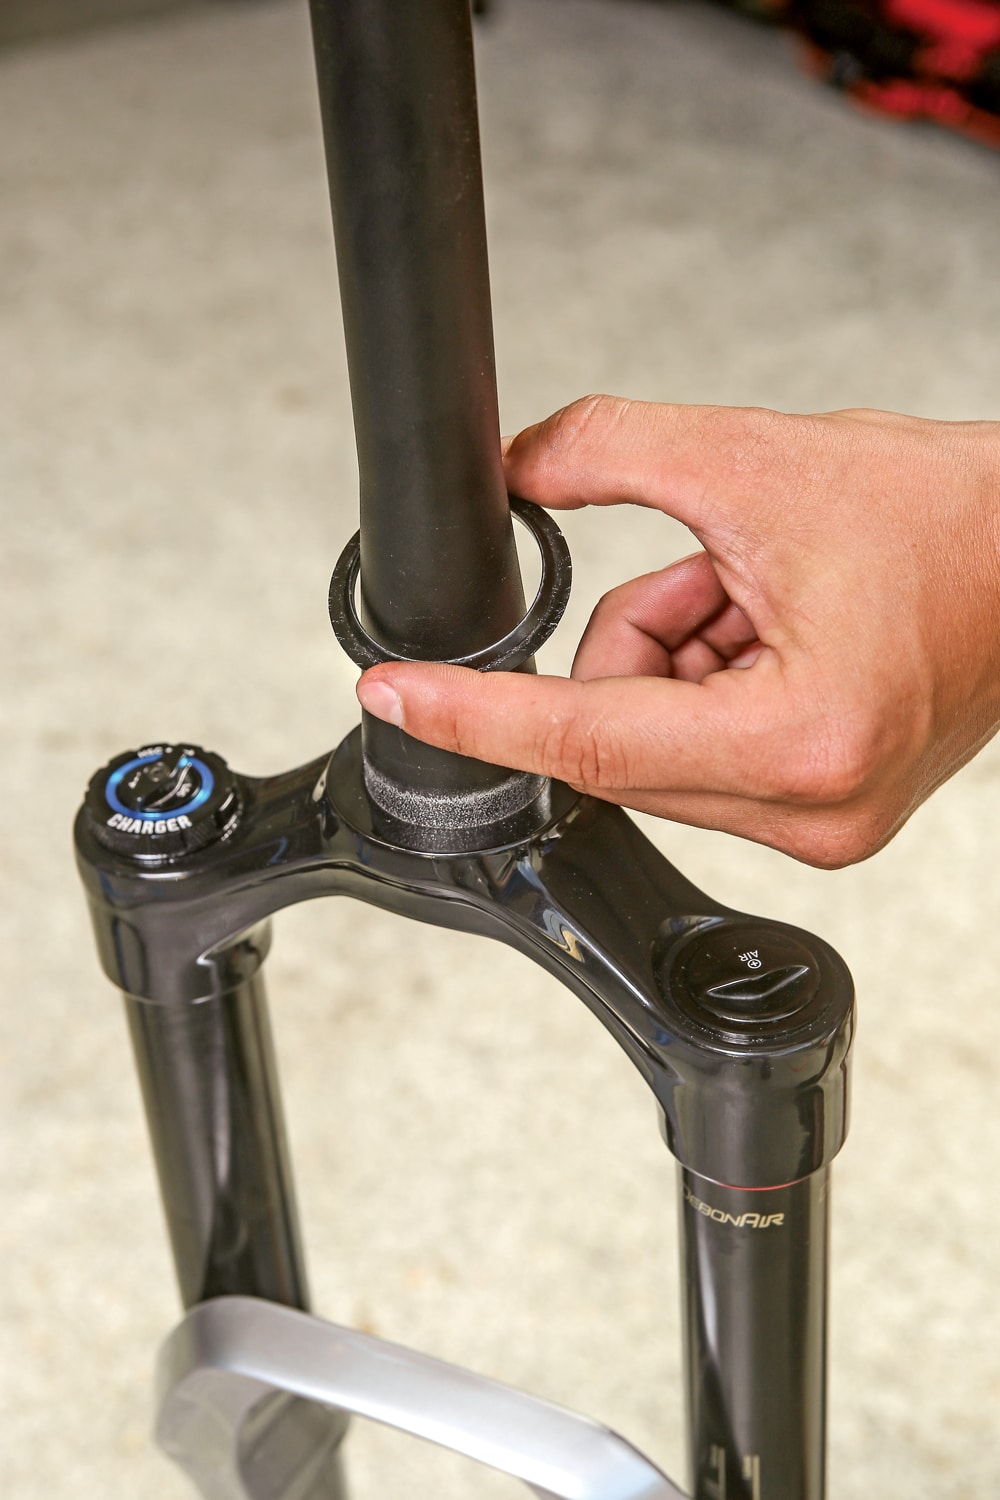
The crown race sits at the base of the steerer tube and is crucial for smooth steering.
- Grease the race seat. Apply a thin layer of grease.
- Align the race. Place it squarely on the fork crown.
- Tap gently with a crown race tool or pipe. Make sure it seats fully and evenly.
If you install the crown race crooked, steering will feel rough and damage can occur.
Inserting The Star Nut (for Threadless Forks)
- Place the star nut on the setter.
- Tap it into the steerer tube. It should sit about 15mm below the top.
Carbon steerer tubes use an expander plug instead. Never hammer a star nut into carbon.
Installing The New Fork
- Grease headset bearings and cups. This prevents creaks and corrosion.
- Slide the fork into the head tube. Support it so it doesn’t fall.
- Install lower bearing, spacers, and upper bearing. Follow the same order as when you removed the old fork.
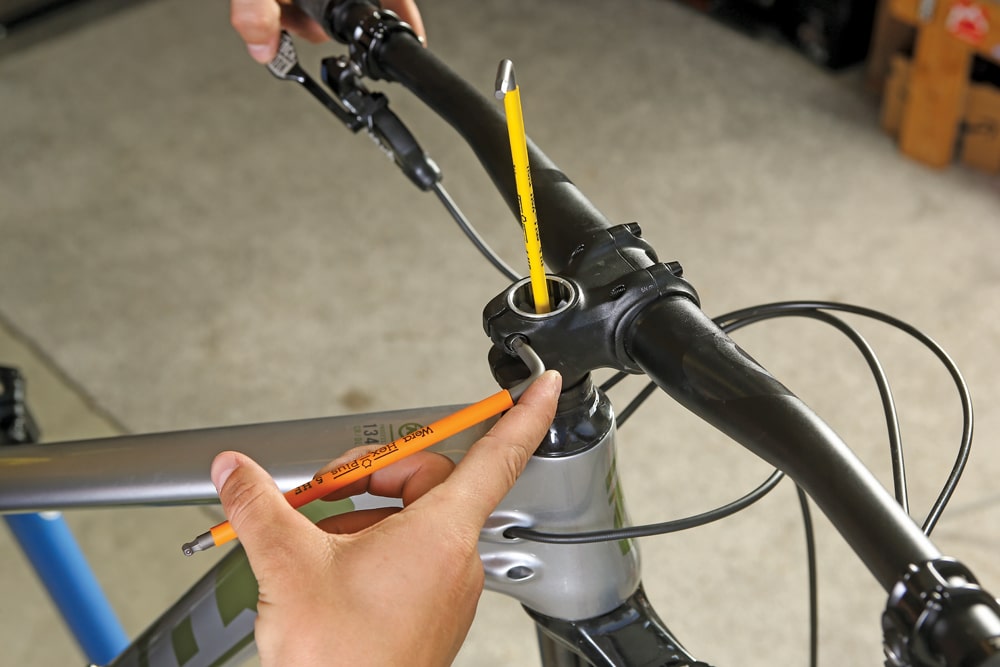
- Slide on the stem and spacers. Make sure the steerer extends slightly above the stem.
- Install top cap and bolt. Tighten until there’s no play but the steering is smooth.
Some riders forget to grease the bearings. Dry installation can cause early wear and noise.
Credit: mbaction.com
Adjusting And Securing The Fork
Align The Stem
- Line up the stem with the front wheel. This ensures straight steering.
- Tighten stem bolts evenly. Use a torque wrench to avoid over-tightening.
Check For Play
Hold the front brake and rock the bike. If you feel movement in the headset, tighten the top cap slightly.
Install The Front Wheel
- Insert the wheel into the fork dropouts.
- Secure with the axle or quick release. Make sure the wheel is centered.
Reattach Brakes
- Disc brakes: Mount the caliper and align it with the rotor.
- Rim brakes: Attach the brake arms and reconnect cables.
Pump the brake lever several times and check for proper function.
Double-checking Your Installation
Before riding, double-check these points:
- Steerer tube is the right length. No gaps under the stem.
- Headset is smooth with no play.
- All bolts are torqued to spec.
- Brakes are working and aligned.
- Front wheel is secure and centered.
A final tip: go for a short test ride in a safe area. Listen for creaks or clicks, and re-check bolt tightness after a few rides.
Common Mistakes To Avoid
- Cutting the steerer too short. Always measure carefully.
- Forgetting the crown race. The fork will not seat properly without it.
- Over-tightening bolts. This can damage carbon or lightweight alloy parts.
- Dry headset bearings. Always use grease.
- Misaligned brakes. Check alignment after reinstallation.
Many riders rush the process or skip steps—taking your time pays off in safety and longevity.
When Should You Replace Your Fork?
Not every situation calls for a new fork. Here are signs you need to replace:
- Visible cracks or dents in the fork legs or crown
- Bent steerer tube (often from a crash)
- Sticky or rough suspension (for suspension forks)
- Worn dropouts where the wheel sits
If unsure, consult a local bike shop for an expert opinion.

Credit: www.youtube.com
Comparing Fork Types
Choosing the right fork matters as much as installing it correctly. Here’s a comparison to help you decide:
| Type | Best for | Weight | Maintenance |
|---|---|---|---|
| Rigid | Commuting, road, touring | Lightest | Low |
| Suspension | Mountain, gravel, off-road | Heavier | Medium-High |
| Carbon | Performance road, cyclocross | Very light | Low |
Step-by-step Timeline Example
Here’s how long each part of the process usually takes:
| Step | Estimated Time |
|---|---|
| Preparation & removal | 20 minutes |
| Cutting steerer & crown race | 15 minutes |
| Installation & adjustment | 30 minutes |
| Final checks & test ride | 10 minutes |
With practice, the whole job takes about 1 to 1. 5 hours.
Pro Tips For A Smooth Fork Installation
- Use a torque wrench for all bolts. Over-tightening can cause expensive damage.
- Don’t skip headset lubrication. Creaks and roughness are hard to fix later.
- Leave the steerer tube a little long if unsure. You can always trim it after a few rides.
- Test the brakes before your first real ride—especially if you changed rotor position.
- Save your old fork. It can be useful for spare parts or as a backup.
A detail most beginners miss: If you have internal cable routing, check that the fork allows for cable passage, or you may need to re-route cables.
When To Seek Professional Help
Installing a fork is a moderate to advanced DIY job. If you have a carbon steerer tube, hydraulic brakes, or an expensive frame, it’s smart to get help from a professional bike mechanic. Mistakes can be costly and dangerous.
Credit: mbaction.com
Where To Learn More
For more on bike maintenance and parts compatibility, the Wikipedia page on bicycle forks offers in-depth information.
Frequently Asked Questions
What Is The Crown Race And Why Is It Important?
The crown race is a small metal ring pressed onto the base of the fork steerer. It supports the lower headset bearing and allows smooth steering. If it’s missing or installed wrong, your headset will feel rough or loose, and your bike may handle dangerously.
Can I Install A Suspension Fork On Any Bike?
Not always. Your bike frame must be designed to handle the extra stress and length of a suspension fork. Check your manufacturer’s specs for compatibility. Installing the wrong fork can change how the bike handles or even damage the frame.
How Do I Know If The Steerer Tube Needs To Be Cut?
Insert the new fork into your bike and install the headset, spacers, and stem. The steerer should stick out about 3mm above the stem. If it’s much longer, measure and cut the excess. Always cut less than you think—you can trim more later, but you can’t add length back.
What Is The Difference Between A Threaded And Threadless Fork?
A threaded fork has threads at the top of the steerer for a threaded headset and quill stem. A threadless fork uses a smooth steerer, with the stem clamping around it and a star nut inside. Most modern bikes use threadless systems for easier adjustments.
Do I Need Special Tools To Install A Fork?
Some tools are essential: Allen wrenches, a torque wrench, and grease. For best results, a crown race setter, star nut setter, and steerer cutting guide are very helpful. If you don’t have them, many bike shops can help with these specific steps for a small fee.
Upgrading or replacing your bike’s fork gives a fresh feel and improved performance. With careful work, the right tools, and good safety checks, you can do this job yourself and enjoy the confidence of a well-maintained bike.