Changing a road bike tube is a skill every cyclist should learn. Whether you’re training for a race, commuting to work, or just enjoying a weekend ride, flat tires happen. Fixing them quickly can save you time, frustration, and money.
While bike shops can help, knowing how to change a tube yourself gives you confidence and independence on the road.
For many riders, the first flat can feel overwhelming. Road bike tires are narrow and often pumped to high pressure, which makes removing and reinstalling them different from other bikes. But with the right steps, anyone can do it. This guide breaks down every part of the process, from preparing your tools to getting back on your bike safely.
You’ll also discover tips that many beginners overlook, making your tube change smoother and faster.
Why Road Bike Tubes Go Flat
Flat tires are common for road bikes because the tires are thin and the pressure is high. There are a few main reasons for a flat:
- Punctures from sharp objects like glass, thorns, or nails.
- Pinch flats when the tube gets trapped between the rim and tire, often after hitting a pothole.
- Valve failure or old, worn-out tubes.
- Improper installation causing the tube to twist or get pinched.
Knowing the cause helps you prevent future flats and check for other damage while you work.
Tools And Supplies You Need
Before you start, gather these items:
- Spare inner tube (correct size for your tire)
- Tire levers
- Bicycle pump (mini-pump or CO₂ inflator)
- Patch kit (optional for emergencies)
- Gloves (optional for keeping hands clean)
- Multitool (if your wheel uses bolts instead of quick release)
Most road bikes use 700c wheels, but always check your tire’s sidewall for the size. Tubes should match both the diameter and the width range.
Essential Tool Comparison
Here’s a quick look at common options:
| Tool | Pros | Cons |
|---|---|---|
| Mini Pump | Reusable, lightweight, fits in a bag | Slower to inflate, requires effort |
| CO₂ Inflator | Fast, very compact | Single-use, not reusable, can run out of cartridges |
| Tire Levers (Plastic) | Gentle on rims, light, cheap | Can break if misused |
| Tire Levers (Metal) | Very strong, lasts long | Can damage rims if used carelessly |
Credit: www.cinquequarti.com
Step-by-step Guide: Changing A Road Bike Tube
Follow these steps for a successful tube change.
1. Move To A Safe Spot
If you get a flat while riding, move off the road or path. Find a flat, safe area to work. This keeps you and your bike out of harm’s way and makes the process easier.
2. Remove The Wheel
- Flip your bike upside down or use a bike stand.
- Open the brake if you have rim brakes—usually there’s a small lever.
- Release the wheel using the quick-release lever or unscrewing axle nuts with a multitool.
- Take off the wheel gently, avoiding contact with the chain or derailleur.
Front wheels are easier to remove. For rear wheels, shift the chain to the smallest cog to make removal smoother.
3. Deflate The Tire Completely
If there’s still air, press down on the valve to let out all remaining pressure. This makes the tire looser and easier to remove.
4. Pry Off The Tire
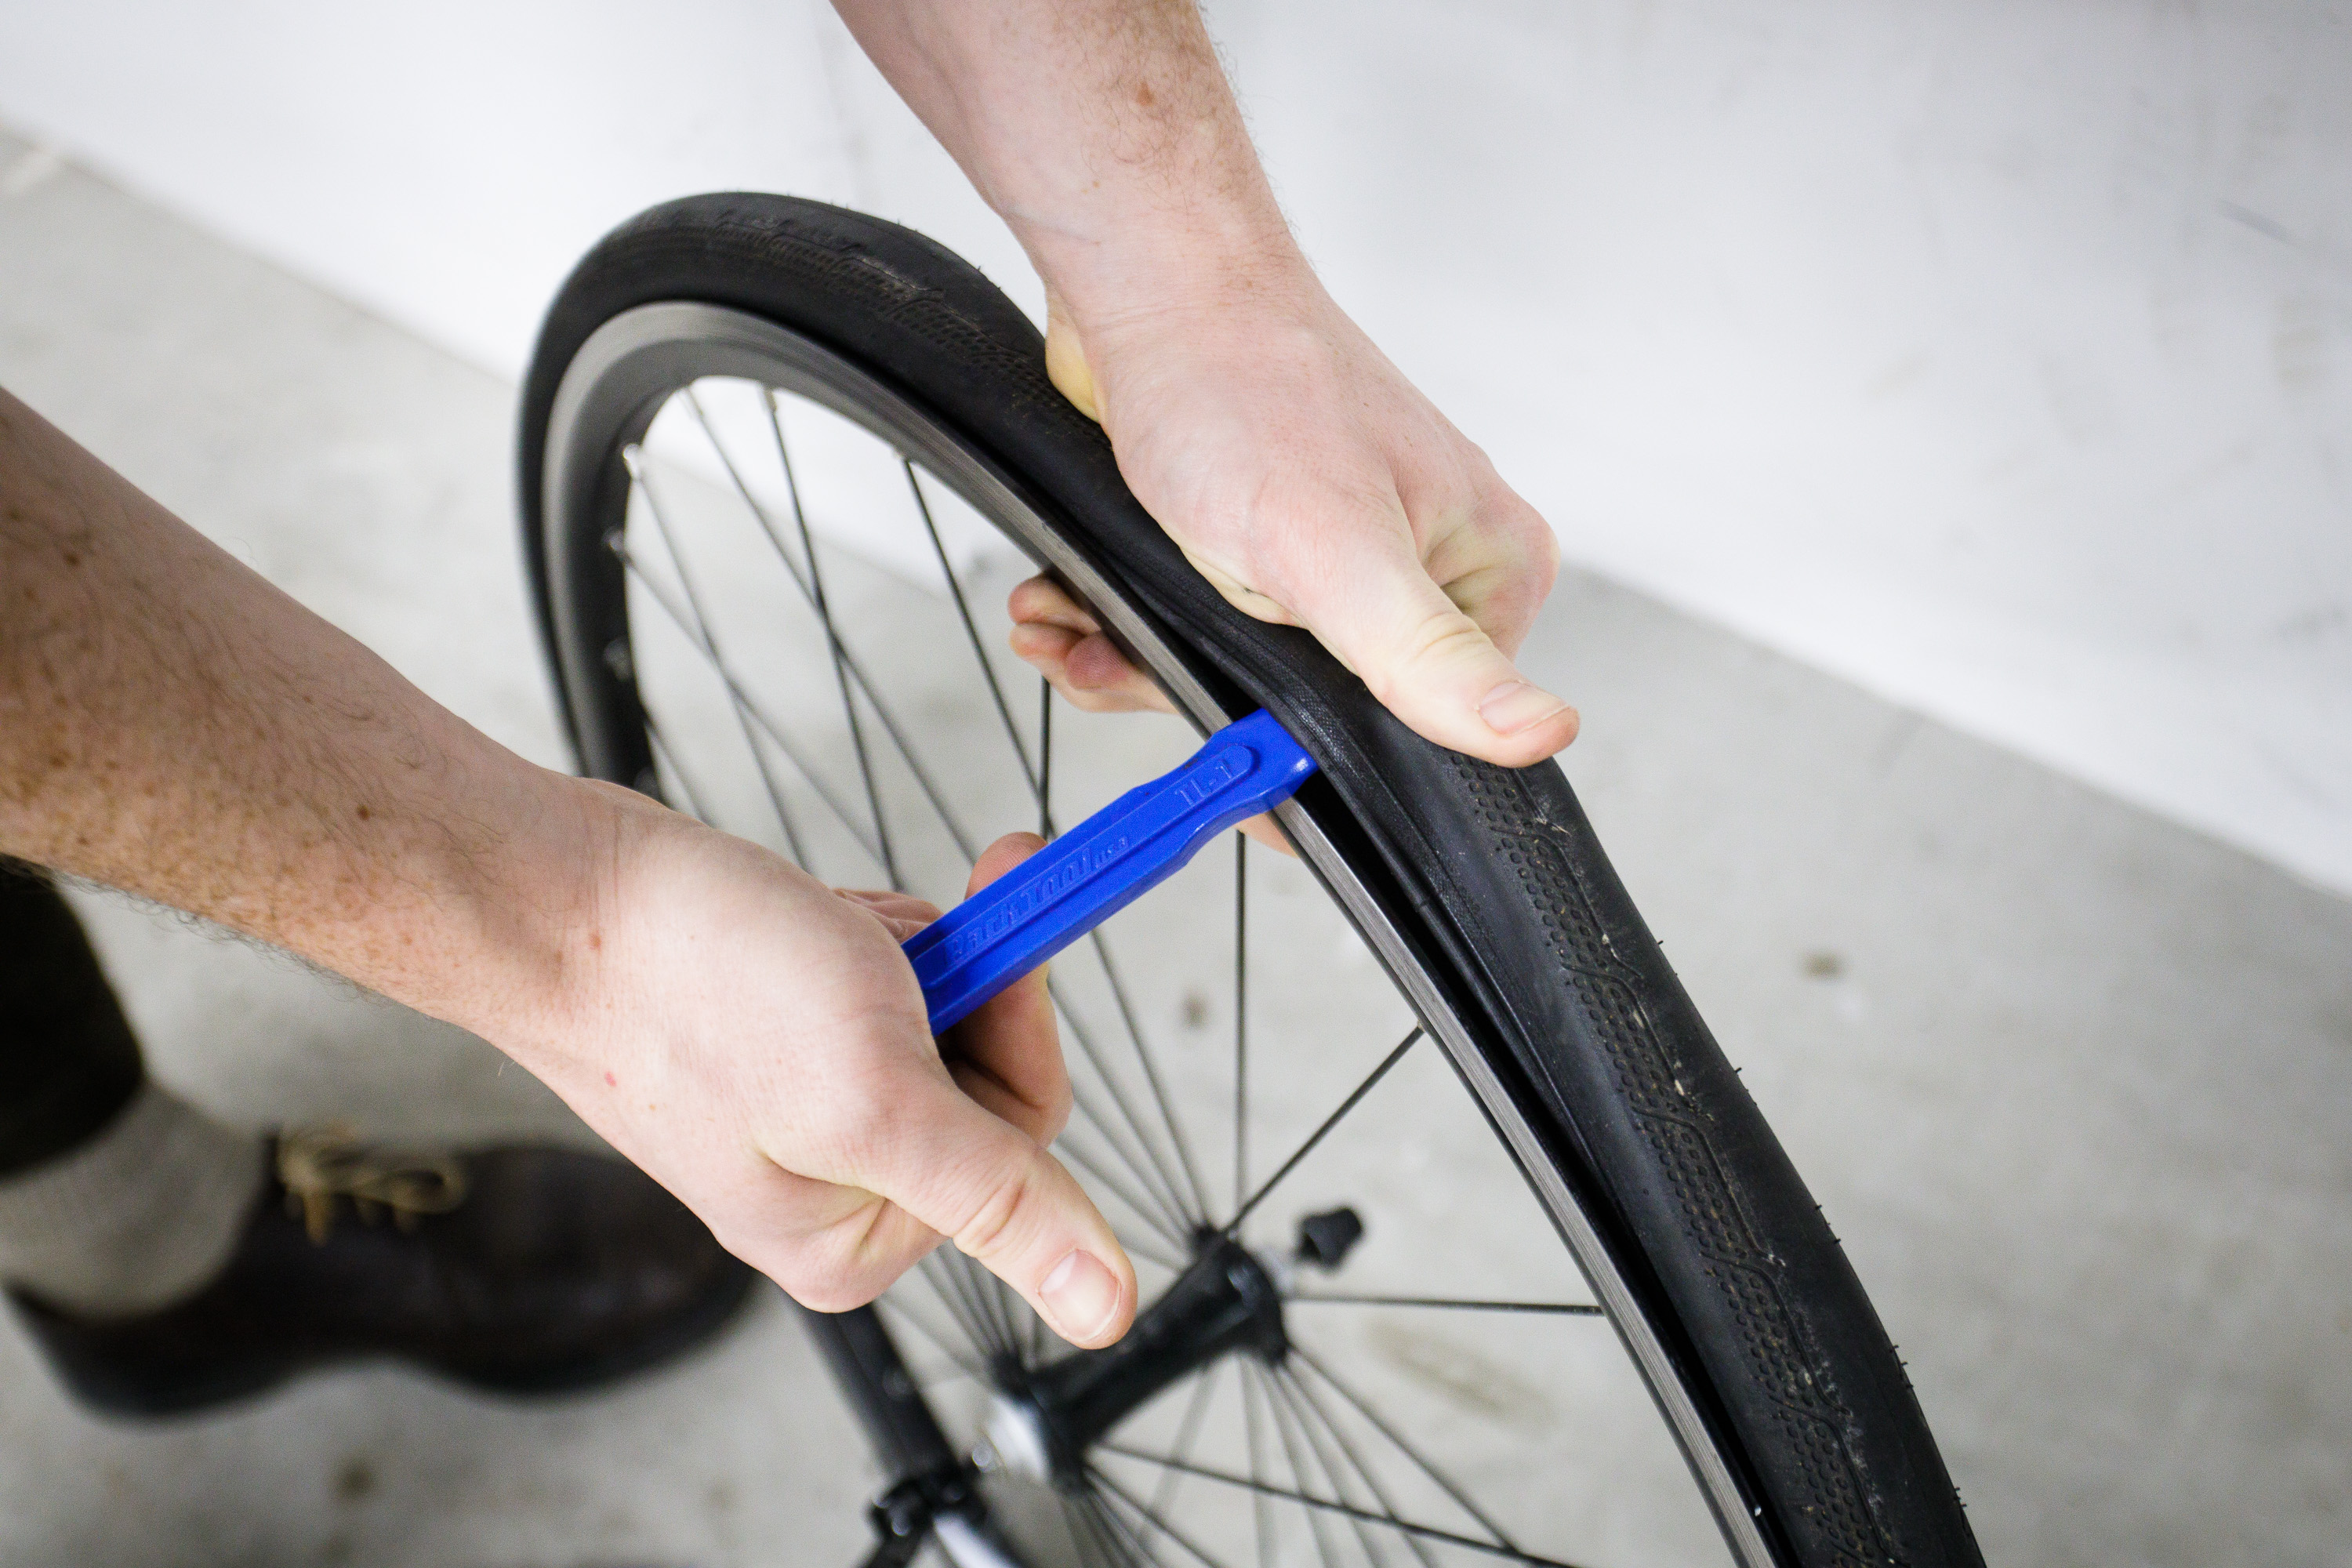
- Insert a tire lever under the tire bead (the edge of the tire).
- Hook the lever onto a spoke.
- Use a second lever a few inches away and slide it around the rim to lift the rest of the tire off.
You usually only need to remove one side of the tire. Avoid using sharp tools, as they can damage the rim or tube.
5. Remove The Old Tube
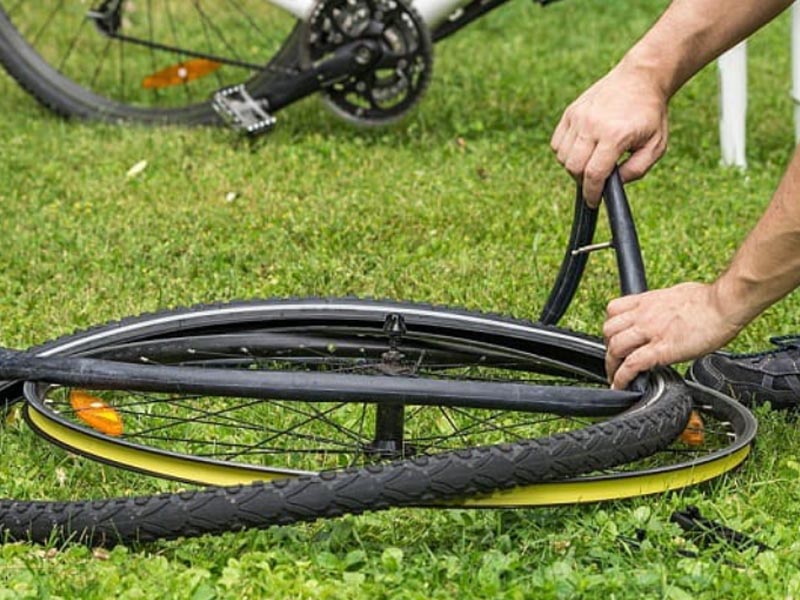
- Pull the tube out, starting opposite the valve.
- Remove the valve last, gently pushing it through the rim hole.
Check the inside of the tire and the rim tape for sharp objects or debris. Even a tiny piece of glass can cause another flat immediately if left inside.
6. Check For Puncture Causes
Run your fingers carefully along the inside of the tire. Look and feel for thorns, glass, wire, or sharp stones. Check the rim tape for damage, as exposed spoke holes can cut a new tube.
This step is often rushed by beginners, but skipping it almost guarantees another flat right away.
7. Prepare And Install The New Tube
- Lightly inflate the new tube so it takes shape but is still soft.
- Insert the valve through the rim hole first.
- Tuck the tube inside the tire, making sure it’s not twisted or pinched.
A slightly inflated tube is less likely to get trapped between the tire and rim, which prevents pinch flats.
8. Reseat The Tire
- Start opposite the valve and push the tire bead back onto the rim.
- Work your way around, using your thumbs to push the last section over the rim.
- Avoid using tire levers here, as they can pinch the new tube.
When you reach the valve, push it up into the tire before seating the last bit. This ensures the tube isn’t caught under the bead.
9. Double-check Tube Placement
Go around the tire and gently squeeze to check that the tube isn’t sticking out. Look carefully at both sides of the rim. If you see the tube, gently push it inside.
This step prevents “snakebite” pinch flats, where the tube gets punctured by the rim edge during inflation.
10. Inflate The Tire
- Use your mini pump or CO₂ inflator.
- Fill to the recommended pressure (usually 80–120 psi for road tires—check your tire’s sidewall).
- Make sure the tire seats evenly and the valve is straight.
If you use a CO₂ inflator, remember the gas will escape over time—reinflate with regular air later if possible.
11. Reinstall The Wheel
- Put the wheel back in the fork or dropouts.
- Tighten the quick-release lever or axle nuts securely.
- Spin the wheel to check for wobbling.
- Reconnect the brake and make sure it works.
For the rear wheel, lift the derailleur slightly to guide the chain onto the smallest cog.
12. Check Everything Before Riding
- Squeeze the tire to feel the pressure.
- Make sure the wheel is secure and brakes work.
- Pack up your tools and old tube (don’t litter).
Test the bike for a short distance before returning to full speed.
Common Mistakes And How To Avoid Them
Even experienced cyclists sometimes repeat basic errors. Here’s what to watch out for:
- Skipping the tire check: Not removing debris from the tire is the biggest reason for repeat flats.
- Pinching the tube during installation: Avoid using metal levers to reseat the tire.
- Inflating too quickly: Pump slowly and check for bulges or unevenness.
- Over-tightening quick releases: This can damage your frame or make it hard to remove later.
- Not matching tube size: A tube that’s too small or too large increases flat risk.
Many beginners also forget to check rim tape. Exposed spoke holes or sharp edges can cut a new tube instantly.
Credit: stogagirlssoccer.com
How To Choose The Right Road Bike Tube
All tubes are not the same. Here’s what matters:
- Valve type: Road bikes usually need Presta valves (thin, tall), not Schrader (wider, like car tires).
- Tube size: Match both diameter (usually 700c) and width (e.g., 23–25 mm).
- Tube material: Butyl rubber is standard, while latex is lighter but loses air faster.
- Valve length: Deep rims need longer valve stems (e.g., 60 mm).
Road Bike Tube Types Comparison
| Type | Weight | Durability | Cost | Air Retention |
|---|---|---|---|---|
| Butyl Rubber | Normal | High | Low | Excellent |
| Latex | Very Light | Lower | Higher | Needs frequent pumping |
| Tubeless | Light | High (with sealant) | Highest | Excellent |
If you’re not sure, stick with butyl rubber tubes and Presta valves. Always carry a spare tube that matches your wheel and rim type.
Tips For Flat Prevention
While flats can’t be avoided entirely, you can reduce the risk:
- Check tire pressure before every ride.
- Avoid debris: Ride around glass, gravel, and potholes.
- Replace worn tires: Thin tread picks up more flats.
- Use quality rim tape to cover spoke holes.
- Install puncture-resistant tires for daily commuting.
Carrying a patch kit adds extra security, but it’s best used as a backup if you already replaced your spare tube.
When To Patch Vs. Replace A Tube
You can patch a tube if the hole is small and not near the valve or a seam. But patches are best for emergencies. Patching at home takes time and patience:
- Clean and dry the area.
- Roughen the tube’s surface with sandpaper.
- Apply glue and let it become tacky.
- Press the patch firmly and wait.
If you’re in a hurry or on the road, replacing the tube is faster and more reliable.
Patching Vs. Replacing: Quick Reference
| Situation | Patch | Replace |
|---|---|---|
| Small puncture, not near valve | Yes | Optional |
| Multiple punctures | Not recommended | Yes |
| Large tear or valve damage | No | Yes |
| Emergency only, no spare tube | Yes | No |
Extra Advice For First-timers
Many new riders struggle with road bike tires because they’re tighter than mountain or hybrid bike tires. Don’t rush. Take the time to seat the tire bead carefully. If you can’t get the last section of tire over the rim, try working it around with both hands from opposite sides, massaging the tire to even out slack.
Wearing thin gloves can help prevent pinched fingers, especially in cold weather. Also, always carry a spare tube, small pump, and tire levers—even on short rides.
For a video demonstration, check resources like Sheldon Brown’s flat tire guide.

Credit: www.youtube.com
Frequently Asked Questions
How Often Should I Check My Road Bike Tire Pressure?
Check your tire pressure before every ride. Road bike tires lose air quickly, sometimes 10–20 psi per week. Riding with low pressure increases the risk of flats and makes your ride less efficient.
Can I Use A Mountain Bike Tube In A Road Bike Tire?
No, mountain bike tubes are usually too wide and not the right diameter. This can cause bunching, poor fit, and increased risk of pinch flats. Always use the correct size tube for your road bike.
What If I Can’t Get The Tire Back On The Rim?
Road bike tires can be tight. Try starting at the valve and working both sides evenly around. Use your thumbs, not tire levers, for the final section. Massaging the tire and making sure the tube isn’t caught can help.
How Do I Know If My Tire Is Too Worn?
Look for bald spots, cuts, or threads showing through the rubber. If you see these, replace the tire. Worn tires pick up more flats and may blow out unexpectedly.
Should I Patch A Tube Or Always Replace It?
You can patch a tube for small holes, but replacing is more reliable—especially for long rides. Carry a patch kit as a backup, but always try to have a spare tube with you.
Knowing how to change a road bike tube is empowering. With a little practice, you’ll fix flats quickly and ride with confidence, ready for any road ahead.