Packing your bike in a bike box can feel complicated, especially if you’ve never done it before. Whether you’re flying for a cycling adventure, shipping your bike for a race, or moving to a new country, knowing how to pack a bike correctly can protect it from expensive damage.
Even small mistakes can lead to bent frames, broken derailleurs, or lost parts. If you want your bike to arrive safely and be ready to ride, learning the right method is essential.
This guide takes you step by step through every part of the process. You’ll see what tools you need, how to disassemble your bike, what to protect, and how to fit everything securely in the box. You’ll also find practical tips that most beginners miss, plus answers to common questions.
By the end, you’ll feel confident packing your bike for any journey.
Why Packing Your Bike Properly Matters
A bike is not just a collection of metal and rubber. For many, it’s a valuable investment—sometimes costing thousands of dollars. Airlines and shipping companies handle thousands of boxes daily. Even with “fragile” stickers, bike boxes can be dropped, stacked, or jostled.
Poor packing can mean broken parts or costly repairs.
Proper packing does more than prevent damage. It also makes reassembling your bike easier when you arrive. Time spent packing carefully now saves you hassle and money later. According to a study by the International Air Transport Association, over 35% of bike shipping claims are due to improper packing.
What You’ll Need Before You Start
Before taking your bike apart, gather the right tools and materials. Missing even one item can make the process stressful.
- Bike box: Cardboard (from a bike shop) or hard-shell case
- Pedal wrench or Allen keys: Usually 6mm or 8mm for pedals
- Multi-tool: For bolts and adjustments
- Torque wrench: To avoid over-tightening bolts
- Zip ties or Velcro straps: To secure parts
- Bubble wrap or foam tubing: For protection
- Packing tape: Strong, wide tape seals the box
- Plastic spacers: For the fork and rear dropouts
- Small bags: For screws, bolts, and small parts
- Permanent marker: To label bags or box
If you’re missing a bike box, most local bike shops will give you one for free or a small fee. Hard cases offer better protection but cost more and add weight.

Credit: tempocyclist.com
Preparing Your Bike For Packing
Good preparation makes the rest of the process smoother. Start by cleaning your bike. Dirt and grease can stain your clothes and damage packaging. Next, shift the chain onto the smallest chainring and cog. This reduces tension in the derailleur and makes removal easier.
Take photos of your bike before you start. This helps you remember cable routing and part positions. Also, deflate your tires to about half pressure. This prevents damage from changes in air pressure during flights.
Step-by-step: Disassembling Your Bike
Disassembly is the part that worries most people, but it’s easier than you think if you follow a system.
1. Remove The Pedals
Use a pedal wrench or the correct Allen key. Remember, the left pedal is reverse-threaded (turn clockwise to loosen). The right pedal is standard (counterclockwise to loosen). Store the pedals in a small bag.
2. Take Off The Wheels
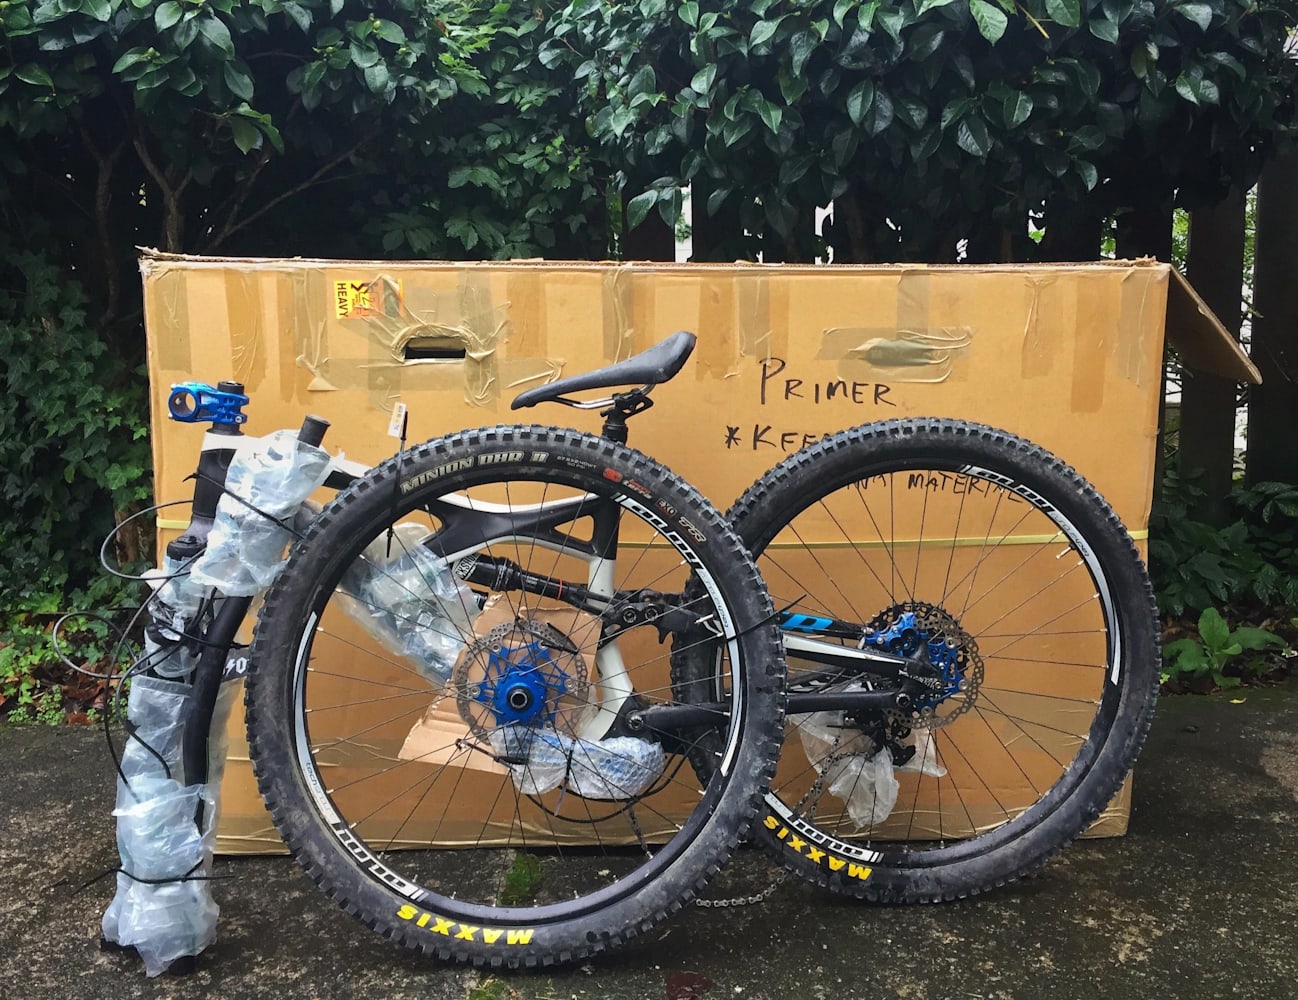
Open the quick-release levers or thru-axles. Remove both wheels. Place the axles or skewers in a labeled bag. Insert plastic spacers into the fork and rear dropouts to prevent them from being crushed.
3. Remove Or Lower The Seatpost
If your seatpost slides easily, take it out. For dropper posts, lower them fully. Mark the original position with tape or a marker to make reassembly simple.
4. Detach The Handlebars
Loosen the stem bolts. You can either remove the handlebars completely or rotate them to the side. Do not let the bars hang from the cables. Wrap the bars in bubble wrap and secure them to the frame with zip ties.
5. Remove The Derailleur
Unscrew the rear derailleur from the hanger, but keep the chain attached. Wrap it in bubble wrap and tape it to the inside of the frame. This step prevents bent derailleur hangers—a common shipping problem.
6. Take Off Accessories
Remove anything fragile or easily lost: computers, lights, bottle cages, fenders, racks, and pumps. Pack these separately.
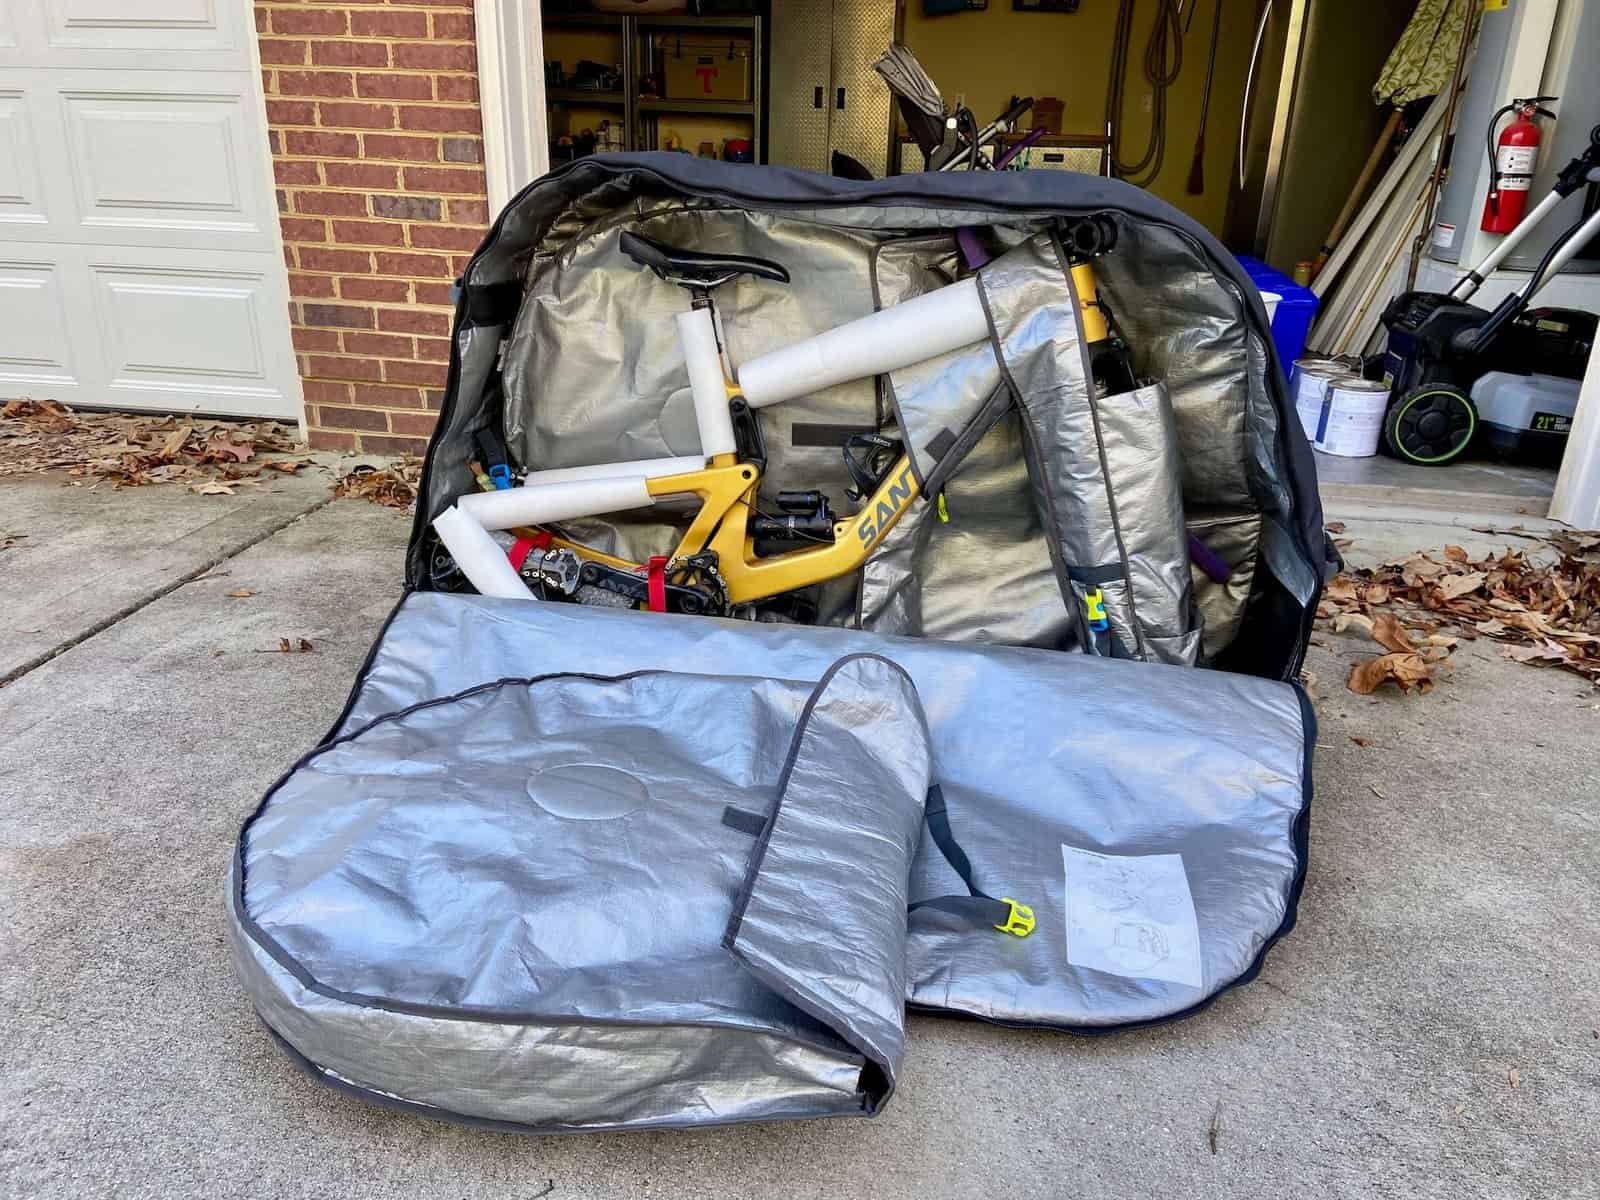
Credit: www.twowheeledwanderer.com
Protecting The Bike’s Vulnerable Parts
Not all parts need the same protection. The following need extra care:
- Frame: Use foam tubing or bubble wrap on all tubes, especially the top tube and down tube.
- Forks: Cover with foam and add a spacer between dropouts.
- Derailleur Hanger: Some people remove it for extra safety.
- Brake Rotors: If you have disc brakes, remove the rotors and pack them flat between cardboard layers.
- Chain: Cover with a rag or wrap to prevent grease stains.
Use zip ties or Velcro straps to keep everything from moving. Make sure nothing metal touches the frame directly.
Fitting Everything Into The Bike Box
Packing is like solving a puzzle. The aim is to use space efficiently and avoid parts rubbing together.
1. Place The Frame First
Lay the frame in the box, with padding underneath. Most boxes fit the frame on its side. Make sure the fork and rear triangle are protected.
2. Add Wheels
Place each wheel on one side of the frame, with foam or cardboard as a barrier. If possible, remove the skewers or axles from the wheels. This avoids accidental damage.
3. Fit The Handlebars
Lay the handlebars alongside the frame. Secure with zip ties so they do not shift.
4. Include The Seatpost And Pedals
Wrap these and place them in the box wherever there is space, usually at the bottom or sides.
5. Add Small Parts And Accessories
Place all small bags with bolts or accessories in a clear, labeled bag. Tape this bag to the frame or inside the box.
6. Fill Empty Spaces
Use bubble wrap, old towels, or clothes to fill gaps. This prevents movement and adds extra protection.
7. Seal And Label The Box
Tape every seam with strong packing tape. Mark the box with your name, address, and phone number. Write “This Side Up” and “Fragile” clearly.
Here’s a comparison of common bike box types to help you choose:
| Box Type | Protection | Weight | Cost | Reusability |
|---|---|---|---|---|
| Cardboard Box | Basic | Light | Low | Single Use |
| Hard Case | Excellent | Heavy | High | Many Times |
| Soft Case | Good | Medium | Medium | Several Times |
Common Mistakes To Avoid
Even experienced cyclists sometimes make errors that cause problems later. Here are mistakes to watch for:
1. Forgetting To Use Dropout Spacers
The fork and rear dropouts are fragile. Without spacers, even a small impact can bend them.
2. Leaving Metal Parts Unwrapped
Metal on metal can scratch or dent. Always wrap anything that could touch the frame.
3. Not Marking Seatpost Or Handlebar Position
Failing to mark these can mean hours adjusting your fit after reassembly.
4. Overpacking The Box
Airlines often have weight limits (usually 23kg/50lbs). Weigh your box before leaving.
5. Losing Small Parts
Use zippered bags, label everything, and tape them to the frame.
6. Not Checking Airline Or Shipping Rules
Each company has specific box size and weight limits. Check before you pack to avoid extra fees.
Shipping And Travel: What To Know
If you’re flying, check your airline’s bike policy in advance. Some airlines treat bikes as regular checked baggage, while others charge special fees. Box size limits usually range from 150 to 320 cm (combined length + width + height).
For shipping, compare services like FedEx, DHL, or bike-specific couriers. Insurance is a good idea if your bike is valuable. Take photos of your packed box for proof in case you need to make a claim.
Here’s a quick look at airline policies for bike boxes:
| Airline | Max Box Size | Max Weight | Fee (USD) |
|---|---|---|---|
| Delta | 300 cm | 23 kg | 150 |
| Lufthansa | 315 cm | 32 kg | 100 |
| Qantas | 277 cm | 23 kg | Free* |
- Qantas includes a bike as part of free checked baggage on some routes.
Reassembling Your Bike After Travel
When you arrive, unpack carefully. Check for damage before removing any padding. Use your phone photos to help with reassembly. Refit the seatpost, handlebars, wheels, and pedals. Tighten bolts to the correct torque. Reinstall accessories and inflate tires. Test the brakes and gears before riding.
A non-obvious tip: carry a small bottle of lubricant. Sometimes cables dry out during travel, and a quick drop makes shifting smooth again.
Advanced Tips For Safe Packing
- Use Pipe Insulation: Hardware stores sell foam pipe insulation that fits perfectly on bike tubes for cheap, reusable protection.
- Double Box for Expensive Bikes: Place the bike box inside a larger box with extra padding for maximum safety.
- Carry a Mini Tool Kit: Put a compact tool kit in your luggage, not the bike box, to avoid loss and help with quick repairs on arrival.
- Label Every Bag: If you have to open your box for customs, labeled bags make reassembly faster and prevent losing tiny parts.
Credit: www.redbull.com
Frequently Asked Questions
How Long Does It Take To Pack A Bike In A Box?
For a first timer, allow 1. 5 to 2 hours. With practice, you can do it in 45 minutes. Taking your time reduces mistakes and stress.
Can I Pack An E-bike In A Bike Box?
Yes, but you cannot ship lithium batteries by air. Remove the battery and ship it separately by ground if needed. E-bikes are heavier, so check weight limits.
Is A Hard Case Better Than A Cardboard Box?
A hard case offers much better protection but costs more and is heavier. For expensive bikes or frequent travel, hard cases are worth the investment. Cardboard is fine for short trips if you pad everything well.
What If I Lose Small Bolts Or Parts?
Always pack extra bolts and washers in a spare bag. If you lose something, most bike shops can provide replacements, but carrying spares saves time and money.
Should I Get Bike Shipping Insurance?
If your bike is valuable, insurance is wise. Airlines and shippers often pay only a small amount per kilo for lost or damaged baggage. Special insurance covers the full value.
For more details on bike travel and packing, check the IATA’s official guidance.
Packing a bike in a bike box is a skill every cyclist should learn. With the right preparation, tools, and careful packing, you’ll enjoy peace of mind—and your bike will be ready for new roads, wherever you go.