Carrying things on a bike can be a challenge. Backpacks get sweaty and uncomfortable, and holding bags while riding is unsafe. That’s where the rear rack comes in. It’s a simple but powerful upgrade that can transform your bicycle into a true utility machine. Whether you want to carry groceries, commute with a laptop, or go on long tours, a rear rack opens up many possibilities. But to get the most out of it, you need to know how to use it safely and efficiently.
This guide explains everything you need about using a rear rack on a bike. You’ll learn how to install one, what you can carry, how to secure your load, and much more. Even if you’re new to cycling, these steps will help you use your rear rack confidently, avoid mistakes, and enjoy a smoother ride.
What Is A Rear Rack And Why Use One?
A rear rack is a metal frame attached above the back wheel of your bicycle. Its main job is to carry bags, boxes, or other items securely. Unlike a front basket, a rear rack keeps the bike stable because the weight sits low and centered. Most racks are made from aluminum or steel, with weight limits from 20 kg (44 lbs) up to 40 kg (88 lbs), depending on the design.
Why use a rear rack instead of a backpack or shoulder bag?
- Comfort: No extra weight on your back or shoulders.
- Safety: Hands stay on the handlebars, not carrying bags.
- Capacity: You can carry much more—groceries, work gear, or even a child seat.
- Stability: The weight distribution makes your bike less likely to wobble.
For daily commuters, touring cyclists, or anyone who wants to run errands by bike, a rear rack is a simple upgrade with big benefits.
Choosing The Right Rear Rack For Your Bike
Not all racks fit all bikes. The right choice depends on your bike’s frame, your needs, and your budget.
Types Of Rear Racks
- Standard racks: Fit most city and touring bikes. They attach to mounting points (eyelets) on the frame.
- Disc-brake compatible racks: Designed to clear disc brake calipers.
- Seatpost racks: Clamp to the seatpost. Good for bikes without eyelets, but lower weight limits.
- Specialty racks: Designed for fat bikes, cargo bikes, or electric bikes.
Key Factors To Consider
- Mounting points: Most racks need threaded holes near the rear axle and seat stays.
- Wheel size: Check if the rack fits your 26”, 27.5”, 29”, or 700c wheels.
- Weight limit: Consider what you plan to carry. Overloading can bend the rack or affect handling.
- Material: Aluminum racks are light, steel racks are stronger and can be repaired if bent.
- Compatibility: Make sure the rack will not interfere with your bike’s brakes or suspension.
Here’s a quick comparison of common rack types:
| Rack Type | Fits Eyelets | Weight Limit | Best For |
|---|---|---|---|
| Standard Rear Rack | Yes | 20–30 kg | Commuting, Touring |
| Seatpost Rack | No | 7–10 kg | Light Loads, No Eyelets |
| Disc Brake Rack | Yes (Special Mounts) | 20–25 kg | Bikes with Disc Brakes |
Insight: Many beginners buy a rack without checking for mounting points. Always look for eyelets near the rear axle before you buy. If your bike does not have them, choose a seatpost rack.

Credit: biketoeverything.com
How To Install A Rear Rack
Installing a rear rack is usually straightforward, but the steps vary by bike and rack type. Most racks include bolts and spacers. Here’s a step-by-step overview for a standard rack:
- Gather tools: You’ll need Allen wrenches (usually 4mm or 5mm) and sometimes a small adjustable wrench.
- Align rack arms: Position the rack’s lower arms over the eyelets near your rear axle.
- Attach lower bolts: Insert and tighten bolts through the rack arms into the frame eyelets. Don’t fully tighten yet.
- Attach upper stays: Adjust the upper arms (stays) to reach the mounting points near the seat or brake bridge.
- Secure upper bolts: Attach and hand-tighten these bolts.
- Check alignment: Make sure the rack is level and centered over the wheel.
- Tighten all bolts: Secure everything firmly, but don’t overtighten—aluminum bolts can strip.
- Test for movement: Wiggle the rack. It should feel solid with no wobble.
If you’re installing a seatpost rack, slide it over the seatpost, adjust the angle, and tighten the clamp.
Pro Tip: Use a small drop of threadlocker on bolts to keep them from loosening over time, especially if you ride rough roads.
What Can You Carry On A Rear Rack?
A rear rack can handle a wide range of items. Here are some common uses:
- Panniers: Special bags designed to hang from the rack’s sides.
- Trunk bags: Sit on top of the rack, often with zippered compartments.
- Baskets: Attach to the top for easy grocery hauling.
- Child seats: Only use racks approved for this purpose and check weight limits.
- Crates and boxes: For larger or odd-shaped items.
For example, a typical commuter might use two panniers for a laptop, lunch, and change of clothes. A touring cyclist may load up with camping gear. Grocery shoppers often use a basket or crate for quick trips.
Beginner mistake: Many people overload their rack. Stay within the weight limit (usually stamped on the rack). Overloading can cause broken bolts, frame damage, or loss of control.

Credit: www.amazon.com
How To Secure Items On A Rear Rack
Riding with loose bags or boxes is risky—they can fall into the wheel or shift the bike’s balance. Proper securing is critical.
Ways To Secure Loads
- Pannier hooks/clips: Most panniers have hooks that lock onto the rack rails.
- Bungee cords: Stretchy cords with hooks, useful for odd-shaped loads.
- Straps: Velcro or nylon straps hold boxes or bags tightly.
- Cargo nets: Small elastic nets for covering loose items.
- Integrated rack straps: Some racks come with built-in straps or clamps.
When carrying something on top of the rack, always check that nothing dangles near the wheel or chain. Test by lifting the rear of the bike and spinning the wheel before you ride.
Practical insight: On bumpy roads, bungee cords can stretch and release. For heavy or valuable items, use secure straps or lockable panniers.
Tips For Safe Riding With A Loaded Rear Rack
Carrying extra weight changes how your bike handles. Heavier loads make the bike less agile and harder to stop. Here are tips to stay safe:
- Balance the load: If using two panniers, keep the weight even on both sides.
- Practice braking: A loaded bike takes longer to stop. Test your brakes before heading onto busy roads.
- Take corners slowly: The extra weight can make sharp turns tricky.
- Check for loose parts: Inspect the rack and fasteners before each ride.
- Watch for heel strike: If your panniers are too far forward, your heel may hit them as you pedal. Adjust the rack or pannier position if needed.
Handling Different Road Conditions
- Rough surfaces: Go slower over bumps to avoid shaking the rack loose.
- Uphill climbs: Shift to an easier gear. Extra weight at the back can make the front wheel lift on steep hills.
- Wet weather: Make sure your bags are waterproof, or use rain covers.
Advanced tip: If touring with very heavy loads, consider adding a front rack to split the weight for better bike handling.
Maintenance And Longevity Of Rear Racks
A rear rack is low-maintenance, but a few habits keep it strong and safe for years.
- Check bolts: Vibrations can loosen bolts over time. Check and retighten monthly.
- Inspect for cracks: Look for bends or cracks, especially after carrying heavy loads.
- Clean regularly: Dirt and road salt can cause rust (especially on steel racks).
- Lubricate contact points: A small amount of grease at the bolt threads helps prevent corrosion.
- Replace damaged parts: Never ride with a broken or loose rack.
If you live in a rainy area, rust can be a concern. Stainless steel racks cost more but resist rust. Aluminum racks don’t rust but can crack under extreme stress.
Here’s a simple maintenance checklist for your rack:
| Task | How Often | Why |
|---|---|---|
| Check bolts | Monthly | Prevent loosening or loss |
| Inspect for cracks | Every 3 months | Spot damage early |
| Clean rack | After rain/mud | Prevent rust/corrosion |
Surprising fact: Most rack failures happen from loose bolts, not metal fatigue. Regular checks are more important than most people think.
Rear Rack Accessories That Make Life Easier
The basic rack is just the start. Accessories expand what your rack can do.
- Pannier bags: Waterproof, quick-release, and often reflective for night riding.
- Trunk bags: Great for tools, spare tubes, or snacks.
- Rain covers: Keep your gear dry in wet weather.
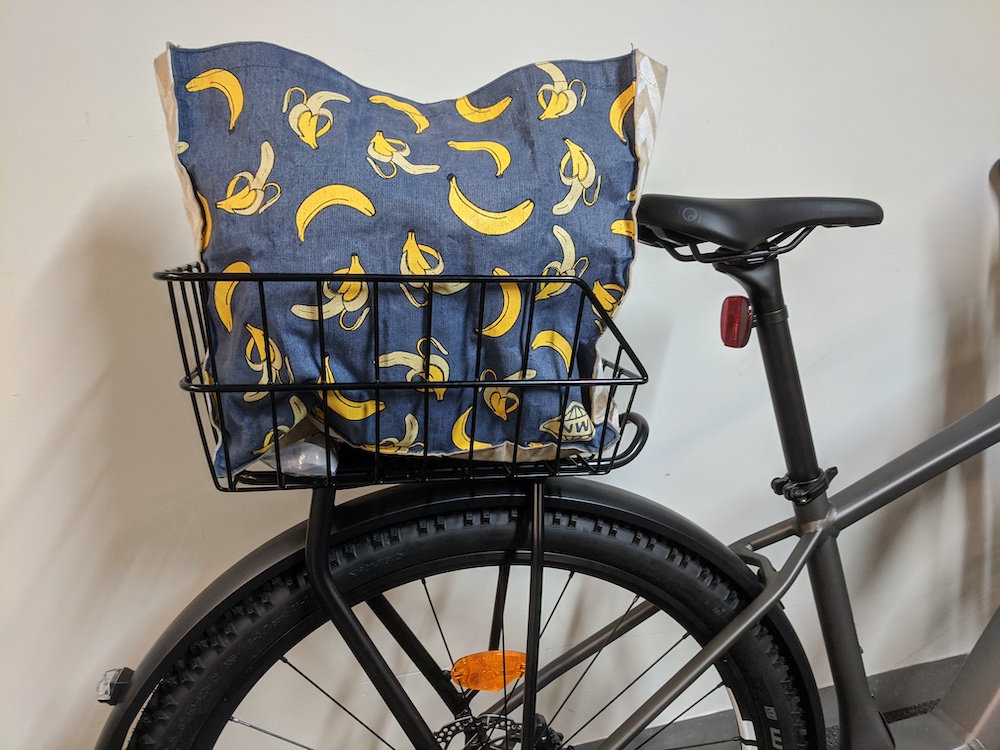
- Cargo baskets/crates: For irregular loads or shopping trips.
- Child seats: Only mount with racks rated for the extra weight.
Some riders add a rear light or reflector to the rack for better visibility. If you ride at night, make sure nothing blocks your rear light.
Credit: www.woolyyarn.com
Common Mistakes When Using A Rear Rack
Even experienced riders make errors with rear racks. Here are some pitfalls to avoid:
- Ignoring weight limits: Overloading is the number one cause of rack failure.
- Poorly secured items: Loose loads can fall, causing accidents.
- Unbalanced loads: Uneven weight makes steering difficult.
- Incorrect installation: Improperly mounted racks wobble or damage the frame.
- Blocking lights/reflectors: Make sure your rear lights stay visible.
Non-obvious insight: Sometimes, racks loosen gradually. If you hear new rattling noises while riding, stop and check before continuing.
When Not To Use A Rear Rack
A rear rack is useful, but not for every situation. Skip the rack if:
- You plan to do aggressive mountain biking. Racks add weight and can catch on obstacles.
- Your bike has a carbon fiber frame without rack mounts. Clamping a rack can damage the frame.
- You need to carry extremely heavy items (over 40 kg). Consider a dedicated cargo bike instead.
- Speed and aerodynamics matter (racing, time trials). Racks add drag.
For all other uses—commuting, shopping, touring—a rear rack is one of the best ways to add carrying capacity safely.
Frequently Asked Questions
How Much Weight Can A Rear Rack Hold?
Most standard rear racks can safely carry 20–25 kg (44–55 lbs), but always check the rack’s rating. Some heavy-duty racks handle up to 40 kg. Never exceed the stated limit, as it can lead to rack or frame failure.
Can I Install A Rear Rack On Any Bike?
Not all bikes are rack-compatible. Look for mounting eyelets near the rear wheel and seat stays. For bikes without mounts (like some road bikes or full-suspension mountain bikes), use a seatpost rack, but remember these have lower weight limits.
Are Panniers Better Than Baskets For Carrying Things?
Panniers are best for heavier or valuable items. They keep the load low and balanced. Baskets are quicker for light groceries or odd-shaped items. For long distances or commuting, panniers are generally more secure and weatherproof.
How Do I Keep My Bags From Being Stolen?
Use lockable panniers or run a small cable lock through the bag handles and rack. For short stops, most thefts are crimes of opportunity—secure your bags, and avoid leaving valuables on the bike unattended.
Where Can I Find More Information On Bicycle Racks And Safety?
For detailed technical info, check out the Wikipedia page on bicycle luggage carriers. It covers different rack types, mounting methods, and safety considerations.
A rear rack turns a simple bike into a practical machine for daily life, travel, and adventure. With the right setup and a few smart habits, you’ll carry more, ride safer, and enjoy your bike even more.