Removing a bike crank arm is a task that many cyclists face, whether you are upgrading components, fixing a problem, or simply doing routine maintenance. While it may seem complex at first, the process becomes much easier once you understand the steps and have the right tools.
Knowing how to remove a crank arm not only saves you money on bike shop labor but also helps you keep your bike running smoothly. In this guide, you’ll learn everything you need to know about removing different types of crank arms, the tools you’ll need, common mistakes to avoid, and tips for making the job easier, even if you’re a beginner.
Why Remove A Bike Crank Arm?
There are several reasons you might need to remove a crank arm from your bike:
- Replacing worn or damaged crank arms
- Upgrading to a better crankset
- Cleaning and inspecting the bottom bracket
- Repairing or replacing pedal threads
- Solving creaking noises
Crank arms play a crucial role in converting your pedaling force into forward motion. If they are loose, damaged, or misaligned, your bike’s performance and safety can be compromised. Removing the crank arm is often the first step in many repair jobs involving the bottom bracket or chainring area.
Understanding Different Crank Arm Types
Not all crank arms are the same. The removal method depends on the type of crankset your bike uses. The most common types include:
- Square Taper (Cotterless)
- Splined (ISIS, Octalink)
- Self-Extracting Crank Arms
- Direct Mount Cranks
- One-Piece (Ashtabula) Cranks
Each type requires a slightly different approach and toolset. Using the wrong method can damage your crank arm, bottom bracket, or tools.
Comparison Of Common Crank Arm Types
| Crank Arm Type | Removal Method | Common Tool |
|---|---|---|
| Square Taper | Crank Puller Tool | Crank Puller |
| Splined (ISIS/Octalink) | Crank Puller Tool | Crank Puller (with ISIS adapter) |
| Self-Extracting | Allen Key Only | 8mm Allen Key |
| Direct Mount | Allen Key and Lockring Tool | Lockring Tool, Allen Key |
| One-Piece (Ashtabula) | Wrench & Mallet | Wrench, Rubber Mallet |
Tools You Need
Having the correct tools makes crank arm removal much easier and prevents damage. Here are the essential tools, depending on your crank arm type:
- Crank Puller Tool (for square taper and splined crank arms)
- 8mm or 10mm Allen Key (for self-extracting crank arms)
- Lockring Tool (for some direct mount cranks)
- Wrench (for one-piece cranks)
- Rubber Mallet (helps loosen stuck arms)
- Grease (for reinstallation)
- Bike Stand (optional, but helps keep the bike stable)
While some people try to use improvised tools, this often leads to stripped bolts or damaged crank arms. Investing in a proper crank puller tool, which usually costs around $10–$20, is well worth it.
Preparing Your Bike
Before starting, it’s important to prepare your workspace and bike:
- Shift the chain onto the smallest chainring and rear cog. This reduces tension and makes removal easier.
- Clean the crank area. Dirt and grease can hide bolts and make it harder to see what you’re doing.
- Stabilize the bike. Use a bike stand if you have one. If not, lean the bike securely against a wall.
- Check the crank arm type. Identify your crank type so you use the correct removal method.
Step-by-step Guide: Removing A Bike Crank Arm
Let’s walk through the removal process for the most common crank arm types. Read the section that matches your bike.
1. Removing Square Taper Crank Arms
This is the most common type on older and entry-level bikes.
- Remove the dust cap. Use a flathead screwdriver to gently pry off the plastic or metal cap in the center of the crank arm.
- Unscrew the crank bolt. Use an 8mm or 14mm socket/Allen key to loosen and remove the bolt holding the crank arm.
- Thread the crank puller into the crank arm. Make sure it is fully threaded in—if not, you can strip the threads.
- Tighten the crank puller’s center bolt. Turn it clockwise until the crank arm slides off the bottom bracket spindle.
- Remove the crank arm. Once loose, it should slide off easily.
Non-obvious tip: Always check the condition of the threads before using a crank puller. Damaged threads can make removal impossible without a shop’s help.
2. Removing Splined Crank Arms (isis, Octalink)
These look similar to square taper but have a different interface.
- Remove the crank bolt. Use the appropriate Allen key or socket.
- Use a compatible crank puller. Splined cranks sometimes need an adapter on the puller tool.
- Thread the puller in carefully. It should go in smoothly—do not force it.
- Tighten the puller to remove the arm. The arm will pop off the spindle.
3. Removing Self-extracting Crank Arms
Many modern bikes use this system.
- Locate the self-extracting bolt. It usually has a large outer ring and a smaller center bolt.
- Insert an 8mm Allen key into the center bolt.
- Turn the bolt counterclockwise. The arm will pull itself off the spindle as you turn.
- Remove the crank arm. It should come off smoothly.
Non-obvious insight: Do not remove the outer ring! It holds the self-extracting system in place.
4. Removing Direct Mount Crank Arms
These are common on high-end mountain bikes.
- Remove the crank bolt. Use an Allen key.
- Remove the lockring. Use a direct mount lockring tool.
- Slide off the crank arm. Some may require gentle taps with a mallet.
5. Removing One-piece (ashtabula) Cranks
Found mainly on old BMX and kids’ bikes.
- Remove the pedals. Use a pedal wrench.
- Loosen the locknut and bearing race. Use an adjustable wrench.
- Slide the whole crank and spindle out.
Example: One-piece cranks are rare on modern bikes, but you may find them on vintage models.
What To Do If The Crank Arm Is Stuck
Sometimes, crank arms refuse to come off, even with the right tools. Here’s what you can try:
- Apply penetrating oil (like WD-40) to the joint and let it sit for 10–15 minutes.
- Tap gently with a rubber mallet. Do not use a metal hammer, or you’ll damage the crank.
- Check for hidden bolts or retaining rings. Missing one can make removal impossible.
- Try tightening before loosening. A small turn in the opposite direction can break a stubborn bond.
If the crank arm still won’t budge, don’t force it. Over-tightening a puller can strip threads. Sometimes, a bike shop’s hydraulic press is the safest option.
Cleaning And Inspecting After Removal
Once the crank arm is off, this is a good chance to clean and inspect the parts:
- Wipe the spindle and crank interface. Remove old grease and dirt.
- Inspect for wear or cracks. Cracks around the spindle area are a sign the crank needs replacing.
- Check the bottom bracket. Spin it by hand; if it feels rough or gritty, consider replacing it.
- Apply fresh grease when reinstalling or installing a new crank arm.
| Part | What to Check | Action Needed |
|---|---|---|
| Crank Arm | Cracks, stripped threads | Replace if damaged |
| Bottom Bracket | Rough spinning, play | Clean or replace |
| Spindle | Burrs, damage | File gently or replace |
Reinstalling The Crank Arm
After cleaning and inspection, you may want to reinstall the same or a new crank arm. Here’s how to do it safely:
- Apply a thin layer of grease to the spindle. This prevents seizing and makes future removal easier.
- Align the crank arm at the correct angle (opposite the other arm).
- Slide the crank arm onto the spindle.
- Install and tighten the crank bolt. Use a torque wrench if possible. Most cranks require 35–50 Nm of torque.
- Install the dust cap or self-extracting cap (if your crank uses one).
Pro tip: Check the tightness after your first ride. New cranks may settle and need retightening.

Credit: www.reddit.com
Common Mistakes To Avoid
Many beginners make errors that can damage their bike or make the job much harder. Here are frequent mistakes to watch out for:
- Using the wrong tool. Forcing the wrong puller or Allen key can strip threads or bolts.
- Not fully threading the crank puller in. This can destroy the crank’s threads.
- Losing small parts. Dust caps and spacers are easy to misplace—keep them in a small container.
- Over-tightening bolts. This can crush bearings or crack the crank arm.
- Skipping grease. Dry installation leads to creaks and makes future removal difficult.
When To Seek Professional Help
While most crank arm removals are straightforward, there are times when it’s better to consult a bike mechanic:
- Badly seized or stripped crank arms
- Specialty cranksets without common tools
- Signs of frame damage
- If you lack confidence or the right tools
A professional mechanic can often complete the job in minutes and spot other potential issues.
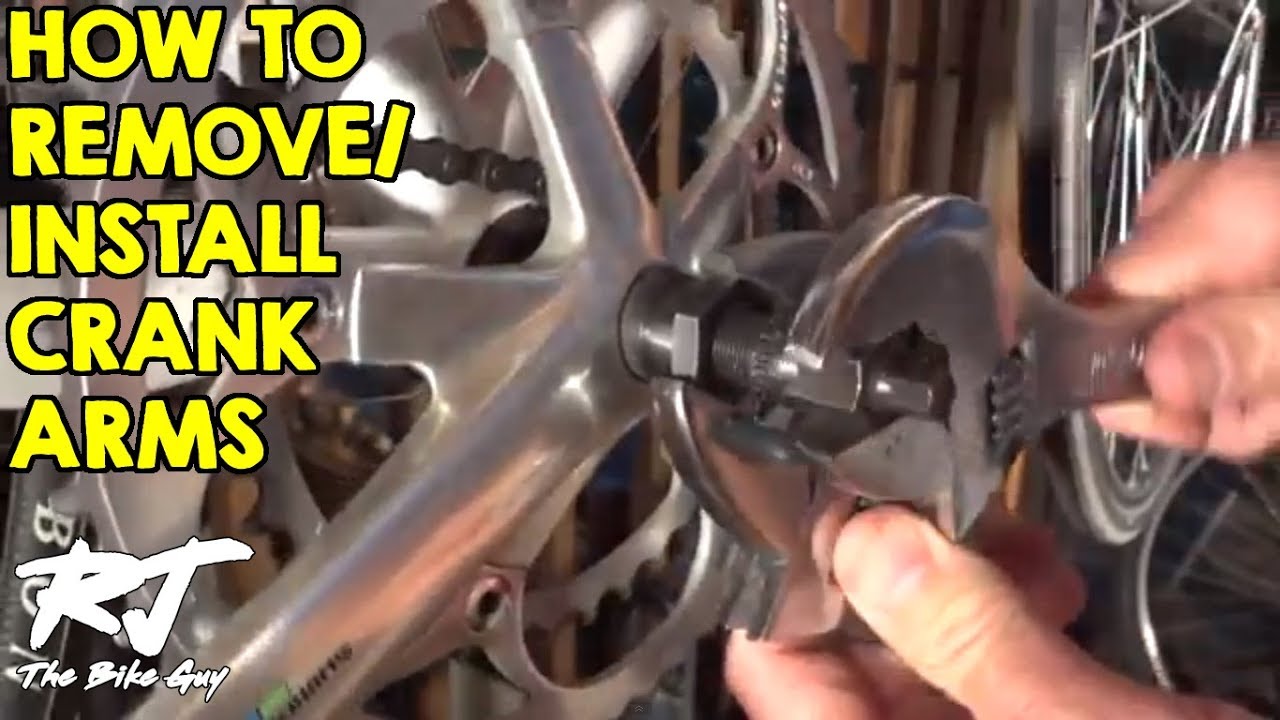
Credit: www.youtube.com
Cost And Time Estimates
Most home crank arm removals take 15–30 minutes if you have the right tools. Crank puller tools cost about $10–$20 USD, while a basic Allen key set is around $5–$15 USD. Bike shop labor for crank removal usually costs $20–$40 USD (not including parts).
| Method | Estimated Time | Cost (Tools/Labor) |
|---|---|---|
| Home DIY | 15–30 minutes | $15–$40 (tools) |
| Bike Shop | 10–20 minutes | $20–$40 (labor) |
Tips For Easier Crank Arm Removal
- Keep your tools organized. A tool tray or magnetic mat helps prevent losing small parts.
- Work in a well-lit area. Shadows make it easy to miss important steps.
- Take photos as you go. If you’re unsure about reassembly, photos can be a lifesaver.
- Don’t rush. Patience prevents mistakes and damage.
- Check manufacturer’s instructions. Some cranks have unique procedures.
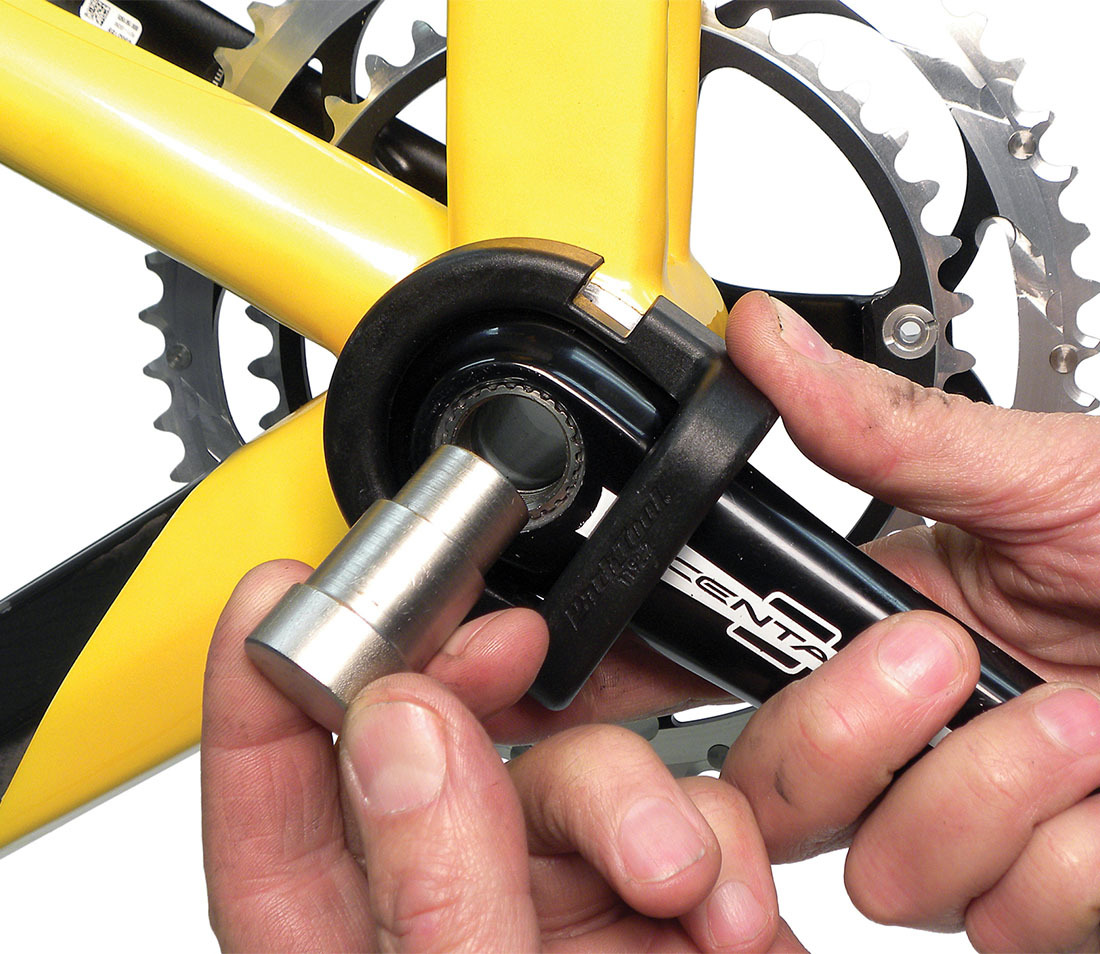
Credit: www.parktool.com
Frequently Asked Questions
What If I Don’t Have A Crank Puller Tool?
If your crank arm requires a puller tool, do not try to remove it with a hammer or screwdriver—you will likely damage the crank or bottom bracket. Borrow or buy a proper crank puller. Some local bike shops will let you use their tools for a small fee.
Can I Reuse The Crank Bolt?
Yes, in most cases you can reuse the crank bolt if it’s in good condition. However, if the threads are stripped or damaged, replace it. Some self-extracting systems use special bolts; check your crank’s manual or manufacturer’s website for details.
How Do I Know Which Crank Arm Type I Have?
Check the area where the crank attaches to the bottom bracket. Square tapers have a visible square interface, splined types have ridges, and self-extracting cranks usually have a large bolt with a cap. If unsure, search your bike model online or visit a trusted resource like Park Tool.
Is It Normal For Crank Arms To Be Hard To Remove?
Yes, especially if they haven’t been removed for years or were installed without grease. Patience and proper tools usually solve the problem. Penetrating oil and gentle tapping help with stubborn arms.
Do I Need To Replace Both Crank Arms If Only One Is Damaged?
No, you can replace just one crank arm as long as the new arm matches the old one in length and fit. However, for best performance and balance, it’s often better to replace both as a set.
Removing a bike crank arm is a valuable skill for any cyclist. With the right tools and careful steps, you can save time and money—and enjoy a smoother, safer ride. Take your time, follow this guide, and soon you’ll handle crank arm removal like a pro.