Teaching a child how to ride a bike is one of those milestones that parents and guardians often remember for life. It’s a mix of excitement, fear, pride, and sometimes a few scraped knees. But with the right approach, patience, and preparation, you can turn this challenge into a fun and empowering experience for both you and your child.
Whether your child is eager or a bit nervous, understanding each step makes the process much smoother. Let’s explore exactly how to teach a kid how to ride a bike, from choosing the right gear to building skills and confidence.
Choosing The Right Bike
The first step is selecting a bike that fits your child’s size and skill level. Many parents make the mistake of buying a bike that the child will “grow into. ” This often backfires, as a too-large bike is harder to control and can shake your child’s confidence.
How To Check Bike Size
- Seat Height: With the child sitting on the saddle, both feet should touch the ground flat. This gives them a sense of control and safety.
- Handlebar Reach: Your child should be able to reach the handlebars comfortably without stretching.
- Weight: Lighter bikes are easier for kids to handle.
A properly sized bike makes the learning process much easier and safer. Here’s a quick comparison of bike sizes by age:
| Age | Wheel Size (inches) | Child Height (cm) |
|---|---|---|
| 3–5 | 12–14 | 90–110 |
| 4–6 | 16 | 105–120 |
| 5–8 | 18–20 | 115–135 |
| 7–10 | 24 | 125–145 |
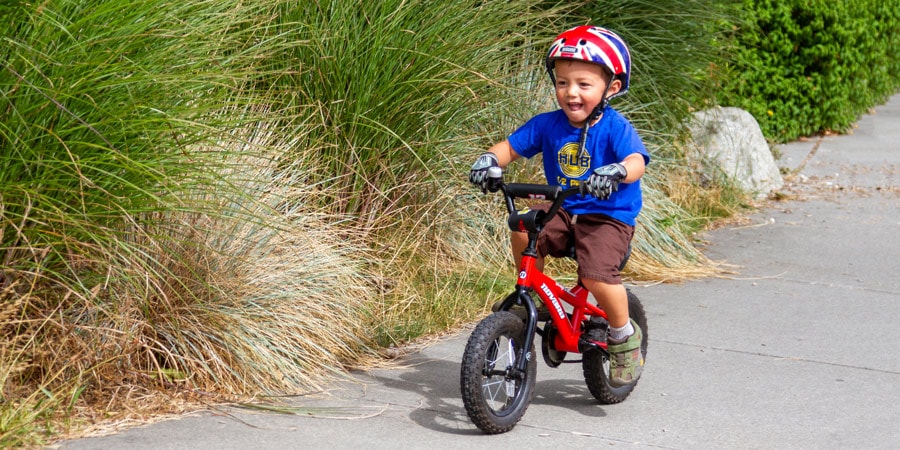
Essential Safety Gear
Safety is non-negotiable when teaching your child to ride a bike. Accidents can happen, especially during the learning phase. The right gear not only protects but also helps your child feel confident.
Key safety gear:
- Helmet: Must fit snugly, cover the forehead, and not move when your child shakes their head.
- Knee and elbow pads: Reduce the risk of scrapes and bruises.
- Closed-toe shoes: Provide grip and protect toes.
- Bright clothing: Increases visibility to others.
Before every ride, double-check that all gear is worn properly. For helmets, remember the “two-finger” rule: two fingers should fit between the chin strap and chin.
Preparing The Learning Environment
Not all locations are suitable for learning. A good environment can make the process faster and less stressful.
Best Surfaces For Learning
- Flat, smooth pavement: An empty parking lot or quiet park path works best.
- Wide-open space: More room means fewer obstacles and distractions.
- Avoid hills and traffic: Steep surfaces and cars create unnecessary risks.
Weather Considerations
Dry, mild weather is ideal. Wet surfaces are slippery, and extreme heat or cold can make practice uncomfortable.
Building Basic Skills Before Pedaling
Many parents rush straight to pedaling, but balance and steering are more important at first. Children who learn to balance before pedaling often ride independently faster.
Using A Balance Bike
Balance bikes have no pedals. Kids push off with their feet, learning to glide and steer. If you don’t have a balance bike, you can remove the pedals from a regular bike.
Benefits of starting with balance:
- Builds core stability
- Improves steering control
- Increases confidence
Practicing Braking
Show your child how to use the brakes gently. Practice stopping while walking the bike. Many kids forget to brake in the excitement of riding, so make this a habit early.

Credit: www.youtube.com
The Step-by-step Process
Here’s a reliable method to teach a child to ride:
- Start with walking the bike: Let your child walk beside the bike, pushing it and getting a feel for its weight and movement.
- Straddle and walk: Have them sit on the seat and walk the bike forward, feet on the ground.
- Gliding: Encourage your child to pick up their feet and glide for short stretches.
- Steering practice: Place small cones or markers and have your child practice turning while gliding.
- Reattach pedals (if removed): Once balance improves, put the pedals back on.
- Pedal start: Teach the “power pedal” position—one pedal up and ready to push down.
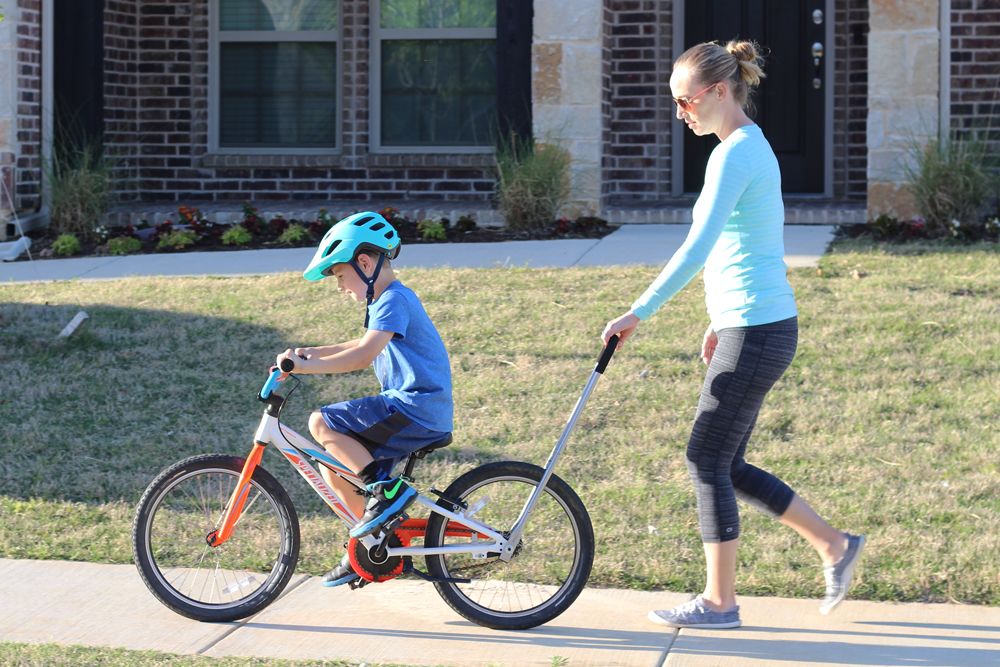
- Support, don’t hold: Stand behind your child, holding under the arms or lightly at the shoulders—not the seat. This way, your child learns to balance, not rely on your grip.
- Short rides: Encourage short, straight rides. Praise effort, not just success.
- Turning and stopping: Practice gentle turns and braking.
Common mistake: Many adults hold the back of the seat. This gives a false sense of balance and can make the child lean on you rather than learn to balance themselves.
Knowing When To Let Go
One of the hardest parts for parents is knowing when to stop supporting. Watch for these signs that your child is ready:
- They keep the bike upright for several seconds without help.
- They steer smoothly and look forward, not at their feet.
- They start to pedal on their own.
Let go gradually, and celebrate even short independent rides. Sometimes, a few tries are all it takes; other times, it may take several sessions.
Overcoming Fear And Building Confidence
Fear is natural for both children and adults during this process. Some kids worry about falling, while others are embarrassed if they don’t succeed right away.
Tips for building confidence:
- Use positive language. Say “You’re learning!” instead of “Don’t fall!”
- Share your own learning stories.
- Take breaks if your child feels frustrated.
Remember, each child learns at their own pace. Avoid comparing them to siblings or friends.
Progressing To New Skills
Once your child is comfortable riding straight, it’s time to practice new skills. These abilities make biking more fun and safer in the long run.
Turning And Circles
Set up cones or markers for your child to ride around. Gentle curves at first, then tighter circles as confidence improves.
Starting And Stopping
Practice starting from a complete stop and using the brakes to come to a gentle halt. Many accidents happen when kids don’t know how to stop safely.
Looking Ahead
Teach your child to look where they want to go, not down at the pedals. This improves balance and helps avoid obstacles.
Riding With Others
Once your child can ride independently, introduce short rides with family or friends in a safe area. Riding with others teaches awareness and sharing space.
Troubleshooting Common Challenges
Even with a good plan, you may run into a few bumps along the way. Here’s how to handle common problems:
Child Won’t Pedal
Some kids focus so much on balance they forget to pedal. Remind them to push down hard on the “power pedal” to get started. Sometimes, holding their hands on the handlebars for a moment helps them focus.
Wobbling And Falls
Wobbling is normal at first. Encourage your child to keep their speed up—a slow bike is harder to balance than a moving one. If they fall, stay calm and positive. Check for injuries and try again when they feel ready.
Fear Of Speed
If your child brakes constantly or refuses to glide, practice shorter glides and gradually increase distance. Use gentle slopes, not steep hills, to build trust.
Understanding The Learning Curve
Every child learns differently. Some may ride after an hour, while others need several days or weeks. Here’s what research says:
| Learning Method | Average Time to Ride Independently | Confidence Level |
|---|---|---|
| Training Wheels | 5–7 days | Medium |
| Balance Bike | 2–3 days | High |
| Pedal-Only Method | 7–10 days | Low to Medium |
Balance bikes help kids learn faster and with more confidence, according to studies.
When To Use Training Wheels
Training wheels are common, but they’re not always the best choice. They teach pedaling but delay the balance step. If you choose them, use them for a short period only, then switch to balance practice.
Tip: If your child already uses training wheels, try raising them slightly so the bike tips from side to side. This helps them get used to balancing.
Encouraging Independence And Responsibility
As your child becomes a confident rider, teach them the basics of bike maintenance and road safety.
Simple lessons:
- Check tire pressure and brakes before riding.
- Always wear a helmet.
- Obey basic traffic rules when riding in public.
Giving your child responsibility over their equipment helps build pride and independence.
Credit: www.rei.com
Celebrate Success
Don’t forget to celebrate progress! A first solo ride is a big achievement. Take photos, share the moment with friends or family, or plan a special treat.
Frequently Asked Questions
How Old Should A Child Be To Learn To Ride A Bike?
Most children are ready between ages 3 and 7, but it depends on their coordination and confidence. Some start earlier with balance bikes. The key is to wait until your child is eager and physically able.
Is It Better To Use A Balance Bike Or Training Wheels?
Balance bikes are widely recommended by experts because they teach balance first. Training wheels teach pedaling but can delay learning to balance. If you use training wheels, switch to a balance method as soon as possible.
How Can I Help A Child Who Is Scared Of Falling?
Start with very short, safe sessions. Use lots of encouragement and let your child progress at their own pace. Remind them that everyone falls sometimes, and focus on small wins.
What If My Child Doesn’t Want To Learn?
Don’t force it. Sometimes kids need more time or motivation. Try making the experience social—invite a friend who can already ride, or let your child watch older kids. Patience is key.
Where Can I Find More Tips About Teaching Kids To Ride Bikes?
For more expert advice, visit the Safe Kids Worldwide website for safety and teaching guides.
Teaching a child to ride a bike is a journey that requires patience, encouragement, and the right approach. Each child is unique, so celebrate every step, keep safety first, and enjoy the ride together. The skills and confidence your child gains will last a lifetime.
Credit: www.bioscott.lu