Riding a dirt bike is all about control, safety, and performance. While most riders focus on engines, tires, and suspension, many forget a less glamorous but vital part: the spokes. These thin metal rods connect your wheel rim to the hub, giving your wheels the strength to handle jumps, bumps, and rough landings. If your spokes are loose, you risk wheel wobble, rim damage, or even dangerous accidents. Knowing how to tighten dirt bike spokes properly is a skill every off-road rider should master. This guide walks you through everything you need to keep your wheels strong and true, whether you’re a weekend rider or a competitive racer.
Why Dirt Bike Spokes Matter
Dirt bike wheels face extreme forces. Every time you land from a jump, hit a rock, or corner hard, your wheels flex. Spokes transfer the load between the rim and the hub, keeping the wheel round and straight. When spokes are tight and balanced, your wheel stays “true”—it doesn’t wobble or hop. Loose or uneven spokes can quickly lead to bent rims, broken spokes, or even wheel collapse.
Most riders notice trouble when their wheel feels wobbly or makes a clicking sound. But by then, damage may already be done. Regularly checking and tightening spokes prevents big problems and keeps your ride safe.
Tools You Need For Tightening Dirt Bike Spokes
You don’t need a full workshop to maintain your spokes, but a few basic tools will make the job easier and more accurate:
- Spoke wrench – This fits the spoke nipples and lets you turn them without slipping. Each bike may need a different size, so check before you buy.
- Truing stand (optional) – Holds your wheel off the ground for easy spinning and checking. You can use the bike itself, but a truing stand is more precise.
- Marker or tape – Helps track your progress as you work around the wheel.
- Lubricant – Penetrating oil like WD-40 can help loosen stuck nipples.
- Dial indicator (optional) – For advanced users, this tool measures rim movement accurately.
Most riders can start with just a spoke wrench and some patience. But investing in a truing stand pays off if you service your wheels often.
Credit: dliras.us
Preparing Your Dirt Bike Wheel
Before you start tightening, get your wheel ready:
- Clean the wheel. Dirt hides cracks and worn parts. Use a brush and soapy water, then dry thoroughly.
- Check for damage. Look for bent rims, missing spokes, or cracked nipples. Replace damaged parts before tightening.
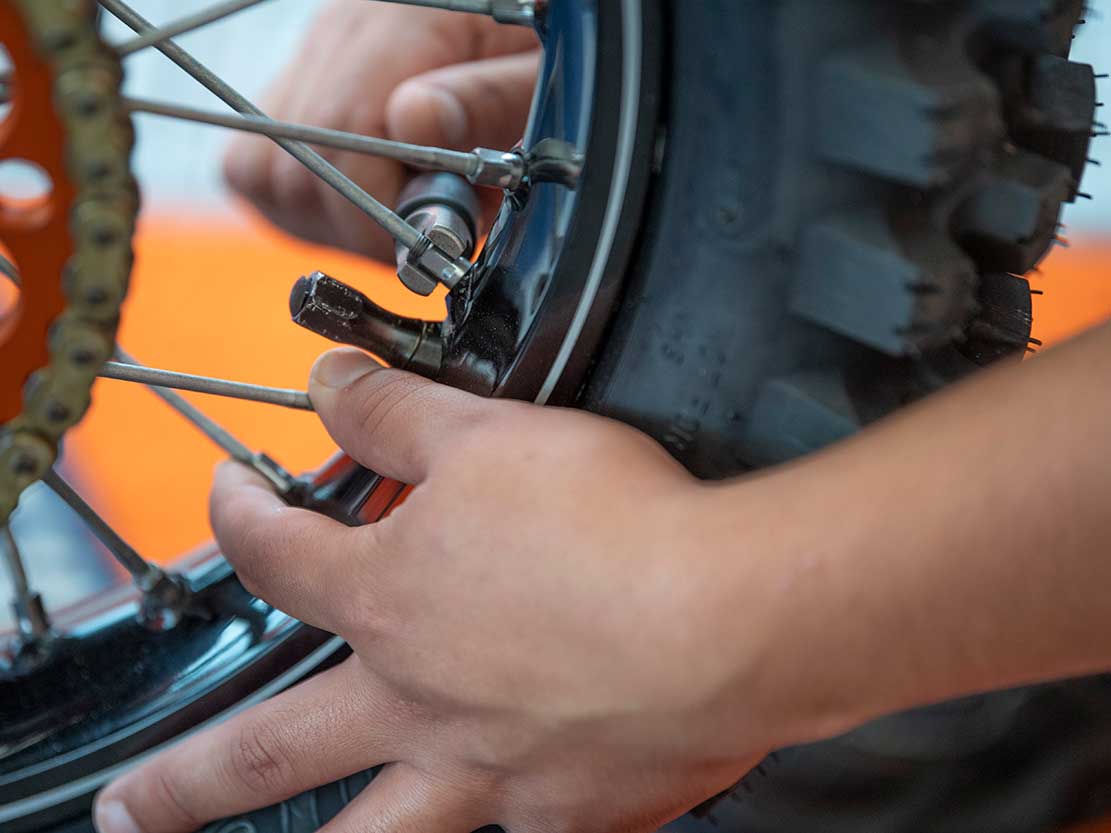
- Loosen stuck nipples. If you find corroded or seized nipples, spray them with lubricant and let them soak for a few minutes.
If you find any broken spokes, always replace them first. Tightening around broken spokes can make the wheel even weaker.
How To Check Spoke Tension
Many beginners simply grab and twist random spokes. But there’s a better way to check for even tension:
- Tap test. Take a small metal tool (like your spoke wrench) and gently tap each spoke. Tight spokes make a higher, clear “ping” sound; loose ones give a dull “thud.”
- Squeeze test. Pinch two spokes crossing each other between your fingers. Compare how much each pair moves. Loose ones will flex more.
- Spin test. If your wheel is off the ground (in a stand or on the bike with the wheel elevated), spin it slowly and watch the rim edge. Look for side-to-side wobbles or up-and-down hops.
A wheel with even tension will sound and feel consistent as you test each spoke.
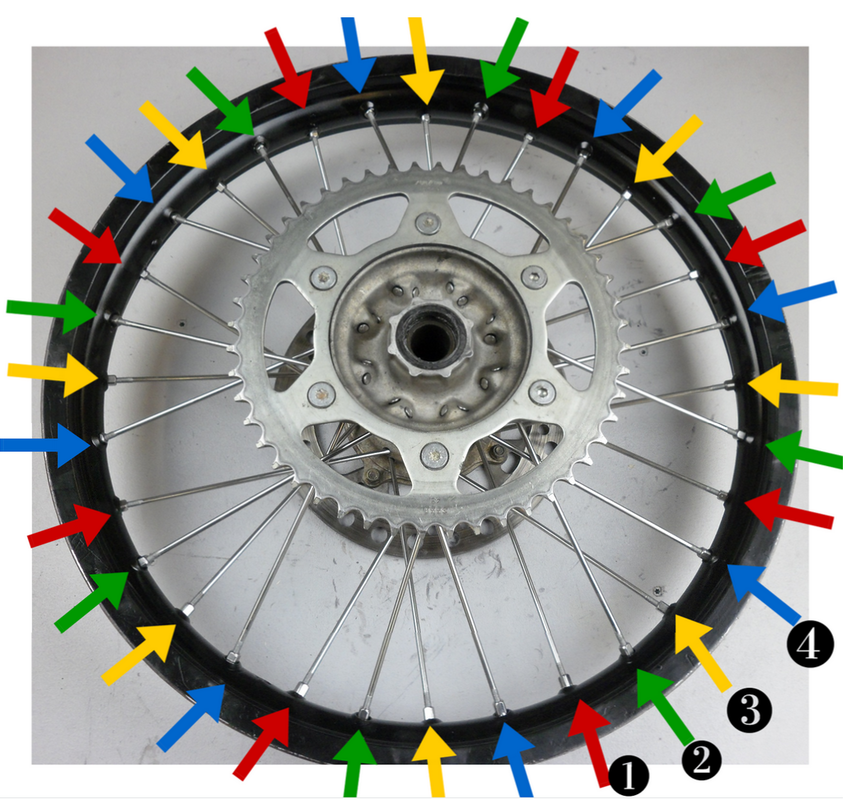
Step-by-step Guide To Tightening Dirt Bike Spokes
Tightening spokes is not just about making each one tight. The key is even tension and keeping the wheel true. Here’s how to do it right:
1. Mark Your Starting Point
Stick a piece of tape on the rim next to the valve stem. This tells you where you started and helps ensure you don’t miss any spokes.
2. Work In Small Increments
Only turn each spoke nipple about 1/4 turn at a time. Over-tightening is a common mistake and can warp the rim or snap the spoke.
3. Use The Correct Pattern
Tighten every fourth spoke as you move around the wheel. This spreads the tension evenly. After one lap, move to the next set (the next spoke after each you just did), then the next, until all spokes are checked.
4. Check Wheel Trueness
After each round, spin the wheel and watch the rim. If it wobbles to one side or hops up and down, adjust the tightness:
- To pull the rim toward you, tighten the spoke on your side.
- To push the rim away, loosen the spoke on your side, or tighten the opposite side.
5. Repeat The Process
Go around the wheel several times, tightening and truing until the wheel is straight and all spokes have similar tension.
6. Final Check
When finished, do the tap and squeeze test again. All spokes should sound and feel similar. Spin the wheel and check for any wobbles.
Example: Realigning A Warped Rim
Suppose you notice the rim pulls to the right at one spot. Find the spokes on the left side at that area. Tighten them slightly, and possibly loosen the right-side spokes a bit. Spin again and check. Repeat until the wobble disappears.
Common Mistakes When Tightening Dirt Bike Spokes
Tightening spokes seems simple, but some mistakes can cause big problems:
- Over-tightening. Too much force can snap spokes or crack the rim.
- Tightening only loose spokes. This makes tension uneven and can warp the wheel.
- Skipping spoke checks. Don’t just tighten the ones that feel loose—check the whole wheel.
- Ignoring spoke lubrication. Dry or rusty nipples can seize, making future adjustments impossible.
- Not rechecking after riding. Spokes can settle after the first ride. Always check again after a short ride.
Learning from these errors helps keep your wheels strong and straight for longer.
How Often Should You Check And Tighten Spokes?
There is no perfect schedule, but here are some guidelines:
- New wheels: Check after every ride for the first 5 rides. New spokes settle quickly.
- After hard riding: Check after every race or tough trail ride.
- Monthly: For regular use, check every few weeks.
- Whenever you hear noise: Clicking or creaking means a spoke is loose.
Frequent checks prevent small problems from becoming expensive repairs.
Signs Your Spokes Need Attention
Some signs are obvious, others are subtle. Watch for:
- Wobbling wheel: Side-to-side or up-and-down movement when spinning.
- Clicking or creaking: Sounds from the wheels while riding.
- Loose spokes: Easily turned by hand or flex more than others.
- Visible rim cracks: Too much flex can crack the rim near the spoke holes.
- Broken spokes: Even one broken spoke makes the wheel weaker.
Fixing these issues quickly keeps your dirt bike safe and reliable.

Credit: www.youtube.com
Table: Common Spoke Wrench Sizes For Popular Dirt Bikes
Knowing your spoke wrench size before starting avoids frustration. Here’s a quick comparison:
| Dirt Bike Brand | Typical Spoke Wrench Size (mm) |
|---|---|
| Honda CRF | 6.0 mm |
| Yamaha YZ | 6.3 mm |
| KTM SX | 6.8 mm |
| Kawasaki KX | 6.0 mm |
| Suzuki RMZ | 6.0 mm |
Always check your owner’s manual or measure before buying a wrench.
Table: Effects Of Spoke Tension On Wheel Performance
Proper tension isn’t just about safety. It affects how your bike feels and handles.
| Spoke Tension | Wheel Strength | Rim Life | Riding Comfort |
|---|---|---|---|
| Too Loose | Poor | Shortened | Rough |
| Correct | Strong | Longest | Smooth |
| Too Tight | Risk of breakage | Damaged | Harsh |
Balanced, correct tension gives you the best performance and longest wheel life.
Credit: www.dirtrider.com
Table: Spoke Tightening Frequency By Riding Style
How often should you check spokes? It depends on how and where you ride.
| Riding Style | Recommended Check Frequency |
|---|---|
| Motocross Racing | After every ride |
| Trail Riding | Every 2-3 rides |
| Casual/Street | Monthly |
| New Wheels (any use) | After each of first 5 rides |
More aggressive riding means more frequent spoke checks.
Non-obvious Tips For Beginners
Some insights even experienced riders sometimes miss:
- Don’t aim for maximum tightness. Spokes should be firm but not over-tight. Too much force weakens the wheel and makes future truing harder.
- Always check spoke tension at room temperature. Metal expands and contracts with temperature. If you check tension in a hot garage, it may loosen on a cold trail.
- Start with the rear wheel. It usually takes more abuse and loosens faster than the front.
- Keep a spoke wrench in your ride pack. Trails and tracks can loosen spokes quickly. A quick field adjustment can save your race or ride.
- Replace nipples with every second spoke change. Old nipples can crack and strip, making future maintenance difficult.
When To Seek Professional Help
Some wheels are so badly bent or damaged that home fixes aren’t enough. If you see large cracks, major rim bends, or can’t get the wheel true after several tries, visit a professional mechanic or wheel builder. They have special tools and experience to repair or rebuild wheels safely.
Frequently Asked Questions
How Tight Should Dirt Bike Spokes Be?
Spokes should be tight enough that they don’t move by hand and all have a similar feel. The rim should run straight with no wobble. There’s no universal torque value, but most manufacturers recommend 30-50 inch-pounds if you use a torque wrench.
The key is evenness, not just tightness.
Is It Okay To Ride With A Few Loose Spokes?
No, riding with loose spokes is risky. It can cause the rim to deform, break more spokes, or even lead to a crash. Always fix loose spokes before riding again. If in doubt, ask a professional.
What Causes Dirt Bike Spokes To Loosen?
Hard impacts, heavy landings, and regular use all cause spokes to loosen over time. New wheels loosen fastest as parts settle. Riding in mud or water can also speed up corrosion, causing spokes and nipples to seize or loosen.
Can I Tighten Spokes With Regular Pliers?
It’s not recommended. Pliers can round off or damage the spoke nipples, making future adjustments impossible. Always use a proper spoke wrench sized for your bike.
Where Can I Learn More About Dirt Bike Wheel Maintenance?
For more details on wheel building and maintenance, check resources like Wikipedia for in-depth explanations and technical details.
Maintaining your dirt bike spokes is not just a mechanic’s job—it’s part of smart riding. With regular checks, careful tightening, and a bit of patience, you’ll keep your wheels strong, safe, and ready for any trail or track ahead.