That rattling, clicking, or grinding sound coming from your drivetrain when you stop pedaling is one of the most common questions we get from riders. If you've ever wondered why does my bike chain make noise when coasting, you're not alone, and the answer might surprise you.
Here's the thing: when you coast, your chain isn't moving under power, so it's almost never the chain itself making that racket. The noise usually comes from the rear hub, specifically the freehub body that lets you glide without pedaling. Understanding that one fact saves you hours of frustration and a lot of wasted chain lube.
Per Shimano and SRAM service documentation, coasting noise typically falls into one of three categories: normal hub engagement buzz, contamination-related grinding, or a mechanical fault like a broken pawl spring. As of 2026, the diagnostic process hasn't changed much, but the tools and lubricants available are better than ever. Let's walk through exactly how to figure out what you're hearing and what to do about it.
Quick Answer
Your bike chain makes noise when coasting because the rear hub's freehub mechanism is clicking, grinding, or ticking. The chain itself is slack and not moving much during coasting, so the sound you hear is almost always from the hub internals.
The freehub contains pawls that engage a ratchet ring when you pedal. When you coast, those pawls skip over the teeth, creating that buzzing or clicking sound. Dirt, dried grease, or broken springs amplify or change that noise.
How Coasting Works: The Freehub and Freewheel Basics
Before you start pulling things apart, it helps to know what's actually spinning inside that rear hub. The modern freehub system is a clever piece of engineering that lets you stop pedaling while your wheels keep turning.
Inside your rear hub, you'll find a freehub body that the cassette slides onto. That freehub body contains small spring-loaded pawls. When you pedal, those pawls push outward and lock into a toothed ratchet ring, transferring power to the wheel.
When you coast, the pawls get pushed inward by the ratchet ring's ramps and just skip over the teeth.
That's where the noise comes from. The "buzz" you hear on high-end mountain bike hubs is actually the pawls clicking over each tooth as the wheel spins. Some riders love the sound, others hate it, but it's completely normal.
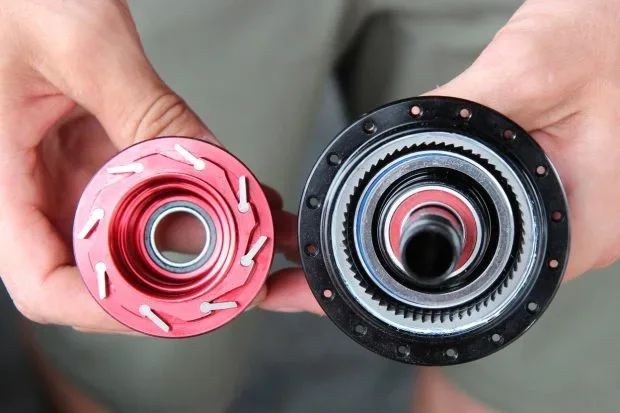
Image source: Bing (Web (fair-use with source credit))
Now, the problem arises when that mechanism gets disturbed. Grit, water, or degraded grease can change how the pawls behave, and that's when the noise shifts from "normal buzz" to "something's wrong." Also worth noting: dirtier hubs are thirstier for lube, which is why a proper drivetrain routine keeps things quiet.
Freewheel vs. Cassette Hub: What's the Difference?
If you have an older bike, you might have a thread-on freewheel instead of a cassette hub. A freewheel contains the ratcheting mechanism inside the cog cluster itself, and the whole thing threads onto the hub. Cassette hubs put the ratchet mechanism in the freehub body, which is separate from the cogs.
For diagnosis purposes, the noise sources are the same. The difference matters when you get to the repair stage, since freewheels usually just get replaced while freehub bodies can be serviced. If your bike has a freewheel and the hub is noisy, you'll likely swap the whole unit rather than rebuild it.
Step 1: Identify the Sound Before You Touch Anything
Okay, you've got a noise. Before you grab tools, you need to determine what kind of noise it is. The fix for a grind is totally different from the fix for a tick, so identifying the sound correctly saves you a ton of time and money.
What Kind of Noise Are You Hearing?
Here's a simple decision tree to narrow it down:
- Clicking or ticking: This is the most common sound. It's usually a single click per wheel revolution or a rhythmic tick that speeds up as you go faster. Often, this indicates a loose cassette lockring, a worn jockey wheel, or a dry pawl.
- Buzzing or rattling: A continuous buzz that gets faster with speed is typically normal hub engagement noise. If it's louder than it used to be, contamination is likely thickening the grease.
- Grinding: This is the serious one. A grinding sound suggests broken pawls, a damaged ratchet ring, or bearings that have failed. Stop riding and inspect the hub before you cause more damage.
- Creaking: A creak that syncs with your pedaling, not your coasting, points to the bottom bracket or crank area rather than the hub.
Does It Change With Speed?
Pay close attention to whether the noise changes when you speed up or slow down while coasting. A noise that increases in frequency with wheel speed points directly to something rotating with the wheel. A noise that stays constant regardless of speed might be wind noise or a frame vibration.
This one detail is the most useful diagnostic clue you'll get, so take a moment to actually listen before you start wrenching.
Step 2: The Chain Check (Rule Out the Easy Stuff)
The freehub is the usual suspect, but you shouldn't skip the free checks first. The chain might not be the source of the noise, but it can absolutely rub against something and create a clicking sound that mimics hub problems.
Jockey Wheels and Derailleur Cage
The upper and lower jockey wheels in your rear derailleur spin constantly, even when you coast, as long as the rear wheel is turning. If those little pulleys have worn bearings or are running dry, they can tick or buzz in a way that sounds like it's coming from the hub.
Check for side-to-side play in the jockey wheels by grabbing them and wiggling. If there's noticeable movement, the bushings are worn and should be replaced. A drop of light lube on the pulley bushings often quiets things down immediately.
Chain Rub and Slack
When you coast, your chain goes slack on the top run. That slack can cause the chain to slap against the bottom of the chainstay or rub against the derailleur cage if the limit screws are off. You'll hear this as a metallic clicking or slapping sound, not a continuous buzz.
Stand next to your bike, lift the rear wheel, and spin the crank backward by hand. Watch the chain path, especially near the derailleur. If you see contact or hear a rub, adjust the derailleur's B-tension screw or check the chain length, a long chain can droop enough to cause real noise and even chain drop.
A Quick Fix Worth Trying
If you're short on time, try this: clean and lube the chain thoroughly, then wipe off any excess. Sometimes the chain is just dry and noisy enough to be mistaken for a hub issue. If the sound persists after a proper lube, move on to the hub inspection.
And keep in mind, routine upkeep like this is covered in plenty of our other guides, such as proper chain maintenance.
Step 3: The Cassette and Lockring Test
If the chain checks out clean, the cassette and lockring are next. A loose cassette lockring is one of those sneaky culprits that sounds exactly like a chain problem when it's actually a hardware issue.
The Wobble Test
With the rear wheel still on the bike, grab the cassette and try to wiggle it side to side. There should be zero play. If you feel or hear a click when you rock it back and forth, the lockring has come loose.
A loose lockring allows the cassette cogs to move slightly against the freehub body's splines. That movement creates a clicking noise that only shows up when you're coasting, because that's when the load direction changes and the cogs shift position.
Tightening the Lockring
To fix this, you'll need a cassette lockring tool and a chain whip. The chain whip holds the cassette in place while you turn the lockring counterclockwise to loosen it. You don't need to remove the cassette entirely, just snug the lockring back down to its specified torque, usually 40 Nm for Shimano and 50 Nm for SRAM.
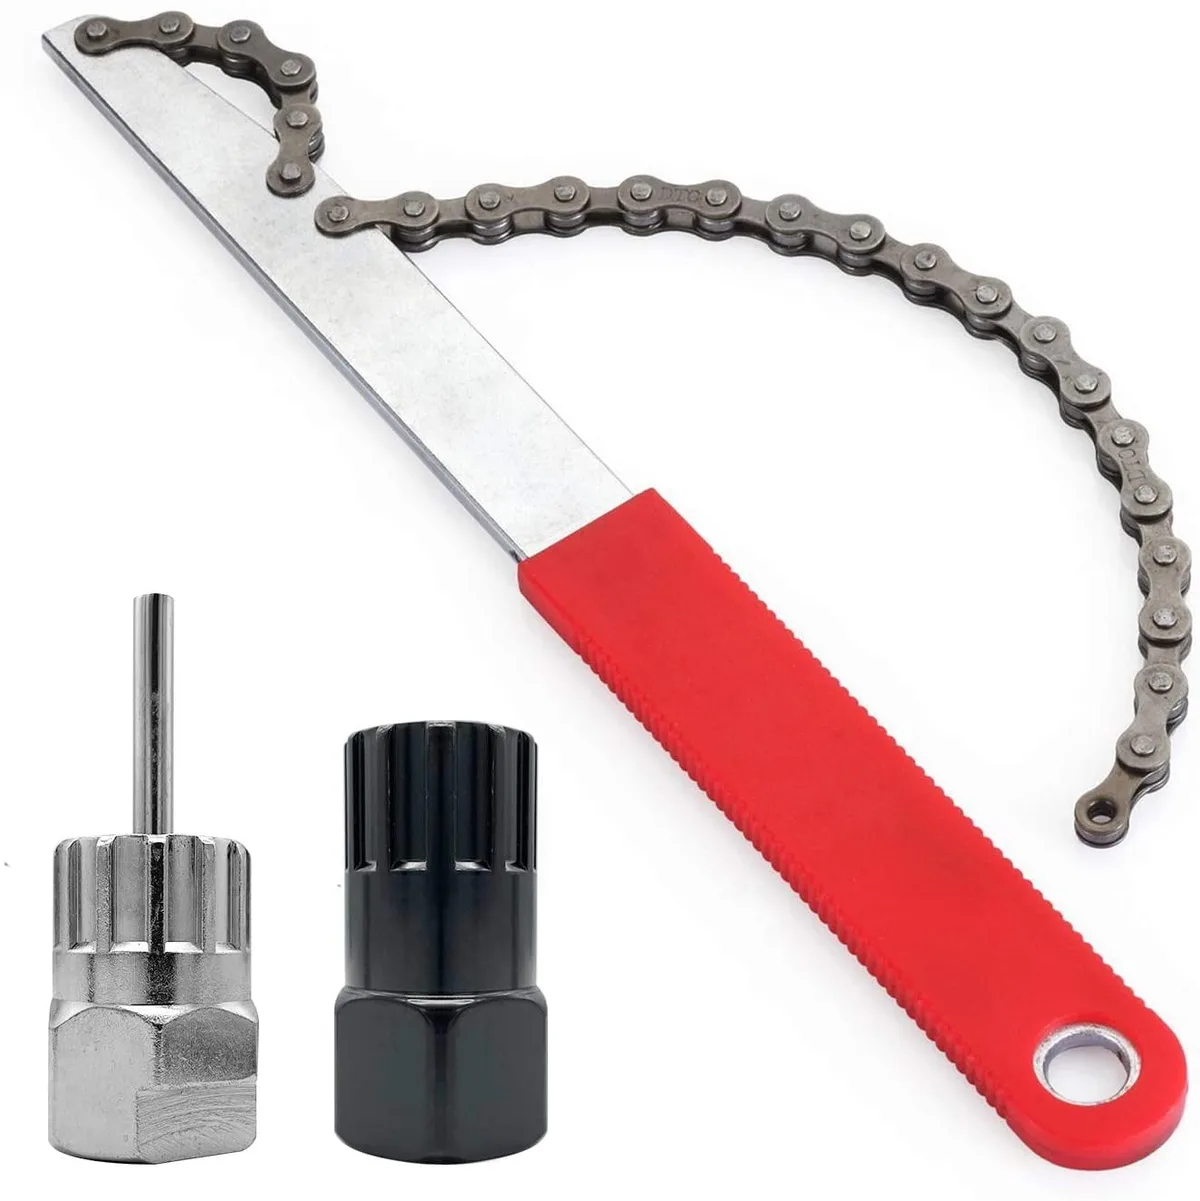
Image source: Bing (Web (fair-use with source credit))
If you don't have a torque wrench, tighten it firmly with a standard wrench, being careful not to strip the splines. Riding with a loose lockring can damage both the cassette and the freehub body's threads, so this is a fix worth doing immediately when you spot it. A proper pair of tools makes this job much easier, and our article on removing a bike crank arm outlines similar drive-side work.
Step 4: The Freehub Body Inspection
Alright, you've ruled out the chain, jockey wheels, and cassette lockring. The noise is still there, which means it's time to look at the freehub body itself. This is where most coasting noise actually originates.
Removing the Rear Wheel
First things first, remove the rear wheel from the bike. If you have a quick-release skewer, open the lever and unscrew the tension nut. For thru-axle bikes, loosen the hex bolt and slide the axle out.
Rest the bike on a stand or flip it upside down to work comfortably. If you're unsure about the axle type, our guide on removing the front wheel shows the same general principles for either system.
Removing the Cassette
With the wheel on a workbench, use the chain whip and lockring tool to remove the cassette. Hold the chain whip firmly on the largest cog to prevent rotation, then turn the lockring counterclockwise. Set the cogs aside in order, keeping the spacers sorted.
What you'll see now is the freehub body, a splined cylinder protruding from the hub shell. This is the part we need to inspect and service.
The Spin Test
Spin the freehub body by hand. It should rotate smoothly in one direction and lock firmly in the other. Listen for roughness, grinding, or excessive play.
If it feels gritty or catches, the internal grease has dried out or contamination has gotten in, lubricating it with fresh grease should sort that out. If it clicks or locks up in both directions, you likely have broken pawls, which means a rebuild or replacement is in order.
The Flush and Re-Lube Method
If the freehub feels gritty but the pawls seem fine, you can often revive it without a full disassembly. This method is quick and works wonders on hubs that just need a refresh.
- Step 1: Spray a degreaser or solvent into the gap between the freehub body and the hub shell.
- Step 2: Rotate the freehub body back and forth to work the solvent in.
- Step 3: Wipe away the dark, contaminated grease that seeps out.
- Step 4: Apply a light oil or specific freehub grease directly onto the pawl area while spinning the body.
Be careful with the lubricant you choose. A heavy grease can cause pawls to stick, while too light an oil will wash out quickly. Freehub-specific grease is a good choice, and many riders find that a simple application of fresh grease to the pawl area keeps things quiet for a full season of riding.
You want something that stays in place under spinning forces, but stays fluid enough for the pawls to move freely. Aggressive cleaning of this mechanism, however, can dry it out, which is a prime trigger for noise, so after cleaning, re-lubrication is essential.
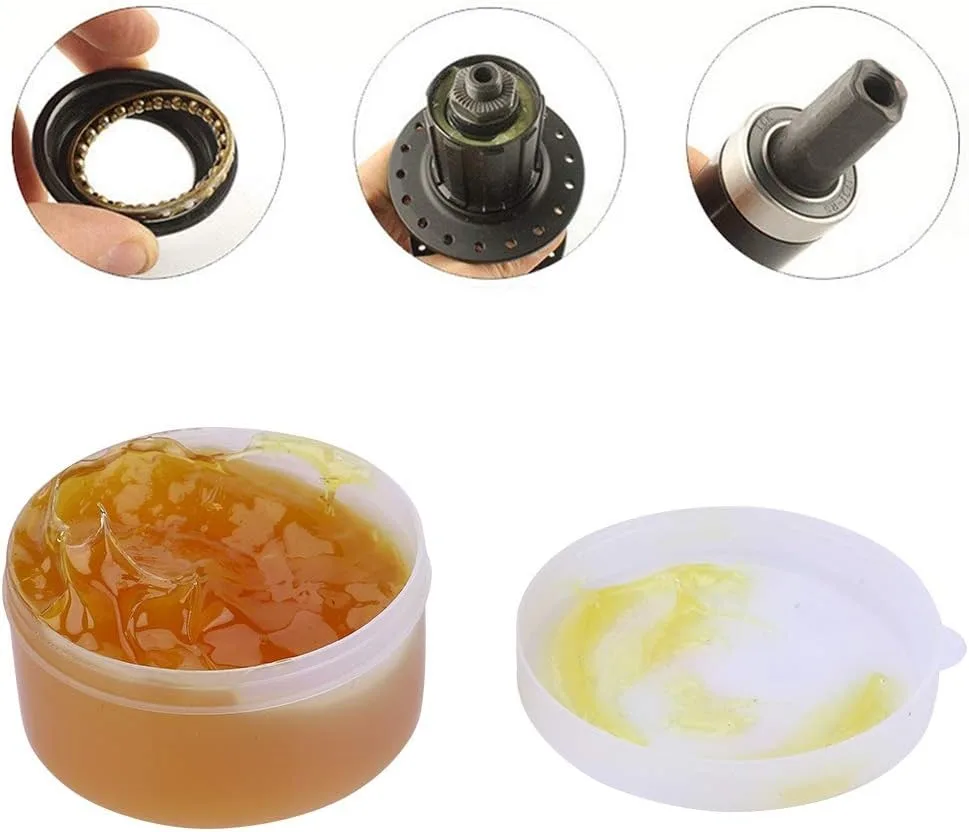
Image source: Bing (Web (fair-use with source credit))
If the flush doesn't quiet things down, the freehub body probably needs a full rebuild or replacement. That brings us to the next decision point.