When your chain skips under hard pedaling, it feels like the drivetrain just gives up. That sudden lurch is a classic warning sign, and how to fix bike chain slipping under load starts with reading the symptoms. You might be dealing with a worn cassette, a stretched chain, or a derailleur that's no longer aligned.
The good news is this is usually a fixable problem, not a reason to retire the bike.
In our research, chain elongation past 0.75% is the point where cassette damage often becomes permanent. Manufacturer specifications for Shimano and SRAM drivetrains say to check wear before that point. We'll walk through the diagnosis step by step, so you can stop the skipping without throwing money at parts you don't need.
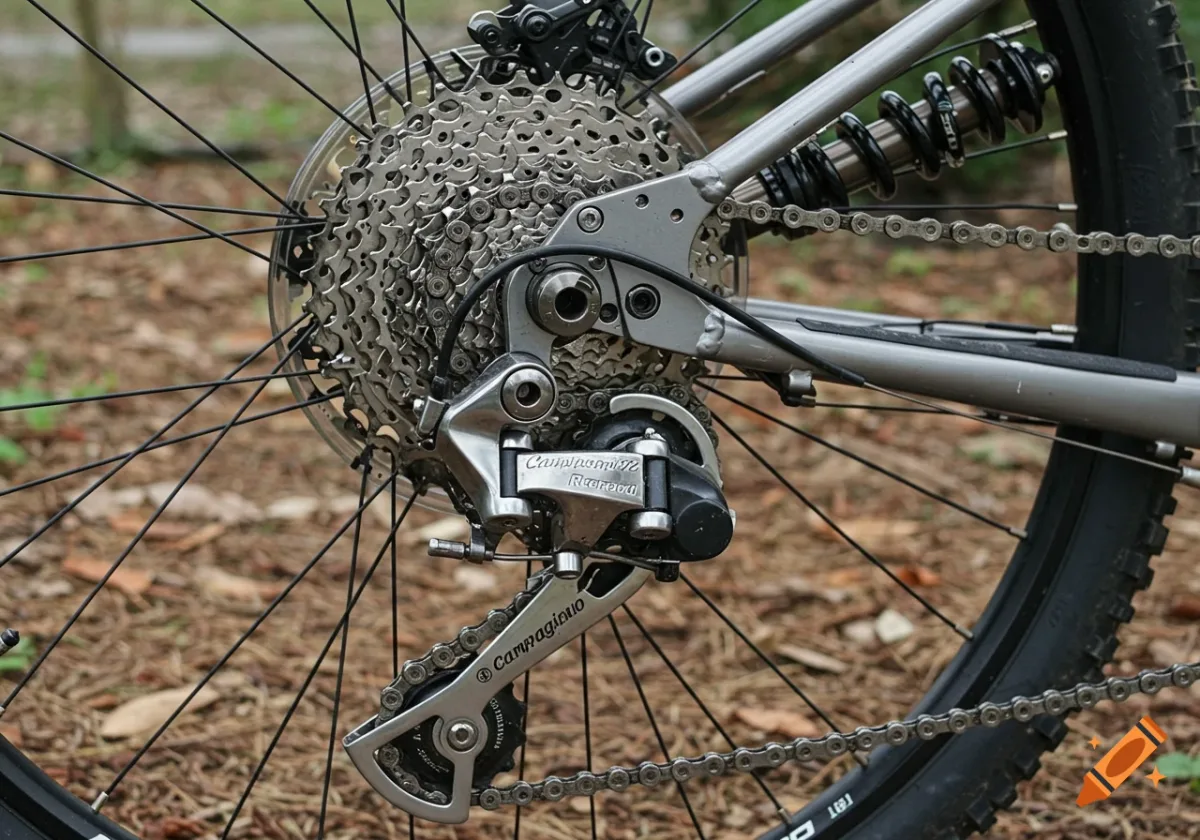
Image source: Bing (Web (fair-use with source credit))
Quick Answer
To fix bike chain slipping under load, first check chain wear. Use a chain checker tool. If it's stretched past 0.75%, replace the chain.
If a new chain still skips, the cassette is worn. A bent hanger or bad cable tension can also cause it. Clean and lube the chain before buying new parts.
The Problem: Why Your Pedals Suddenly “Give Out”
When the chain slips under load, it's not usually a lubrication issue. It's mechanical wear or misalignment. The chain rolls up over the teeth instead of staying seated.
That's why it usually happens when you're standing on the pedals or climbing a steep hill.
The slip feels different from a normal gear change. A shift is controlled and the chain settles quickly. A skip under load is sudden, loud, and often makes the pedals drop for a split second.
According to the Consumer Product Safety Commission, that sudden loss of pedal resistance can cause a rider to lose balance and crash. So this is a safety problem, not just a noise complaint.
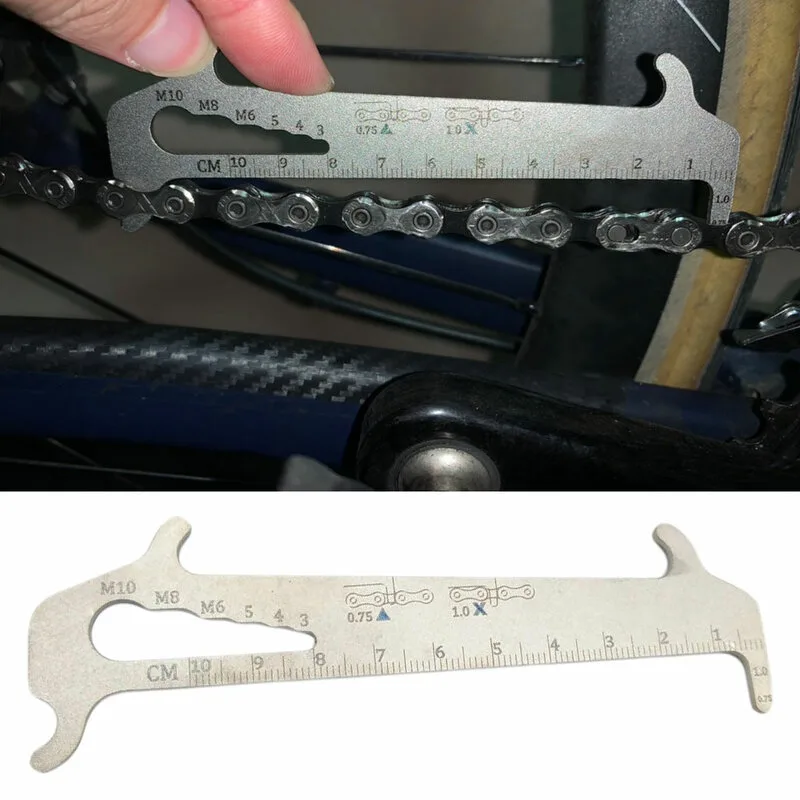
Image source: Bing (Web (fair-use with source credit))
You'll usually see the slipping in a few predictable patterns:
- Slipping only in one gear often points to a worn cassette sprocket.
- Slipping across multiple gears suggests a stretched chain.
- A sudden jump without shifting often means cable tension or hanger issues.
- A grinding slip that also feels like the pedals drop out could be a worn freehub.
As of 2026, most 11 and 12 speed drivetrains are more sensitive to chain wear than older 8 speed setups. The teeth and gaps are narrower, so they punish neglect faster.
How the Drivetrain Works (And Where Slipping Comes From)
A geared bike drivetrain works by meshing the chain's pins with cassette and chainring teeth. As the chain wears, its effective length grows because the pivot points loosen. That means the chain no longer sits perfectly in the valleys between cassette teeth.
Under hard pedaling force, it climbs the teeth and skips forward one notch.
A new chain has a precise half-inch pitch. Once it stretches even 0.5%, the gap between rollers no longer matches the cassette. At 0.75% to 1%, the mismatch is usually enough to cause skipping under load.
The chain doesn't actually stretch like a rubber band. The pins and inner plates wear down. That wear increases the distance between each roller set, and that is what people call chain stretch.
Manufacturer guidance from Park Tool confirms that replacing a chain before it reaches 0.75% elongation is the single best way to protect the cassette and chainrings. Once the chain has worn too far, it files the cassette teeth into a hook shape. Then even a brand new chain won't hold properly on those damaged teeth.
Diagnose It Yourself: A Decision Tree
Before you buy any parts, go through this sequence. It separates chain wear from cassette wear from derailleur adjustment. You'll save money and avoid replacing the wrong thing.
Step 1: Does it slip in every gear or just one?
- If it slips in all gears under hard load, suspect chain stretch first.
- If it slips in just one or two cogs, the cassette or chainring is the likely culprit.
Step 2: Did you recently install a new chain?
- Yes, and it skips now means the old cassette is worn. You'll probably need a new cassette too.
- No, and it's been a while means the chain may be stretched.
Step 3: Does it only happen when you stand and sprint, not when spinning lightly?
- That points to wear or torque-related freehub issues. It's not just cable tension.
Step 4: Check the derailleur hanger.
- A bent hanger can mimic chain slip perfectly. Even a small bend shifts the chain off the cog.
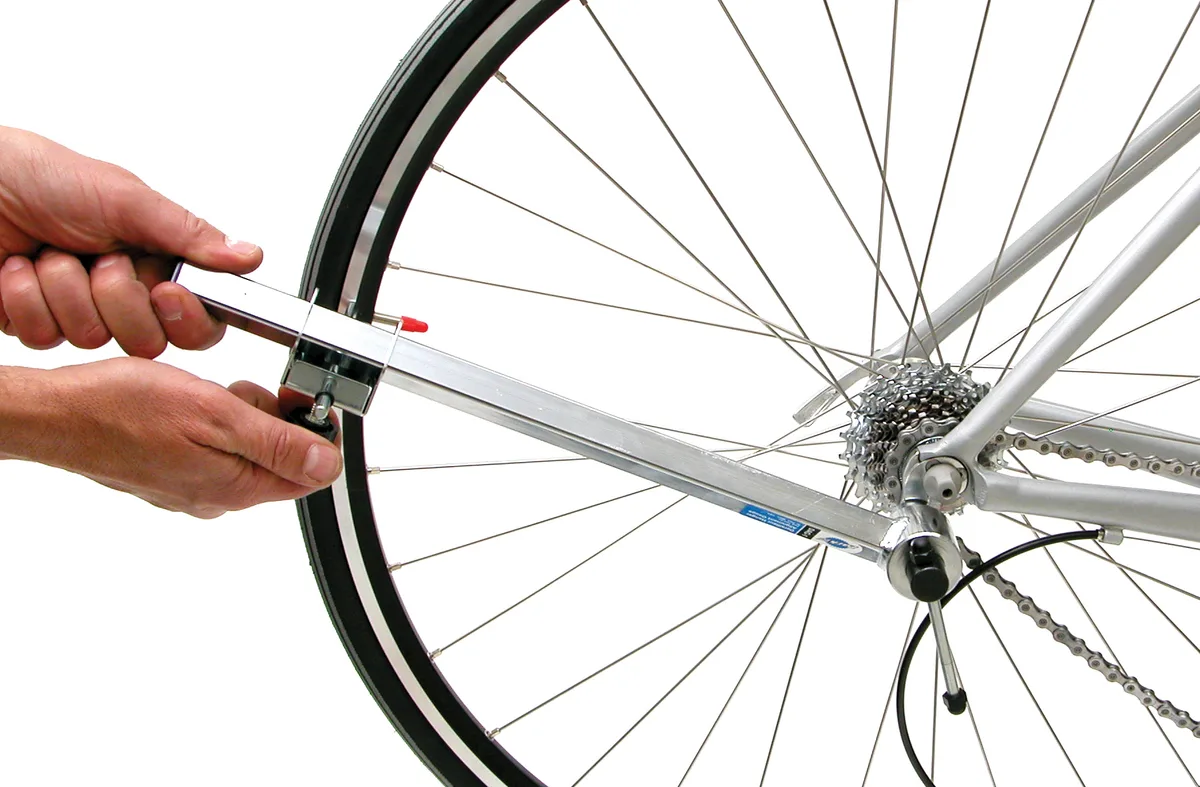
Image source: Bing (Web (fair-use with source credit))
Step 5: Measure the chain.
- Use a chain checker. If the tool drops into the 0.5% slot, plan to replace soon. At the 0.75% slot, replace now.
Step 6: Look closely at the cassette teeth.
- Hooked teeth, sharp points, or a shark-fin shape means the cassette is done. If you need to inspect the rear cogs up close, removing a bike wheel is the same basic process regardless of which end you are working on.
Here's a quick reference table for what you find:
| Symptom | Likely cause | Quick test |
|---|---|---|
| Only one gear slips | Worn cassette cog | Inspect for shark-fin teeth |
| Every gear slips under load | Stretched chain | Use chain checker at 0.75% |
| Random skip, noisy | Bent hanger or bad cable | Check hanger alignment |
| Skips right after new chain | Cassette worn out | Compare old vs new cassette teeth |
Common Causes and Their Fixes
Once you know which part is responsible, the fix gets simple. Here are the most common causes and what to do about each.
Chain Stretch
Chain stretch is the most common cause of slipping under load. The fix is easy. Replace the chain before it damages anything else.
Measure it with a chain checker or a ruler. A ruler across 12 full links should show exactly 12 inches. At 12 1/8 inches, the chain is worn out.
A worn chain stretches the cassette teeth as it runs. The longer you ride on a stretched chain, the more expensive the repair becomes. On an e-bike, check chain wear twice as often.
The extra motor torque accelerates wear significantly.
Worn Cassette Teeth
If you put a new chain on a bike and it still skips under load, the cassette is the problem. The new chain can't hold onto worn cogs. Look at the teeth.
If they look like little shark fins instead of even triangles, the cassette is finished.
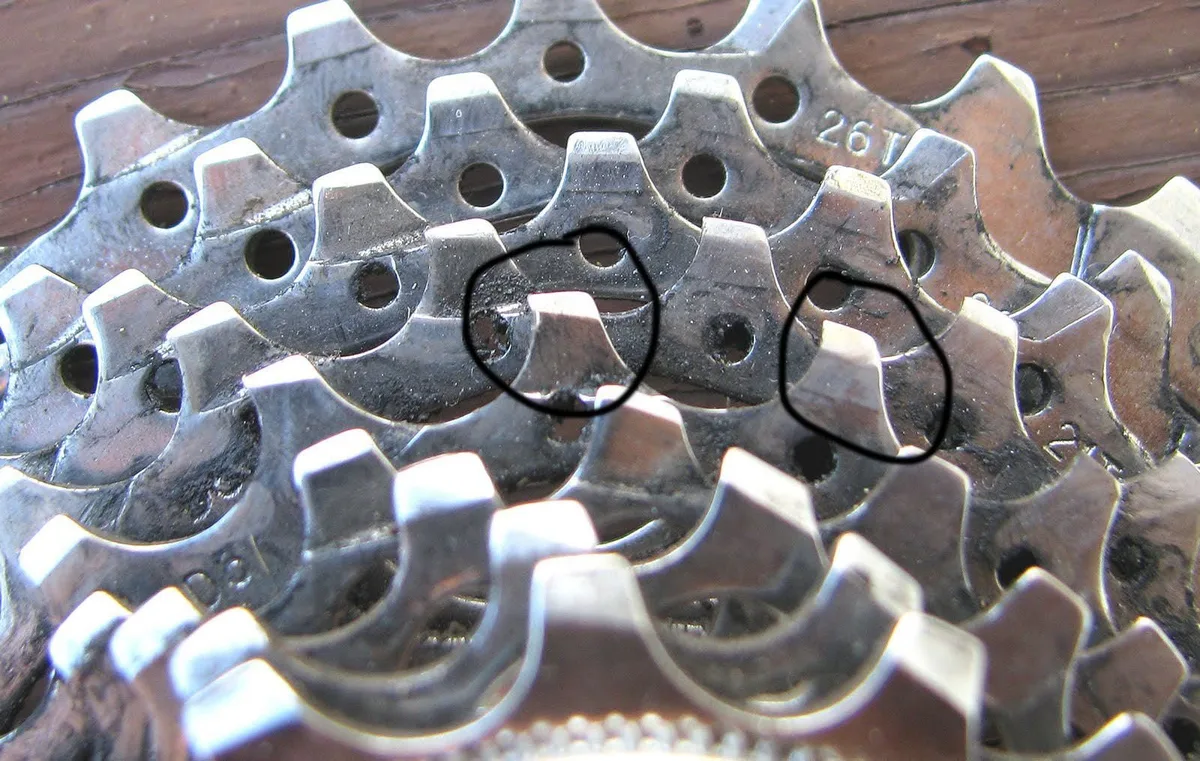
Image source: Bing (Web (fair-use with source credit))
The fix is to replace the cassette. You'll need a cassette lockring tool, a chain whip, and a torque wrench. The lockring should be tightened to roughly 40 Nm.
If you're unsure about pulling the wheel and removing cogs, start with the basics of wheel removal before you dig in.
Worn Chainring Teeth
Chainrings wear slower than cassettes, but they do wear. If the chain slips only in the front, especially on the smallest or most-used chainring, check those teeth. Hooked chainring teeth can also cause chain suck, where the chain sticks to the ring and gets pulled up into the frame.
Replacing a chainring usually means pulling the crank arm. That's a job you can do with the right tools, but it's more involved than a cassette swap. If the chainring has narrow-wide teeth and they look rounded off, it's time for a new ring.
Derailleur and Cable Issues
Sometimes the chain isn't slipping at all. The derailleur is shifting it between gears under load. This is called ghost shifting.
The fix is usually cable tension or hanger alignment.
First, turn the barrel adjuster a quarter turn clockwise to add tension. Test ride. If the problem gets worse, turn it counterclockwise.
Small changes make a big difference. If that doesn't fix it, look at the hanger. A bent hanger can be straightened with a hanger alignment gauge.
Most home mechanics don't have this tool, so a shop visit is reasonable.
B-tension adjustment also matters. If the upper pulley sits too close to the cassette, the chain can't wrap enough teeth. Most modern derailleurs need about a 5mm gap between the upper pulley and the largest cog when in the biggest gear.
Set that before you chase cable tension.
Freehub and Stiff Link Problems
Two less common causes can still fool you. A worn freehub will slip under hard pedaling even with a new chain and cassette. The pawls inside the hub body skip over the ratchet ring.
You'll feel it as a sharp crack and a pedal drop. The test is simple. Hold the rear wheel and pedal hard by hand.
If the cassette moves without the wheel moving, the freehub is worn.
A stiff chain link can cause a similar periodic slip. If one link doesn't bend freely, it pops as it passes through the derailleur pulleys under load. Flex the chain sideways to find the stiff link.
Work it gently with a chain breaker tool or replace the chain if it's near the end of its life anyway.
Keep the drivetrain clean after any repair. Degreaser on brake pads can ruin stopping power, so keep them protected. And before any test ride, check tire pressure first.
A soft tire can mask or exaggerate shifting issues and lead you to misdiagnose the drivetrain.