Changing bike handlebars can transform your cycling experience. Whether you want a more comfortable ride, improved control, or simply a new look for your bicycle, the process is easier than many expect. Still, it demands careful attention to detail. Mistakes can lead to discomfort, poor handling, or even unsafe riding.
This guide will help you change bike handlebars confidently, with clear explanations and practical steps for both beginners and experienced riders.
Why Change Bike Handlebars?
Many cyclists change handlebars for specific reasons. Some want to improve their riding position, others are searching for better performance or aesthetics. The type of handlebar affects your comfort, control, and style. For example:
- Drop bars suit road bikes, giving aerodynamic posture.
- Flat bars are common on mountain bikes, offering stability and easy handling.
- Riser bars add height, often used for relaxed riding.
If your hands or wrists hurt, your bike feels awkward, or you want to try new riding styles, changing handlebars can help. Studies show that handlebar changes can reduce upper body fatigue by up to 20% in long-distance rides.
Tools And Materials Needed
Before starting, you need the right tools and parts. Missing tools can delay your work or cause frustration. Here’s what you’ll need:
- Allen keys (usually 4mm–6mm sizes)
- Screwdrivers (for certain grips or accessories)
- Torque wrench (helps avoid over-tightening bolts)
- Handlebar grips (if you’re changing to flat or riser bars)
- Bar tape (for drop bars)
- New handlebars (choose the correct diameter and width)
- Stem (sometimes you need a new stem if the handlebar diameter changes)
- Grease (prevents corrosion and makes assembly easier)
- Rags (for cleaning parts)
- Replacement cables (if necessary)
Some bikes may need extra parts, like shims or spacers. It’s wise to check your bike’s specifications before buying handlebars.
Choosing The Right Handlebar
Handlebars come in many shapes and sizes. Selecting the best one depends on your bike type and riding goals. Here are the main handlebar types and their features:
| Type | Best For | Comfort | Control |
|---|---|---|---|
| Drop Bar | Road, Touring | Medium | High |
| Flat Bar | Mountain, Hybrid | High | Medium |
| Riser Bar | Urban, Comfort | Very High | Medium |
| Bullhorn | Track, Urban | Medium | High |
Always measure your current handlebar’s diameter at the stem. Most modern bikes use 31.8mm, but some use 25.4mm or 26mm. Width affects handling: wider bars give more control but can be tiring, while narrow bars are good for speed but less stable.
Removing The Old Handlebars
Proper removal is the first step. Rushing can damage parts or create unsafe conditions. Follow these steps:
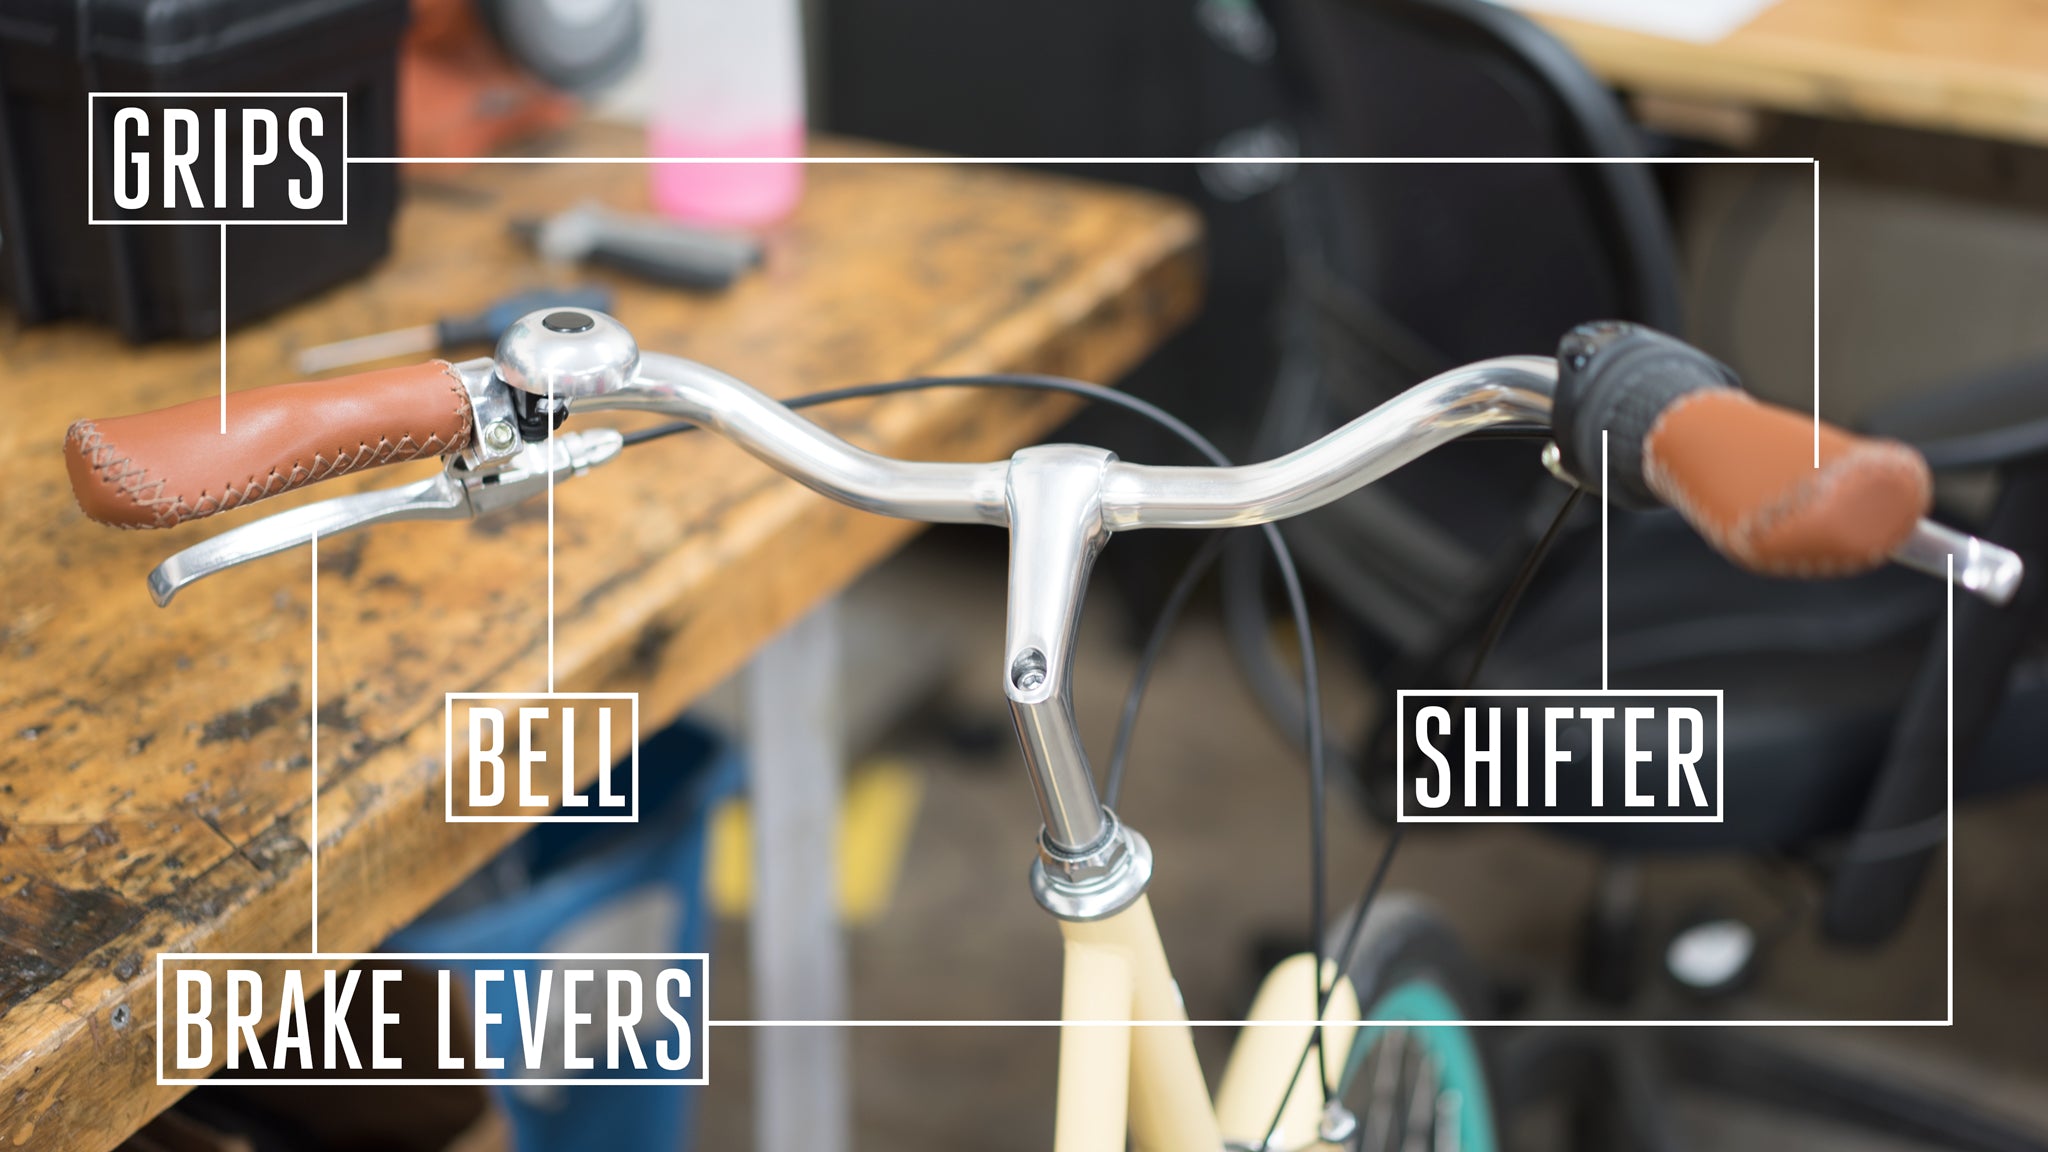
- Remove accessories: Take off any lights, bells, computers, or mirrors.
- Take off grips or bar tape: For flat bars, slide grips off using rubbing alcohol or compressed air. For drop bars, unwind the tape completely.
- Disconnect brake and shifter cables: If your controls are attached to the handlebar, loosen the bolts and gently slide them off. Sometimes, you must disconnect cables if the new handlebars require different routing.
- Loosen stem bolts: Use an appropriate Allen key. Loosen the bolts that clamp the handlebar to the stem.
- Remove handlebars: Carefully pull the old handlebars out of the stem.
A common mistake is forgetting to support the controls during removal. Letting them hang can pull or damage cables.

Credit: funnmtb.com
Installing The New Handlebars
Now it’s time to fit the new handlebars. Accuracy matters for safety and comfort.
- Clean stem and handlebar: Wipe down the stem clamp and the new handlebar with a rag.
- Apply grease: Lightly grease the contact area where the handlebar meets the stem. This prevents corrosion.
- Insert handlebars: Slide the new handlebar into the stem clamp. Center it carefully.
- Tighten stem bolts: Use the torque wrench. Check your bike’s manual for the correct torque—usually 5–8Nm. Over-tightening can crack the handlebar or stem, especially with carbon parts.
- Reattach controls: Slide brake levers and shifters onto the new bar, aligning them for easy reach. Tighten bolts gently.
- Reinstall grips or bar tape: For flat bars, slide grips back on. For drop bars, wrap bar tape tightly, finishing with electrical tape or bar-end plugs.
- Reconnect cables: If you disconnected cables, reconnect and adjust them. Make sure brakes and shifters work smoothly.
- Check alignment: Look from above and in front of the bike. The handlebars should be perpendicular to the front wheel.
Many beginners forget to check for cable tension. Too tight or too loose cables can cause shifting or braking problems.
Adjusting Handlebar Position
A good handlebar position prevents strain and improves control. After installing, you should adjust:
- Height: Raise or lower using spacers below the stem (if your bike allows). Too low causes back pain; too high affects handling.
- Angle: Tilt the handlebars for your wrist comfort. Flat bars should be nearly horizontal; drop bars slightly angled.
- Reach: The distance from saddle to handlebar matters. If your reach feels too long or short, consider a different stem length.
Here’s a quick comparison of reach and height impacts:
| Position | Effect | Common for |
|---|---|---|
| High, Close | Comfort, Upright | City, Commuter |
| Low, Far | Aerodynamic, Fast | Road, Racing |
| Medium | Balanced | Hybrid, Touring |
Fine-tune your position by riding a short distance and adjusting as needed. Small changes make a big difference in comfort.

Credit: www.youtube.com
Safety Checks After Changing Handlebars
Safety is crucial. After changing handlebars, inspect your bike carefully:
- Check for tightness: All bolts should be snug but not over-tightened.
- Inspect cables: Make sure cables are not pinched, too tight, or rubbing.
- Test brakes and shifting: Squeeze brakes and shift gears, watching for smooth operation.
- Look for cracks: Examine the handlebar and stem for signs of stress or cracks, especially if you used force during installation.
- Ride test: Take a short ride. Listen for unusual noises, check steering, and verify comfort.
If you notice any issues, stop and recheck your work. It’s better to spend extra time than risk unsafe riding.
Common Mistakes And How To Avoid Them
Even experienced cyclists make mistakes. Here are some errors to watch out for:
- Wrong diameter: Installing a handlebar that doesn’t fit your stem causes loose parts or damage.
- Skipping torque checks: Over-tightening can break parts, while under-tightening leads to slipping.
- Poor cable routing: Twisted or stretched cables cause shifting and braking problems.
- Misalignment: Handlebars not centered or angled correctly create handling issues.
- Ignoring comfort: Not adjusting for your body can lead to pain or numbness.
Avoid these by double-checking each step. If unsure, ask a bike shop for help.
Upgrading Handlebar Accessories
Changing handlebars is a good time to update accessories. You can add:
- Ergonomic grips: Reduce hand fatigue.
- Bar ends: Improve climbing leverage.
- Mirror mounts: Increase safety in traffic.
- New lights or computers: Some handlebar shapes suit certain accessories better.
Choose accessories that fit your riding style. For example, commuters may want mirrors, while mountain bikers prefer bar ends.
Real-life Example: A Commuter’s Handlebar Change
Let’s look at a real-life case. Maria, a daily commuter, swapped her flat bar for a riser bar. Her bike had a 31. 8mm stem, and she chose a 620mm riser bar for more comfort. She also switched to ergonomic grips.
After the change, Maria noticed:
- Better posture: She sat more upright, reducing back pain.
- Easier steering: Wider bars improved control in city traffic.
- Improved comfort: New grips reduced numbness.
The process took one hour. She followed safety checks and adjusted the angle twice after short rides. Maria’s experience shows how handlebar changes can solve practical problems.
Cost And Time Estimates
Changing handlebars is affordable. Here are average prices:
| Part | Average Cost (USD) | Time Required |
|---|---|---|
| Handlebars | $20–$80 | 30–60 min |
| Stem | $15–$50 | 10–20 min |
| Grips/Bar Tape | $10–$30 | 10–15 min |
| Labor (Bike Shop) | $30–$60 | 45–75 min |
DIY is cheaper, but shops offer professional installation and advice. Most riders can finish the job in under two hours if prepared.
Practical Tips For Smooth Handlebar Changes
- Measure twice: Confirm diameter and width before buying.
- Organize tools: Lay out everything before starting.
- Work in a clean area: Avoid losing small bolts or parts.
- Take photos: Snap pictures before removing parts for reference.
- Ride and adjust: Don’t settle for discomfort; fine-tune as needed.
One non-obvious tip: If you have hydraulic brakes, avoid tilting the bike for long periods. Air bubbles can enter the system, causing braking issues.
Another advanced tip: For carbon handlebars, always use a torque wrench. Carbon can crack easily if over-tightened.
Changing bike handlebars is a valuable skill. With careful preparation and attention to detail, you can customize your ride for maximum comfort and performance.
Credit: www.purecycles.com
Frequently Asked Questions
What Handlebar Diameter Do I Need?
Most modern bikes use 31.8mm diameter handlebars. Older bikes may use 25.4mm or 26mm. Always measure the area where the handlebar meets the stem before buying.
Can I Change Handlebars Myself, Or Should I Go To A Bike Shop?
You can change handlebars at home if you have basic tools and follow instructions. If your bike has complex cables or hydraulic brakes, or if you are unsure, a bike shop can help. Professional installation reduces risk.
Do I Need To Replace The Stem When Changing Handlebars?
Sometimes, yes. If your new handlebar has a different diameter than your current stem, you must replace the stem or use a shim. Always check compatibility.
How Do I Choose The Right Handlebar Width?
Handlebar width affects comfort and control. For road bikes, common widths are 38–44cm. Mountain bikes often use 680–760mm. Choose width based on your shoulder size and riding style.
Is It Safe To Use Second-hand Handlebars?
Second-hand handlebars are safe if they are free from cracks, dents, or signs of stress. Always inspect used parts carefully. For carbon bars, avoid buying used unless you trust the seller.
Changing bike handlebars is not just a technical task—it’s a chance to improve your ride. With the right knowledge, tools, and careful steps, you can customize your bike for better comfort, performance, and safety. If you want to read more about handlebar types and cycling ergonomics, visit Wikipedia for detailed information.