Changing mountain bike pedals might sound simple, but many riders struggle with stuck threads, the wrong tools, or confusing pedal types. If you’re new to bike maintenance, the process can seem intimidating. Yet, swapping pedals is a valuable skill for every mountain biker—whether you want to upgrade to clipless, switch to flat pedals for better grip, or just replace worn-out parts.
Doing this job yourself saves money, gives you more control over your setup, and helps you learn more about your bike.
This guide explains the whole process from start to finish, with practical tips and clear instructions. You’ll find out which tools you need, how to avoid common mistakes, and how to make sure your new pedals are secure and safe.
We’ll also discuss pedal types, thread directions, and what to do if something goes wrong. By the end, you’ll feel confident changing your mountain bike pedals at home.
Understanding Mountain Bike Pedals
Mountain bike pedals come in two main types: flat pedals and clipless pedals. Flat pedals are wide platforms that work with any shoe. Clipless pedals (confusingly, you “clip in” with special shoes) lock your feet to the pedal for better power and control. Some bikes use hybrid pedals, with a flat side and a clipless side.
Different pedals use slightly different methods to attach to your bike’s crank arms, but most thread in and out with a wrench. The right pedal is standard-thread (tightens clockwise), while the left pedal is reverse-thread (tightens counterclockwise). This stops the pedals from loosening as you ride.
Knowing your pedal type is important because the shape and size affect how you ride and what tools you’ll need. For example, some clipless pedals require a hex wrench from the inside of the crank arm, while most flat pedals use a pedal wrench on the outside.
Tools And Preparation
Having the right tools makes pedal changes easy and prevents damage. Here’s what you’ll need:
- Pedal wrench (usually 15mm) or an 8mm hex key (Allen wrench), depending on your pedals
- Grease for threads
- Rag or towel to clean parts
- Bike stand (optional, but helpful)
A pedal wrench is thinner than a standard spanner, so it fits between the pedal and crank arm. Most modern pedals use either a 15mm wrench flat or an 8mm hex socket. Check your pedals to see which tool fits.
Before you start, shift your chain to the smallest chainring and the smallest rear cog. This lowers the chain and gives you better access to the pedals without cutting your hands. Make sure your bike is stable—lean it against a wall or use a bike stand.

Credit: el-greco.ru
Removing Old Pedals
Taking off old pedals can be tricky, especially if they’ve been on for a long time. Follow these steps:
1. Identify Left And Right Pedals
The right pedal is on the chain side, the left is on the other side. Most pedals are marked with “L” or “R” on the spindle.
2. Position The Cranks
Turn the crank arm so the pedal you’re removing is facing forward and parallel to the ground. This gives you the most leverage.
3. Insert The Tool
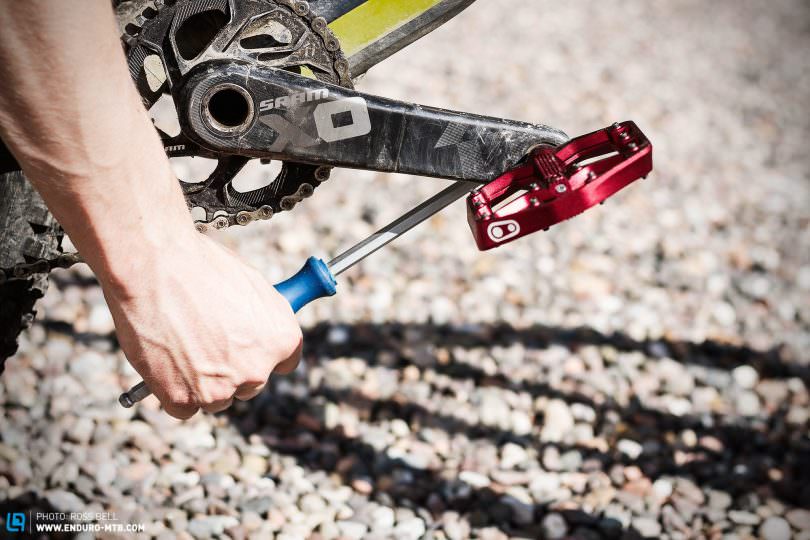
Put the pedal wrench or hex key on the spindle. For a pedal wrench, fit it to the flat part between pedal and crank arm. For a hex key, insert it into the end of the spindle, inside the crank arm.
- Loosen the Pedal
- Right Pedal (drive side): Turn counterclockwise to loosen.
- Left Pedal (non-drive side): Turn clockwise to loosen.
This is the opposite of what many people expect. If the pedal is stuck, spray a little lubricant and let it soak for a few minutes.
5. Remove By Hand
Once loose, spin the pedal out by hand. If it’s gritty or dirty, wipe the threads clean.
Common Mistakes When Removing Pedals
- Using the wrong tool size can round off the flats or hex socket.
- Turning the wrong direction is very common. Always double-check which side you’re working on.
- Applying force at a bad angle may strip the thread or damage the crank arm.
If your pedal is really stuck, longer wrenches give more leverage. Sometimes, a sharp tap on the wrench with your hand or a mallet can break it free. Don’t use too much force, as this can damage aluminum crank arms.
Cleaning And Inspecting Threads
When the old pedals are off, it’s smart to clean the threads on both the crank arms and the pedals (if you plan to reuse them). Use a rag to wipe away old grease, dirt, or grit. Check the threads for damage—look for cross-threading (where the threads look mashed or angled) or missing pieces.
If the threads are damaged but not destroyed, sometimes running a clean pedal in and out a few times will clear minor burrs. For serious damage, a bike shop can use a thread tap to fix it, but if the threads are completely stripped, you may need a new crank arm.
A small amount of grease on the threads is essential. This prevents rust and makes future removal much easier. Some riders use anti-seize compound, especially if they ride in wet or muddy conditions.

Credit: allurelakestorey.com
Installing New Pedals
Now you’re ready to fit your new pedals. Here’s how to do it right:
1. Check Left And Right
Pedals are not interchangeable. Make sure you match the right pedal to the right crank, and the left to the left. The markings “L” and “R” are usually on the end of the spindle or the wrench flats.
2. Apply Grease
Coat the pedal threads with a thin layer of bike grease. This stops them seizing up and makes removal easier next time.
3. Start By Hand
Thread the pedal into the crank arm by hand. Do not use a wrench at first. If you feel resistance or the pedal won’t go in straight, stop and back it out. Cross-threading can ruin your crank arm.
4. Tighten With Tool
Once the pedal is threaded all the way by hand, use your wrench or hex key to snug it up. Tighten firmly, but do not over-tighten. Most pedals need about 35–40 Nm of torque (a firm hand-tight fit).
5. Double-check
Give the pedals a spin. They should turn smoothly with no wobble. If they creak or feel loose, check the tightness again.
Pedal Installation Table
Here’s a quick reference for thread direction and tool type:
| Pedal Side | Thread Direction | Common Tool |
|---|---|---|
| Right (Drive Side) | Clockwise to tighten | 15mm wrench or 8mm hex |
| Left (Non-Drive Side) | Counterclockwise to tighten | 15mm wrench or 8mm hex |
Choosing The Right Pedals
Before you install new pedals, make sure they fit your riding style and bike.
Flat Pedals
- Good for beginners, technical trails, or riders who want to put a foot down quickly.
- Wide platform gives better grip and control with casual shoes.
- Heavier than clipless, but more comfortable for short rides.
Clipless Pedals
- Best for long rides, racing, or aggressive climbing.
- Lock your foot to the pedal for more power, but require special shoes.
- Take practice to get used to clipping in and out.
Hybrid Pedals
- Offer a flat side and a clipless side.
- Great for riders who want flexibility.
Pedal Material Comparison
Pedal material affects weight, strength, and price. Here’s a simple comparison:
| Material | Weight | Durability | Cost |
|---|---|---|---|
| Plastic/Composite | Light | Medium | Low |
| Aluminum | Medium | High | Medium |
| Steel | Heavy | Very High | High |
| Titanium | Very Light | High | Very High |
Most riders choose aluminum for a mix of strength and weight. Plastic pedals are fine for casual use. Titanium pedals are used by racers who want the lightest setup.
Credit: enduro-mtb.com
Safety Checks After Installation
After changing your pedals, do a few safety checks before riding:
- Stand next to the bike and push down on each pedal. There should be no movement or creaking.
- Ride slowly in a safe area and test the pedals. Make sure they spin freely and feel stable.
- For clipless pedals, practice clipping in and out until it feels natural.
Check pedal tightness again after your first ride. Sometimes new pedals settle into the crank arm and need a small retightening.
Troubleshooting Common Problems
Even when you follow all the steps, sometimes things go wrong. Here’s how to handle common issues:
Pedal Won’t Thread In
- Double-check you have the correct pedal for each side.
- Make sure you’re threading by hand before using a tool.
- Clean the crank threads to remove dirt or metal shavings.
Pedal Feels Loose
- Tighten with your wrench until snug.
- If it still moves, the threads may be worn out.
Pedal Stuck In Crank Arm
- Use penetrating oil and let it soak for 15–30 minutes.
- Try a longer wrench for more leverage.
- If it still won’t move, visit a bike shop before damaging the crank arm.
Noisy Pedals
- Remove and re-grease the threads.
- Check for dirt or grit between pedal and crank.
Pedal Squeaks Or Creaks
- Clean both crank and pedal surfaces.
- Grease threads and reinstall.
If you can’t solve the problem, don’t force it. Damaged crank arms or pedal threads are expensive to fix, so it’s better to get help early.
Maintenance Tips
Changing pedals is also a chance to check other bike parts. Here are a few tips:
- Inspect crank arms for cracks or wear.
- Check your chainring bolts for tightness.
- Clean around the bottom bracket area, as dirt collects here.
- Store your pedal wrench and hex keys in your bike kit for quick fixes.
If you ride in wet, muddy, or salty conditions, remove and re-grease your pedals every few months. This prevents rust and makes future changes easier.
Real-world Example
Consider a rider switching from flat pedals to clipless for the first time. They remove their old flats, clean the crank threads, and install the new clipless pedals by hand. On their first ride, they find clipping in is harder than expected.
Practicing in a safe area helps them get used to the system. After a week, they retighten the pedals and have a smooth, powerful ride.
This example shows the importance of patience, the right tools, and learning by doing.
Frequently Asked Questions
What Size Wrench Do I Need To Change Mountain Bike Pedals?
Most mountain bike pedals use a 15mm pedal wrench or an 8mm hex key. Check your pedals for a flat surface (for a wrench) or a hex socket (for a hex key). Some older pedals use 9/16-inch, but this is rare on modern bikes.
Can I Use Regular Grease On Pedal Threads?
Yes, regular bike grease is fine for pedal threads. It prevents rust and makes removal easier. Some riders use anti-seize compound for extra protection, especially in wet climates.
Why Are My Pedals So Hard To Remove?
Pedals can seize due to lack of grease, corrosion, or being overtightened. Use penetrating oil and the correct wrench. Remember, the left pedal loosens clockwise and the right pedal loosens counterclockwise. If they’re still stuck, see a mechanic.
How Tight Should I Install New Pedals?
Pedals should be firmly tight, but not overtightened. Most manufacturers recommend 35–40 Nm of torque. Hand-tight with a proper wrench is usually enough. Check them after your first ride to make sure they haven’t loosened.
Where Can I Learn More About Bike Maintenance?
Many resources exist, including local bike shops, YouTube tutorials, and guides from major brands. For detailed technical advice, the Wikipedia: Bicycle Maintenance page is a good starting point.
Changing mountain bike pedals is a simple job with the right tools and knowledge. It’s a great way to customize your bike and improve your riding experience. With practice, you’ll be able to swap pedals quickly and confidently, keeping your bike in top condition for every trail ahead.