Changing pedals on a mountain bike might sound simple, but it’s a task where small mistakes can cause big problems. Stripped threads, stuck pedals, and even injuries happen when people rush or don’t understand the details. Whether you’re upgrading to lighter pedals, switching between clipless and flat styles, or simply replacing worn-out parts, learning how to change pedals the right way can save you money and frustration.
This guide takes you through every step, explains the tools you’ll need, highlights common beginner mistakes, and shares some pro tips that most manuals miss.
Why Change Your Mountain Bike Pedals?
Pedals are one of the most important contact points between you and your bike. Over time, they can wear out, get damaged, or simply not suit your riding style anymore. Some riders switch pedals for better grip, lighter weight, or to try a different riding technique. For example, moving from flat pedals to clipless pedals can improve efficiency on long rides. Worn pedals can also affect your safety—loose or slippery pedals increase the risk of crashes.
Another reason to change pedals is maintenance. If you hear creaking noises, feel play in the pedal, or struggle with engagement, a pedal swap might be the easiest fix. Remember, pedals are relatively inexpensive compared to other bike parts, but they play a huge role in your comfort and performance.
Tools And Materials You’ll Need
You don’t need a workshop full of tools, but using the right ones makes the job much easier and safer.
- Pedal wrench (usually 15mm, thin profile)
- Hex/Allen wrench (often 6mm or 8mm)
- Grease (bike-specific or waterproof)
- Shop rag (for cleaning threads)
- Gloves (optional, for better grip and clean hands)
- Replacement pedals
Some modern pedals require a hex wrench, while older or cheaper models use a pedal wrench. Always check your new pedals before starting.

Credit: www.youtube.com
Understanding Pedal Threads: Left Vs. Right
Here’s an easy-to-miss detail: pedal threads are not the same on both sides. The right (drive side) pedal has a standard thread (tightens clockwise), but the left (non-drive side) pedal has a reverse (left-hand) thread (tightens counter-clockwise). This design prevents pedals from loosening as you ride.
Many beginners damage their crank arms by forcing the pedal the wrong way. Before you start, check the markings on the pedal spindles: look for “L” for left and “R” for right. If you can’t find the markings, remember: both pedals loosen toward the back of the bike and tighten toward the front.
Step-by-step Guide To Removing Old Pedals
Follow these steps for a smooth and safe pedal removal:
- Position your bike: Set your bike upright, either on the ground or in a work stand. If you don’t have a stand, lean the bike against a wall for stability.
- Find the correct wrench: Check the pedal axle for a flat spot or hex socket. Use a pedal wrench or hex key accordingly.
- Set the crank arm position: For the right pedal, position the crank arm at 3 o’clock (forward and parallel to the ground). For the left pedal, position at 9 o’clock.
- Loosen the pedal: Place your wrench on the pedal axle. For the right pedal, turn counterclockwise to loosen. For the left pedal, turn clockwise.
- Apply force carefully: Pedals can be tight, especially if they haven’t been removed for a long time. Use your body weight if needed, but don’t jerk the wrench suddenly.
- Remove by hand: Once loose, unscrew the pedal by hand. Keep the washers (if any) for reuse.
- Clean the threads: Wipe the crank arm threads with a shop rag to remove old grease or dirt.
Table: Pedal Removal Direction
| Pedal Side | Loosening Direction | Tightening Direction |
|---|---|---|
| Right (Drive Side) | Counterclockwise | Clockwise |
| Left (Non-Drive Side) | Clockwise | Counterclockwise |
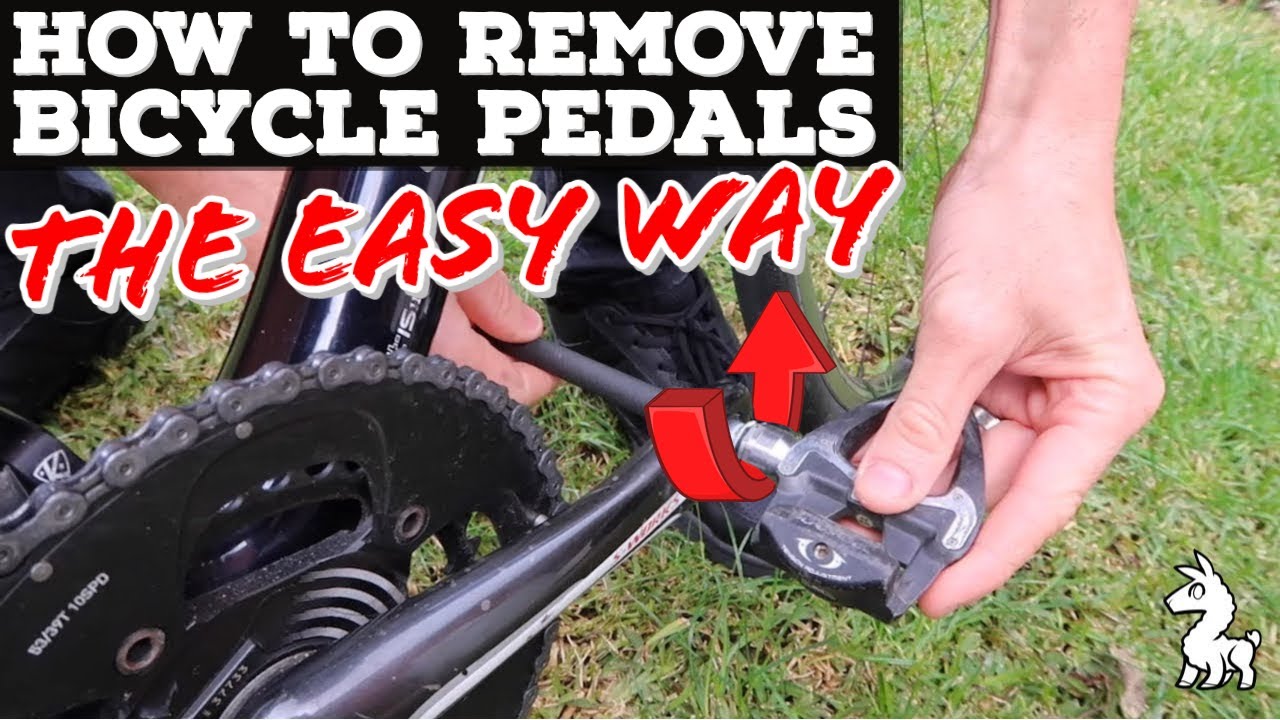
Credit: www.youtube.com
Preparing And Installing New Pedals
Before you fit the new pedals, preparation is key for smooth installation and future removal.
- Check pedal markings: Identify the left and right pedals. Most have a small “L” or “R” etched on the spindle or end cap.
- Apply grease: Coat the pedal threads with a thin layer of bike grease. This prevents them from seizing in the crank arm and helps avoid creaks.
- Start threading by hand: Insert the right pedal into the right crank arm, turning clockwise. For the left pedal, turn counterclockwise. Thread each pedal in by hand for the first few turns.
- Tighten with wrench: Once the pedal is hand-tight, use the pedal or hex wrench to finish tightening. Firm is enough—you don’t need to overtighten. Most pedals require about 35–40 Nm (newton meters) of torque.
- Reinstall washers: If your old pedals had washers, use them with the new pedals unless the manufacturer says not to.
- Double-check fit: Spin the crank arms to make sure the pedals turn smoothly and are fully seated.
Table: Common Pedal Wrench Sizes
| Pedal Type | Wrench Type | Common Size |
|---|---|---|
| Flat Pedal | Pedal Wrench | 15mm |
| Clipless Pedal (Shimano, Look) | Hex/Allen Wrench | 6mm or 8mm |
| Old or Kids Bike Pedal | Pedal Wrench | 15mm or 9/16″ |
Common Mistakes To Avoid
Even experienced riders make errors when swapping pedals. Here are the most frequent problems and how to avoid them:
- Cross-threading: Forcing pedals at an angle can ruin your crank arms. Always start threading by hand and check alignment.
- Mixing sides: Never install a left pedal on the right side (or vice versa). This strips the threads and can be costly to fix.
- No grease: Dry threads can seize, making future removal almost impossible.
- Overtightening: Using too much force can damage the crank arm or pedal threads.
- Wrong tools: Adjustable wrenches or pliers can slip and round off the flats, making removal harder next time.
When To Replace Pedals Instead Of Repairing
Sometimes, cleaning or minor repairs aren’t enough. Consider full replacement if you notice:
- Worn out grip pins: On flat pedals, lost or damaged pins reduce traction.
- Loose spindle: Excessive side-to-side movement means internal wear.
- Stuck bearings: If pedals feel crunchy or don’t spin smoothly, internal parts may be failing.
- Damaged bodies: Cracks or deep gouges affect pedal strength and safety.
New pedals aren’t just about function—they can also reduce weight, improve efficiency, and boost your riding confidence.
Tips For Easier Pedal Changes In The Future
- Reapply grease every time you change pedals.
- Check pedal tightness every few rides.
- Store your pedal wrench in your regular bike kit.
- If you switch between flat and clipless pedals often, consider quick-change pedal systems (like the ones from Speedplay or Look).
Choosing The Right Replacement Pedals
Not all pedals are created equal. Here’s what matters when selecting new ones:
- Riding style: Flat pedals suit technical, downhill, or learning riders. Clipless pedals offer efficiency for long rides or racing.
- Shoe compatibility: Make sure your shoes match the pedal system (e.g., SPD, Crankbrothers).
- Weight: Lighter pedals make climbing easier but may be less durable.
- Grip: More pins or aggressive shapes provide better traction for flat pedals.
- Budget: High-quality pedals last longer and feel better, but you don’t need to spend a fortune.
Table: Flat Vs. Clipless Pedals Comparison
| Feature | Flat Pedals | Clipless Pedals |
|---|---|---|
| Foot Retention | No | Yes |
| Learning Curve | Easy | Moderate |
| Grip | High (with pins) | Very high (shoe locks in) |
| Disengagement | Instant | Twist to release |
| Maintenance | Low | Moderate |
| Best For | Trail, downhill, beginners | XC, long rides, racing |
Non-obvious Insights And Pro Tips
- Pedal washers help: Some crank arms, especially carbon or lightweight alloy, require pedal washers. These small metal rings distribute force and protect the crank. Check your bike’s manual—using or skipping washers at the wrong time can void warranties.
- Thread direction memory trick: A quick way to remember pedal threading is: “Both pedals tighten towards the front wheel and loosen towards the back.”
- Worn threads can be fixed: If you find crank threads are slightly damaged, a bike shop can use a thread chaser tool to repair them before installing new pedals. Don’t force a damaged thread.
- Travel with spare pedals: If you travel for biking, bring spare pedals and a wrench—rental or demo bikes often come with basic pedals.
- Torque wrenches prevent damage: For carbon cranks, use a torque wrench to avoid overtightening, which can crack the material.
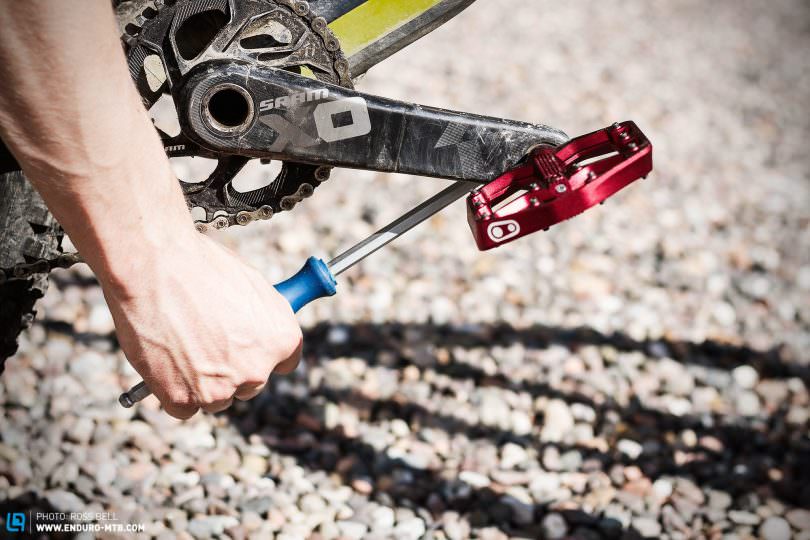
Credit: enduro-mtb.com
Safety Checks After Changing Pedals
After installing new pedals, do these quick checks before your next ride:
- Spin the cranks and pedals by hand to confirm smooth rotation.
- Check for any side-to-side play or looseness.
- Ride slowly and test engagement/disengagement if using clipless pedals.
- Listen for creaks or grinding—if you hear anything unusual, re-check tightness.
Frequently Asked Questions
How Often Should I Change My Mountain Bike Pedals?
Change your pedals when they show signs of wear, such as loose axles, damaged pins, or rough spinning. Most casual riders replace pedals every 1–3 years, but aggressive riders may need to do so more often.
Can I Use Any Pedals On My Mountain Bike?
You can use most standard pedals, but always check thread size (usually 9/16″ for adult bikes) and compatibility with your crank arms and shoes.
What If My Pedal Is Stuck And Won’t Come Off?
Apply penetrating oil and let it sit for 10–15 minutes. Use a longer wrench for more leverage. If it still won’t move, visit a bike shop before you damage the crank arm.
Is It Possible To Install Pedals Without A Pedal Wrench?
Yes, many modern pedals use a hex/Allen wrench inserted from the crank’s back side. A pedal wrench is needed only if your pedals have flat sections on the spindle.
Where Can I Learn More About Pedal Types And Maintenance?
For more detailed information on pedal systems, types, and care, visit the Wikipedia page on bicycle pedals.
Changing pedals on a mountain bike is a valuable skill that every rider should learn. Doing it right means fewer mechanical issues, better riding comfort, and more confidence on the trail. With these clear steps, practical tips, and expert insights, you’re now ready to swap pedals like a pro—saving time, money, and hassle on every ride.