Changing the stem on your bike can transform your ride. Whether you want a more comfortable position, better handling, or simply need to replace a worn part, swapping the stem is a straightforward task with the right guidance. Many cyclists hesitate because they fear making mistakes, but with proper steps and a bit of patience, anyone can do it.
This guide explains every detail, from tool selection to fine-tuning, so you can tackle the job with confidence and avoid common errors.
Understanding The Bike Stem
The stem is a small but crucial component that connects your handlebars to the steerer tube of your fork. It affects your reach, bike handling, and overall comfort. A shorter stem gives more responsive steering, while a longer one offers more stability. The angle and rise of the stem also influence how upright or stretched you feel while riding.
Modern bikes mainly use two stem types:
- Threadless stem: Most common on recent bikes, clamps onto the outside of the steerer tube.
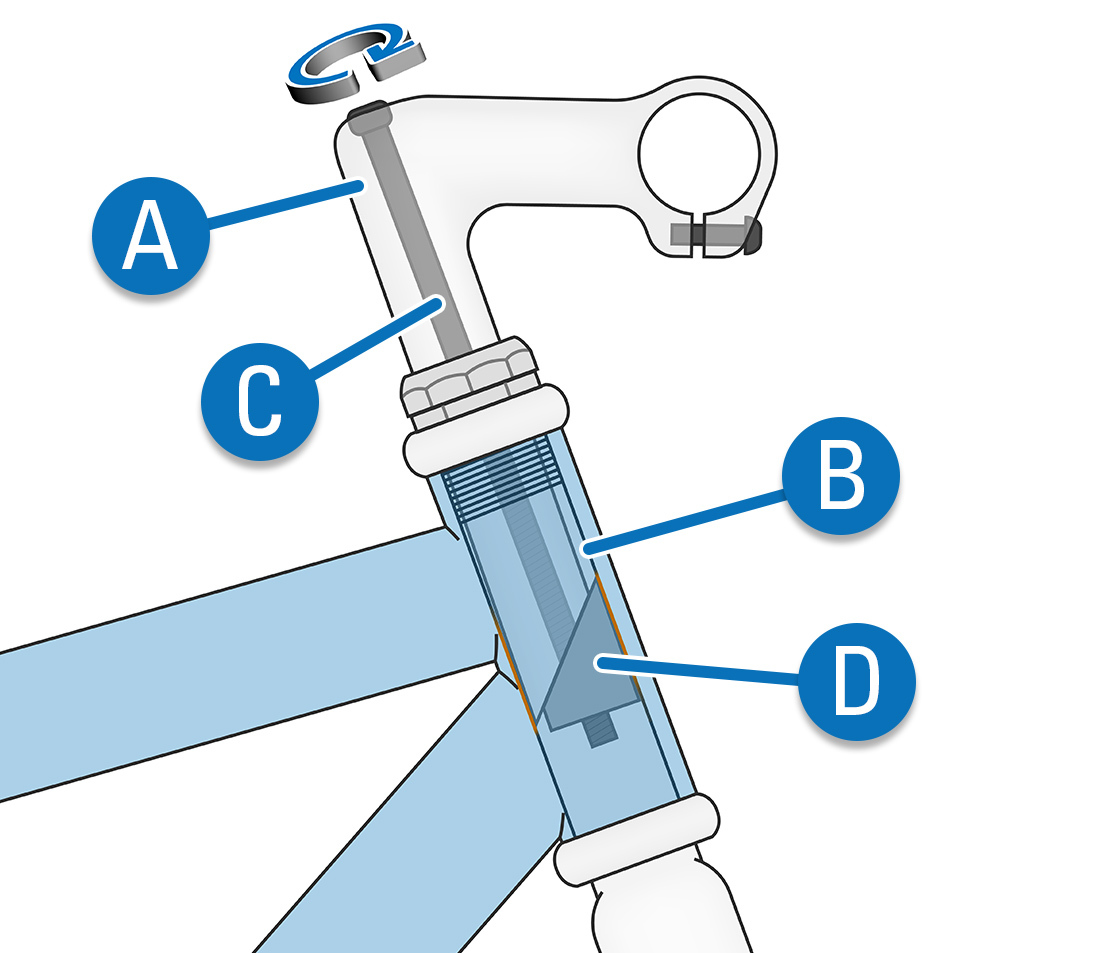
- Quill stem: Found on older or classic bikes, fits inside the fork steerer tube.
Knowing your stem type is essential. Threadless and quill stems are not interchangeable. Measure the diameter and length of your stem before buying a new one to ensure compatibility.
Why Change Your Bike Stem?
People change their bike stems for several reasons:
- Comfort: Adjusting reach and handlebar height to reduce back, neck, or wrist pain.
- Performance: Improving handling for racing or technical trails.
- Fit adjustments: Adapting the bike to suit your body size.
- Aesthetics or damage: Replacing a worn or outdated stem.
A well-fitted stem helps prevent injuries and enhances enjoyment on every ride.

Credit: countrystylechwf.com
Tools And Parts You Need
Before starting, gather these tools and parts:
- Hex keys (Allen wrenches): Usually 4mm, 5mm, or 6mm sizes.
- Torque wrench: For accurate bolt tightening.
- Grease: Prevents seizing and creaks.
- New stem: Check length, angle, and clamp diameters.
- Rag: For cleaning surfaces.
- Measuring tape: To ensure correct positioning.
- Spacer rings: For threadless stems if needed.
Having everything ready avoids frustration and reduces mistakes during the process.
Removing The Old Stem
For Threadless Stems
- Remove the top cap: Unscrew the bolt on the top of the stem with a hex key. Set aside the cap and bolt.
- Loosen stem bolts: The stem is held by two or more bolts at the side. Loosen them evenly, but do not remove them completely yet.
- Remove handlebars: Loosen and remove the faceplate bolts, then gently set the handlebars aside. Let them hang safely or support them to avoid cable strain.
- Slide off the stem: Gently pull the stem upward and off the steerer tube.
For Quill Stems
- Loosen the stem bolt: This is usually at the top center of the stem. Turn it counterclockwise several times.
- Tap the bolt: Lightly tap the bolt with a rubber mallet to release the wedge inside.
- Twist and pull: Wiggle the stem and pull upward to remove it.
Tip: Take photos before starting. This helps you remember cable positions and original setup.
Credit: www.parktool.com
Preparing For Installation
Check the following before installing the new stem:
- Clean surfaces: Use a rag to wipe the steerer tube and handlebar clamp area.
- Inspect for damage: Look for cracks or wear on the steerer tube and handlebars.
- Check compatibility: Confirm the new stem matches your fork and handlebar diameters. Common sizes are 1 1/8” for threadless steerer tubes and 31.8mm for handlebars.
If you see any damage, replace the affected parts before continuing. Never install a stem on a cracked steerer or bar.
Installing The New Stem
For Threadless Stems
- Slide the stem onto the steerer tube: If needed, add or remove spacers to get your preferred handlebar height.
- Align the stem: Make sure it points straight ahead, in line with the front wheel.
- Insert the top cap: Place the top cap and screw in the bolt until it’s snug—do not overtighten.
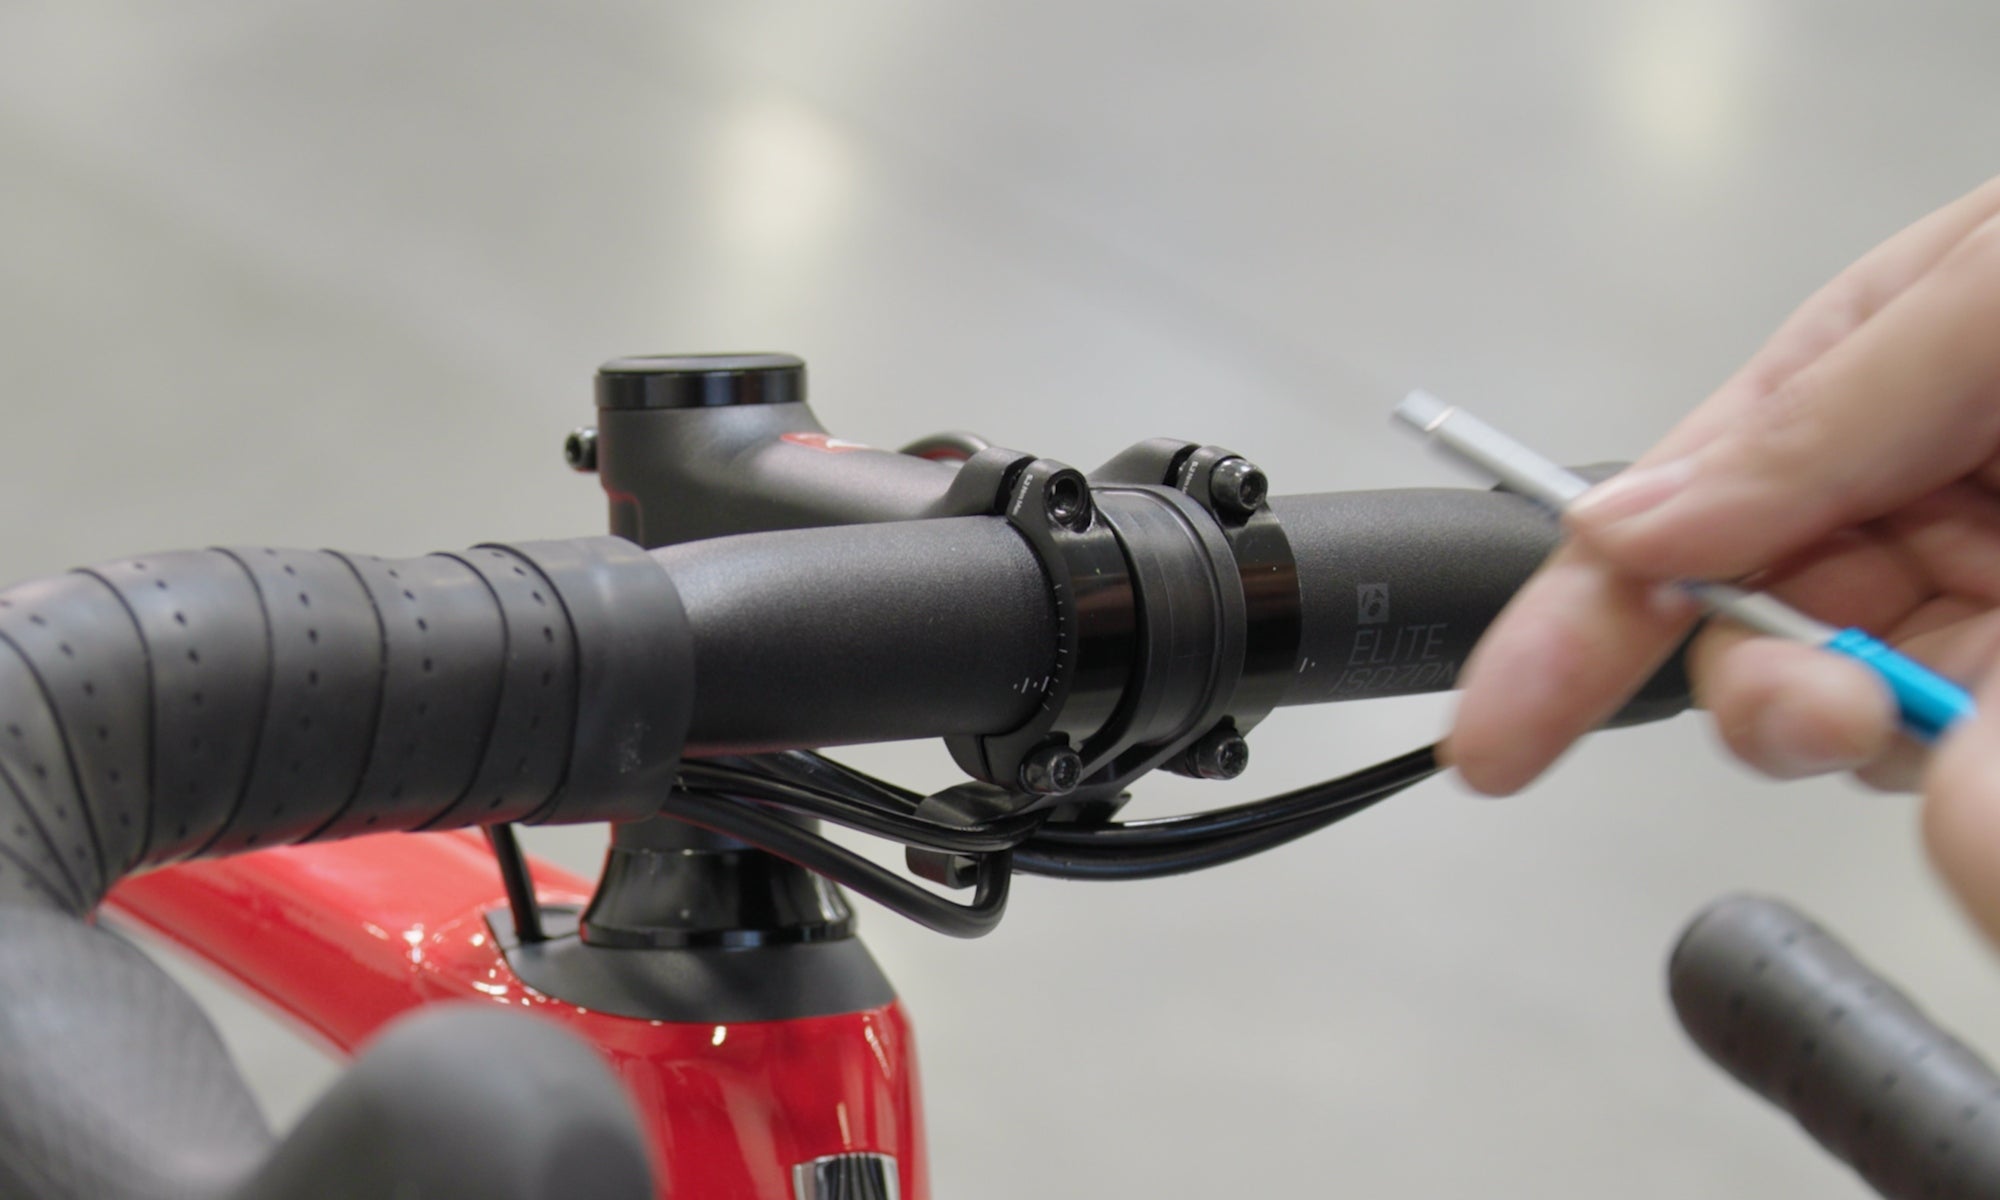
- Tighten stem bolts: Evenly tighten the side bolts to the manufacturer’s torque specification, typically 5–8 Nm. Use a torque wrench for accuracy.
- Reattach handlebars: Place the handlebars in the stem clamp and install the faceplate. Tighten the bolts in a cross pattern, a little at a time, to avoid uneven pressure.
For Quill Stems
- Insert the stem into the steerer tube: Slide it in until you reach the desired height, staying below the minimum insertion mark.
- Align the stem: Make sure it’s straight with the front wheel.
- Tighten the stem bolt: This expands the wedge, locking the stem in place.
- Attach handlebars: If not already installed, clamp the bars into the stem and tighten evenly.
Note: Never raise a quill stem above the minimum insertion line. This can cause the stem to fail suddenly.
Adjusting Your Bike Stem For Fit
Proper adjustment is critical for both safety and comfort. Here are the key elements:
- Height: For threadless stems, adjust height by moving spacers above or below the stem. For quill stems, slide up or down (but not past the minimum mark).
- Angle: Some stems have adjustable angles. Try different positions to see what feels best.
- Reach: Select a stem length that matches your preferred reach. Longer stems stretch you out; shorter ones bring you closer to the bars.
After installation, sit on your bike and test your position. Your arms should have a slight bend, and you should feel comfortable reaching the brakes and shifters. If possible, take a short test ride and tweak the alignment.
Common Mistakes To Avoid
Many beginners overlook important details. Here are mistakes to watch for:
- Omitting the torque wrench: Guessing bolt tightness can lead to dangerous over-tightening or loose parts.
- Wrong stem size: Forcing a stem onto the wrong diameter can damage your bike.
- Ignoring minimum insertion marks: For quill stems, this can cause failure.
- Misaligned handlebars: Even a small misalignment can affect control.
- Skipping safety checks: Always inspect bolts, alignment, and cable tension before riding.
Credit: www.theproscloset.com
Comparing Stem Types And Sizes
Choosing the right stem can be confusing. Here’s a quick comparison of key features:
| Feature | Threadless Stem | Quill Stem |
|---|---|---|
| Common on | Modern bikes | Older/classic bikes |
| Installation | External clamp | Internal wedge |
| Adjustability | Spacers, angle, length | Height (within limits) |
| Standard sizes | 1 1/8” steerer, 31.8mm bar | 1” steerer, 25.4mm bar |
| Tools needed | Hex keys, torque wrench | Hex key, mallet (sometimes) |
When replacing your stem, always match the type and sizing to your bike’s specifications.
When To Upgrade Your Stem
Sometimes, changing the stem is about more than just comfort. Here are signs it’s time for an upgrade:
- Visible cracks or corrosion
- Bent or damaged stem
- Difficulty achieving a comfortable fit
- Upgrading handlebars or fork
- Desire for lighter or stiffer components
Modern stems are often lighter and stronger. If you ride aggressively or carry heavy loads, a robust, high-quality stem is a smart investment.
Fine-tuning After Installation
Once your new stem is in place, a few extra steps ensure a safe and dialed-in ride:
- Check bolt tightness: After a short ride, recheck all bolts with the torque wrench.
- Test for play: Hold the front brake and rock the bike. If you feel movement at the headset, adjust the top cap and stem bolts.
- Inspect cable tension: If your handlebars moved significantly, your brake and shift cables may be too tight or loose.
- Go for a test ride: Pay attention to steering, comfort, and any noises.
Non-obvious insight: If you feel numbness in your hands after changing the stem, your body may need to adapt, or you may need further fit adjustments. It can take a few rides to find the perfect position.
Professional Vs. Diy Stem Change
Most cyclists can swap a stem at home. However, certain cases may require a visit to a bike shop:
- Carbon fiber components: These require extra care and precise torque settings.
- Unusual fit issues: If you cannot find a comfortable position, professional bike fitting can help.
- Complex cockpits: Integrated cables or electronic shifting may complicate a simple swap.
A mechanic can also spot subtle problems, like a slightly bent steerer tube or worn headset bearings, that you might miss.
Cost And Time Estimates
Changing a stem is not expensive or time-consuming. Here’s what to expect:
| Item | Estimated Cost | Time Required |
|---|---|---|
| Basic stem | $20–$60 | – |
| Torque wrench | $20–$50 | – |
| Bike shop labor (if needed) | $20–$40 | 20–40 minutes |
| DIY at home | Free (if you have tools) | 20–30 minutes |
Practical tip: Investing in a torque wrench pays off in the long run, protecting your bike from costly damage.
Safety Checks Before Riding
Before taking your bike out, always do these checks:
- Bolt tightness: Ensure all stem and handlebar bolts are secure.
- Steering test: Turn the bars side to side—no sticking or grinding.
- Brake and shifter function: Cables should not be too tight or snagged.
- Test ride: Start with slow speeds and gentle turns.
If anything feels odd, stop and double-check your installation.
Extra Tips For A Perfect Stem Change
- Mark your old position: Use tape or a marker before removing the old stem. It helps match your original setup.
- Upgrade spacers: Lightweight or colored spacers can improve appearance.
- Handlebar angle: Adjust bars for wrist comfort before tightening fully.
- Creaks or clicks: Apply a thin layer of grease to bolts and contact points.
- Keep old parts: Store your old stem and bolts in case you need them later.
Where To Learn More
For those who want to dive deeper into bike fitting or advanced repairs, check out resources like Park Tool’s Repair Help. Their tutorials cover everything from basic maintenance to complex rebuilds.
Frequently Asked Questions
How Do I Know If My Stem Is Too Long Or Too Short?
If you feel stretched out and your arms are almost straight, your stem may be too long. If you feel cramped or your knees are close to the bars, it might be too short. Aim for a slight bend in the elbows and comfortable access to shifters and brakes.
Can I Change My Bike Stem Without A Torque Wrench?
It’s possible, but not recommended. Overtightening can crush carbon or lightweight parts, while undertightening can cause dangerous looseness. A torque wrench gives peace of mind and ensures manufacturer specifications are met.
Will Changing My Stem Affect My Bike’s Handling?
Yes, stem length and angle directly affect handling. A shorter stem makes the bike turn more quickly, while a longer stem makes it more stable. Make small changes and test ride to find your preferred feel.
What If My Handlebars Are A Different Diameter From My New Stem?
You need a stem that matches your handlebar diameter. Common sizes are 31. 8mm and 25. 4mm. Never force mismatched parts together—it’s unsafe. If needed, some adapters are available, but it’s better to get the right size.
Is It Safe To Reuse Old Bolts When Changing A Stem?
If the bolts are in good condition (not rusty or stripped), you can reuse them. However, some manufacturers recommend replacing bolts, especially if switching to a carbon stem or bar. Always inspect carefully before reuse.
Changing your bike stem is a smart way to improve comfort and performance. With careful steps and the right tools, you can make this upgrade safely and confidently, enjoying a better ride every time you hit the road.