Changing a bike tube might seem intimidating if you’ve never done it before. But once you understand the steps, it becomes a straightforward skill that every cyclist should know. Whether you’re on a casual ride or training for a long race, a flat tire can happen anytime.
Being prepared to swap your tube on the go will save you time, frustration, and money. This guide will take you through everything you need to know to change tubes on a bike, from tools to tips, with clear instructions and insights to help you avoid common mistakes.
Why Learning To Change Tubes Matters
Getting a flat tire is one of the most common issues cyclists face. Roads and trails are full of hazards, from glass shards to thorns, that can puncture your tube. Waiting for help or walking your bike home isn’t practical for most people.
Knowing how to replace a tube means you can get back on your ride quickly and with confidence.
Many beginners think changing tubes is only for mechanics. In reality, this skill is basic bike maintenance, like adjusting your seat or oiling your chain. With practice, you can do it in less than 10 minutes.
Tools And Materials You Need
Before you start, gather the essential tools and materials. Having everything ready prevents frustration and makes the process much smoother.
Must-have items:
- Spare tube (make sure it matches your tire size)
- Tire levers
- Bicycle pump (hand pump or CO₂ inflator)
- Patch kit (optional, for temporary fixes)
- Gloves (optional, to keep hands clean)
Choosing The Right Tube
Bike tubes come in different sizes and valve types. Check the side of your tire for numbers like “700x28c” or “26×1.95”. These numbers show the diameter and width. The tube must match both. There are two main valve types: Presta (narrow, with a lock nut) and Schrader (wider, like a car tire). Use the same type your rim supports.
Here’s a quick comparison to help you check compatibility:
| Valve Type | Appearance | Common Use | Rim Hole Size |
|---|---|---|---|
| Presta | Thin, with lock nut | Road/Hybrid bikes | Smaller |
| Schrader | Thicker, like car tire | Mountain/City bikes | Larger |
Insider tip: If you’re not sure, take a photo of your tire label and valve before buying a replacement.
Removing The Wheel
Changing a tube starts with removing the wheel from your bike. This step can be easy or tricky, depending on your bike design.
- Shift to the smallest gear if you’re working on the rear wheel. This makes it easier to reinstall.
- Release the brakes if your bike uses rim brakes. For V-brakes, squeeze the arms together and unhook the cable.
- Open the quick release lever or use a wrench to loosen axle nuts. Some bikes use thru-axles; unscrew these and slide them out.
- Lift the bike or flip it upside down for stability, then carefully remove the wheel.
Common mistake: Forgetting to shift to the smallest gear makes rear wheel removal and installation much harder.
Deflating The Tube And Removing The Tire
Once the wheel is off, you need to get the tire off the rim.
- Let out all the air. Press down on the valve until the tube is completely flat.
- Insert tire levers under the tire bead (the edge of the tire that sits inside the rim).
- Work the lever around the rim to lift the bead over the edge. Sometimes one lever is enough, but you may need two.
- Slide one side of the tire off the rim. Leave the other side in place to make installation easier.
If the tire feels stuck, don’t force it. Work the levers slowly around the rim, and it will loosen.
| Step | Tool | Time Needed (approx.) |
|---|---|---|
| Remove wheel | None or wrench | 2 minutes |
| Deflate tube | None | 10 seconds |
| Remove tire | Tire levers | 2-3 minutes |
Credit: www.decathlon.com
Taking Out The Old Tube
With one side of the tire off, you can now remove the damaged tube.
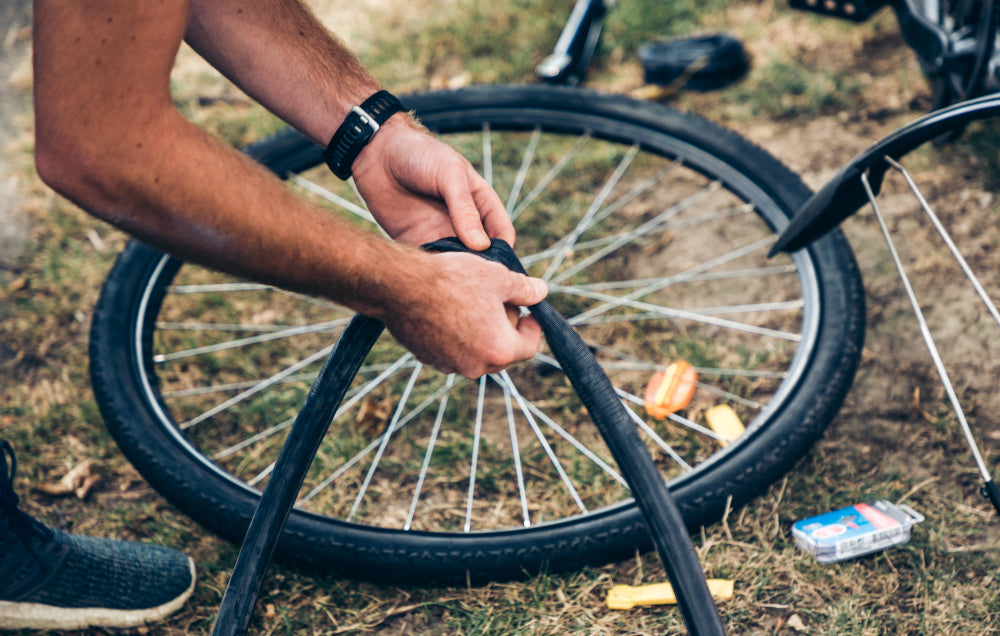
- Pull out the tube starting near the valve. Gently push the valve stem through the rim.
- Inspect the tube and tire. Check for thorns, glass, or sharp objects still stuck in the tire. Run your fingers carefully inside the tire to avoid missing anything.
Non-obvious insight: Many flats happen again because the cause wasn’t removed. Always check the inside of the tire and the rim tape for sharp edges.
Preparing The New Tube
Before installation, prepare the new tube properly.
- Inflate the new tube slightly. Add just enough air to give it shape. This helps prevent pinching when you reinstall the tire.
- Check the tube for leaks. Squeeze gently and listen for escaping air. It’s rare, but new tubes can have small holes from the factory.

Credit: ebikecanada.com
Installing The New Tube
Now you’re ready to put the new tube in.
- Insert the valve stem into the rim hole first. Make sure it sits straight; a bent valve can cause leaks later.
- Tuck the tube inside the tire all the way around.
- Push the tire bead back onto the rim. Start opposite the valve and work both sides evenly toward the valve area. Use your thumbs, not tools, for the last section if possible to avoid pinching the tube.
If the tire is tight, use a tire lever carefully, but this increases the chance of a “pinch flat,” where the tube is damaged by the lever.
Inflating And Seating The Tire
With the tire back on, you need to inflate it and make sure everything is seated correctly.
- Check that the tube isn’t trapped under the tire bead. Squeeze the tire all the way around to feel for pinches.
- Inflate the tube slowly. Start with a little air, then check again for pinching or bulges.
- Pump up to the correct pressure. The recommended PSI (pounds per square inch) is listed on the tire sidewall. Most road bikes use 80-120 PSI; mountain bikes use 30-50 PSI.
Pro tip: Slightly lower pressures give better grip on rough terrain, but too low can cause “snake bite” flats.
| Bike Type | Typical PSI Range | Notes |
|---|---|---|
| Road bike | 80–120 PSI | Higher pressure for speed, less comfort |
| Hybrid/City bike | 50–70 PSI | Balance of comfort and efficiency |
| Mountain bike | 30–50 PSI | Lower pressure for grip |

Credit: www.youtube.com
Reinstalling The Wheel
Once the tire is properly inflated, it’s time to put the wheel back on your bike.
- Align the wheel in the dropouts. Make sure it sits straight.
- Tighten the quick release or axle nuts. For thru-axles, screw in and tighten as recommended.
- Reconnect the brakes if you disconnected them earlier.
- Spin the wheel to check that it moves freely and the tire is seated evenly.
Beginner mistake: Not tightening the axle enough. A loose wheel is dangerous.
Final Checks Before Riding
A few more checks can prevent problems on your ride.
- Make sure the tire is properly seated. Look for any lumps or bulges.
- Check brake function. Squeeze the levers to ensure the pads contact the rim correctly.
- Listen for air leaks. If you hear hissing, check the valve and bead area.
Carry your tools and a spare tube on every ride. Even if you just changed the tube, another flat is possible.
Practical Tips And Insights
- Practice at home. The first time is always the hardest. Practicing in a calm place is much better than learning on the roadside.
- Carry a patch kit. If you run out of spare tubes, a patch kit can get you home, but it’s not as reliable as a new tube.
- Avoid overinflation. Too much pressure can blow out the tube or tire.
- Store tubes in a cool, dry place. Heat and sunlight can make them brittle.
Common Mistakes To Avoid
- Pinching the tube with tire levers during installation.
- Forgetting to check for sharp objects inside the tire.
- Installing the wrong tube size. Double-check diameter and width.
- Not tightening the wheel. This is a safety risk.
- Not checking valve type. Presta won’t fit a Schrader rim and vice versa.
Non-obvious tip: If your tire is very hard to remove, it might be because the rim or tire is slightly bent. Check for damage if you consistently struggle.
When To Patch Vs. Replace A Tube
Some cyclists wonder if they should patch a tube or always replace it. Here’s a quick guideline:
- Replace: If the hole is near the valve, if the tube has multiple holes, or if you need a reliable, long-term fix.
- Patch: For small punctures in the main body of the tube when you’re out riding.
Multiple patches can work for a while, but a new tube is more reliable for everyday use.
How To Avoid Getting Flats
While some flats are unavoidable, you can reduce the risk:
- Keep tires inflated to the recommended pressure.
- Avoid riding through debris like glass, thorns, or sharp gravel.
- Replace worn tires before they get thin and vulnerable.
- Check rim tape for sharp edges or movement.
For more about puncture-resistant tires and flat prevention, visit the Sheldon Brown website.
Frequently Asked Questions
How Do I Know What Size Tube My Bike Needs?
Check the sidewall of your tire for numbers like “700x28c” or “26×1. 95”. Match both the diameter and width. Also, match the valve type (Presta or Schrader).
Can I Reuse A Tube After Patching It?
Yes, you can reuse a patched tube if the repair is strong and in the main body of the tube. Avoid patching near the valve or if there are multiple holes.
Why Does My Tire Keep Going Flat After Changing The Tube?
This usually means there’s something sharp still inside the tire or rim, or the tube was pinched during installation. Always check and clean before putting in a new tube.
Is It Okay To Use Tire Levers To Reinstall The Tire?
You can, but be careful. Tire levers can pinch and damage the new tube. It’s best to use your hands for the last section if possible.
How Long Does It Take To Change A Bike Tube?
With practice, it takes about 10 minutes. Beginners might take 20–30 minutes the first few times. Practicing at home will help you become faster and more confident.
Changing a bike tube is a valuable skill that gives you freedom and confidence on every ride. With the right tools, clear steps, and a bit of practice, you’ll be ready to handle flats anywhere. Stay prepared and enjoy the journey!