Charging a dirt bike battery seems simple, but many riders get it wrong and end up with a dead battery or even damage. Whether you’re new to dirt bikes or just want to keep your machine in top shape, understanding the right way to charge your battery is crucial.
A healthy battery doesn’t just power your starter—it supports all electronics, keeps your rides smooth, and saves money on replacements.
Let’s break down the process, step by step, with practical tips, safety advice, and expert insights you won’t find in most guides. By the end, you’ll know exactly what to do, what to avoid, and how to extend your battery’s life.
Understanding Dirt Bike Batteries
Before grabbing a charger, it’s important to know what type of battery your dirt bike uses. Not all batteries are the same, and charging methods can differ.
Most dirt bikes use either:
- Lead-acid (AGM or conventional)
- Lithium-ion (LiFePO4 or similar)
Lead-acid Batteries
These are the traditional batteries, sometimes called “wet cell” if they contain liquid acid or “AGM” if sealed with absorbent glass mat technology. They are reliable but sensitive to overcharging.
Lithium-ion Batteries
Modern dirt bikes may use lithium-ion batteries. They are lighter, last longer, and charge faster, but require special chargers and care. Never use a regular lead-acid charger on a lithium battery.
How To Identify Your Battery Type
Check the label on your battery. It will usually say “AGM,” “Lithium,” or “Lead Acid. ” If you’re not sure, refer to your owner’s manual.
Tools And Equipment You’ll Need
Charging a dirt bike battery safely and correctly requires a few basic items:
- Smart battery charger (with automatic shutoff)
- Safety gloves and glasses
- Multimeter (for checking voltage)
- Owner’s manual (to confirm battery type and specifications)
- Clean rags (to wipe terminals)
- Baking soda and water (for cleaning corrosion)
A smart charger is better than a basic one because it adjusts the current and stops when the battery is full. This protects your battery from overcharging.

Credit: www.youtube.com
Preparing To Charge Your Battery
Taking time to set up properly reduces risk and ensures a full, healthy charge.
Remove The Battery
If possible, always remove the battery from your dirt bike before charging. This gives you better access, prevents accidental shorts, and keeps your bike’s electronics safe.
- Turn off the ignition and remove the key.
- Use the correct tools to disconnect the negative (-) terminal first, then the positive (+).
- Carefully lift the battery out, keeping it upright.
Inspect For Damage
Check for cracks, bulges, or leaks. If you see any, do not charge—replace the battery. Damaged batteries can leak acid or catch fire.
Clean The Terminals
Dirty or corroded terminals reduce charging efficiency. Mix a little baking soda with water, dip a rag, and gently clean both terminals. Dry completely before charging.
Check Voltage
Use a multimeter to test your battery’s voltage. This tells you how discharged it is and if it needs charging.
- 12.6V or higher: Fully charged (no need to charge now)
- 12.0V – 12.6V: Partially discharged (safe to charge)
- Below 12.0V: Needs charging soon
- Below 11.8V: Deeply discharged (charge carefully; may not recover)
Charging Lead-acid Dirt Bike Batteries
Lead-acid batteries need a gentle, controlled charge. Here’s how to do it safely:
Step 1: Choose The Right Charger
Use a smart charger designed for motorcycles. Set the output to 1-2 amps—higher rates can overheat small batteries.
Step 2: Connect The Charger
- Attach the positive (red) cable to the positive terminal.
- Attach the negative (black) cable to the negative terminal.
- Make sure the charger is off before connecting.
Step 3: Start Charging
Switch on the charger. For most dirt bike batteries, charging takes 4-8 hours if partially discharged. Never leave it unattended for long periods.
Step 4: Monitor Progress
Most smart chargers show charging status. If you’re using a basic charger, check the battery every hour to prevent overcharging.
Step 5: Disconnect Safely
Once fully charged, turn off the charger before removing the cables. Disconnect the negative cable first.
Charging Table: Lead-acid Battery Voltages
Here’s a quick reference for what voltage means for a 12V lead-acid battery:
| Voltage | State of Charge | Action Needed |
|---|---|---|
| 12.7V – 13.0V | 100% (Full) | No Charging |
| 12.4V – 12.6V | 75% – 90% | Top-Up |
| 12.0V – 12.3V | 50% – 70% | Charge Soon |
| 11.8V – 11.9V | Low | Charge Now |
| Below 11.8V | Very Low/Dead | Slow Charge; May Need Replacement |
Charging Lithium Dirt Bike Batteries
Lithium-ion batteries are becoming more common, but they are sensitive to incorrect charging.
Use A Lithium-compatible Charger
Never use a lead-acid charger on a lithium battery unless it’s specifically marked as lithium-safe. Lithium batteries can overheat and fail if charged incorrectly.
Set Correct Charging Rate
Most lithium dirt bike batteries should be charged at 1-2 amps. Fast charging can shorten their lifespan.
Charging Steps
- Connect the charger as you would with a lead-acid battery.
- Monitor charging closely; lithium batteries often charge faster (2-4 hours).
- Many lithium batteries have built-in protection circuits, but you should still avoid leaving them unattended.
Important Lithium Battery Tips
- Do not charge if the battery is below 10V—some chargers will not start, and deep discharge may have damaged the battery.
- Store lithium batteries at 50-70% charge if not using the bike for a long time.
Lithium Vs. Lead-acid: Charging Comparison
| Feature | Lithium-Ion | Lead-Acid |
|---|---|---|
| Weight | Lighter | Heavier |
| Charge Time | 2-4 hours | 4-8 hours |
| Charger Type | Lithium-specific | Standard (with smart features preferred) |
| Overcharge Protection | Usually built-in | Charger-dependent |
| Lifespan | Up to 2000 cycles | 300-500 cycles |
Reinstalling The Battery
Once your battery is fully charged, it’s time to put it back in your dirt bike.
- Place the battery in the holder, keeping it upright.
- Connect the positive terminal first, then the negative.
- Tighten connections to prevent vibration.
- Apply a thin layer of battery terminal grease to reduce future corrosion.
- Turn on your bike and check electrical functions before riding.

Credit: www.wikihow.com
Safety Tips When Charging Dirt Bike Batteries
Battery charging can be dangerous if you’re not careful. Here’s how to stay safe:
- Always charge in a well-ventilated area. Charging batteries can release gases, especially lead-acid types.
- Wear gloves and eye protection to avoid acid burns.
- Never smoke or use open flames near batteries.
- Keep metal objects away from battery terminals to prevent short circuits.
- Do not charge frozen batteries; let them warm to room temperature first.
- Never charge a visibly damaged battery.
Common Mistakes To Avoid
Many riders ruin their batteries by making small mistakes. Here’s what to watch for:
- Using the wrong charger type: Always match your charger to your battery.
- Overcharging: Leaving a battery on charge too long reduces lifespan or can cause leaks.
- Charging at too high a rate: Fast charging heats up and damages small dirt bike batteries.
- Not disconnecting the battery from the bike: This can risk frying electronics if something goes wrong.
- Charging dirty or corroded terminals: This reduces efficiency and can cause sparks.
- Ignoring voltage checks: Charging a battery that’s deeply discharged may not always bring it back to life.
How To Maintain Your Dirt Bike Battery
Proper charging is only part of battery care. Regular maintenance extends battery life and keeps your bike ready to ride.
- Check voltage monthly if the bike is not used often.
- Keep terminals clean and tight.
- Use a battery tender if storing for long periods (it keeps the battery topped up without overcharging).
- Avoid deep discharges; always recharge after rides.
- Store batteries in a cool, dry place.
Storage Tips
If you won’t use your dirt bike for a month or more, remove the battery and store it indoors. For lithium batteries, leave them about half-charged; for lead-acid, keep them fully charged.
Signs Your Dirt Bike Battery Needs Replacement
Even with perfect charging, batteries don’t last forever. Watch for these signs:
- Bike cranks slowly or won’t start
- Battery can’t hold charge
- Visible swelling, leaks, or corrosion
- Voltage drops quickly after charging
If you notice any of these, it’s time for a new battery.
Credit: www.batterystuff.com
Real-world Example: Charging A Dirt Bike Battery
Let’s say you have a Yamaha YZ250F with a 12V 5Ah lead-acid battery. You check the voltage and find it’s at 12.1V after a few months in storage. Here’s what you do:
- Remove the battery, clean terminals, and check for damage.
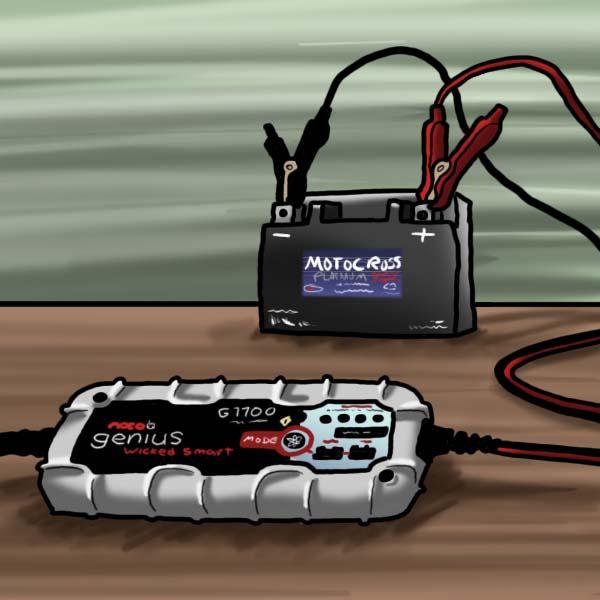
- Connect a smart motorcycle charger set to 1A.
- Let it charge for about 6 hours, checking status every 2 hours.
- When the charger indicates “full,” check voltage (should read 12.7V+).
- Reinstall in your bike and confirm everything works.
This simple routine keeps your battery strong for years and avoids last-minute surprises.
Comparing Popular Battery Charger Brands
Choosing the right charger makes battery care much easier. Here’s a quick look at three popular brands:
| Brand | Features | Typical Price | Best For |
|---|---|---|---|
| Battery Tender Jr. | Smart, automatic, supports most battery types | $35-$50 | All-around use, storage |
| Noco Genius 1 | Multi-chemistry, waterproof, fast charge | $40-$60 | Lithium and lead-acid |
| CTEK MXS 5.0 | Advanced diagnostics, reconditioning mode | $70-$90 | Frequent use, tough batteries |
Frequently Asked Questions
What Happens If I Use A Car Battery Charger On My Dirt Bike Battery?
Car chargers usually supply too much current for small dirt bike batteries. This can overheat, damage, or even destroy your battery. Always use a motorcycle-specific charger with a low amp setting.
Can I Leave My Dirt Bike Battery Connected To A Charger All Winter?
If you use a battery tender (maintenance charger), it’s safe to leave it connected for months. Do not use a basic charger for this purpose—it can overcharge and ruin the battery.
How Often Should I Charge My Dirt Bike Battery?
Charge after every few rides, or at least once a month if not used. If you store your bike for the winter, check and charge the battery every 4-6 weeks.
Is It Safe To Jump-start A Dirt Bike Battery?
Jump-starting is possible, but risky. Use only a compatible source (another motorcycle battery, not a car), and keep the cables connected for just a few seconds. Incorrect jump-starting can damage your electronics.
Why Does My Dirt Bike Battery Keep Dying?
Common reasons include old age, parasitic drain (electrical draw when the bike is off), or not charging after rides. Check for loose wires, clean terminals, and consider replacing an old battery.
Keeping your dirt bike battery healthy is not just about plugging in a charger. It’s about matching the right tools, following safe steps, and avoiding common mistakes. Treat your battery with care, and it will reward you with reliable starts and many miles of adventure. For more technical details about batteries and charging, visit the Wikipedia page on rechargeable batteries.
Safe riding, and may your dirt bike always start on the first try!