Installing new bike handle grips is a simple upgrade that can make a big difference in your cycling experience. Whether your old grips are worn out, slipping, or just not comfortable, changing them can improve both your comfort and control.
Many riders delay this task because they think it’s tricky or they might damage their bike. The truth is, with the right tools and steps, almost anyone can do it at home—even if you’re new to bike maintenance.
In this guide, you’ll learn the complete process of installing bike handle grips. We’ll cover the tools you need, how to remove old grips, clean and prepare your handlebars, and install new grips like a pro. You’ll also find tips for different grip types, common mistakes to avoid, and how to make your grips last longer.
Let’s get your bike feeling fresh and your hands happy.
Why Changing Handle Grips Matters
Grips are more than just a part of your bike’s look. They affect comfort, safety, and control. Old or damaged grips can cause sore hands or even lead to accidents if they slip. New grips offer better cushioning, reduce vibrations, and help you ride longer without fatigue. If you ride in the rain or sweat a lot, fresh grips can even improve your grip strength and confidence.
Choosing The Right Handle Grips
Before you start, it’s important to pick the right grips for your bike and riding style. There are two main types:
- Slip-on grips – Made of rubber or foam, these slide directly onto the handlebar. They’re common on mountain and hybrid bikes.
- Lock-on grips – These have plastic or metal sleeves and small locking rings. They’re easier to install and remove, and less likely to slip.
When choosing, consider:
- Grip diameter: Thicker grips can be more comfortable for big hands; thinner ones give better control for small hands.
- Material: Rubber for durability, foam for light weight, or gel for extra comfort.
- Texture: Patterns or ridges can give better grip, especially in wet weather.
- Length: Make sure the grip fits your handlebar width.
If you’re not sure, visit a bike shop to try different types. For more details, you can check this Cycling Weekly guide.

Credit: www.youtube.com
Tools And Materials Needed
You don’t need many special tools. Here’s what to have ready:
- New handle grips
- Rubbing alcohol or grip glue
- Flathead screwdriver (for stubborn old grips)
- Utility knife (if you want to cut old grips off)
- Clean rag
- Compressed air (optional, but very useful for slip-on grips)
- Allen wrench (if you have lock-on grips)
- Soapy water (optional, for easier installation)
Step 1: Remove Old Handle Grips
Old grips can be stuck on tight, especially if they’ve been in place for years.
For Slip-on Grips
- Loosen the grip. Try twisting it by hand. If it won’t budge, slide a flathead screwdriver under the edge. Be careful not to scratch the handlebar.
- Add some lubricant. Spray a bit of rubbing alcohol or soapy water under the grip using the screwdriver to create a gap. Wiggle the grip back and forth until it loosens.
- Pull off the grip. Once it moves freely, pull it off slowly.
For Lock-on Grips
- Find the locking bolt at one or both ends of the grip.
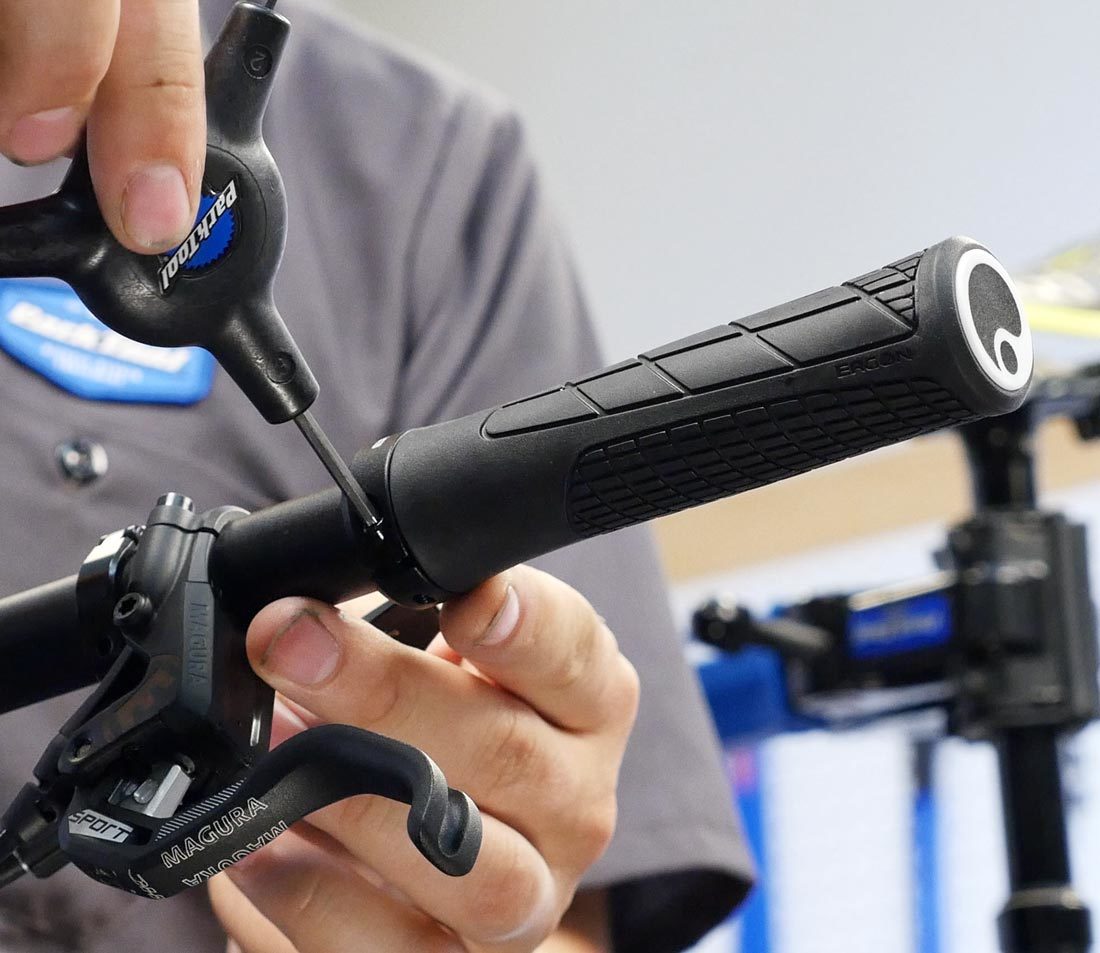
- Use an Allen wrench to loosen the bolts.
- Slide off the grip. If it’s stuck, check for hidden bolts or dirt.
Pro tip: If you don’t plan to reuse old slip-on grips, cut them off with a utility knife. Always cut away from your body.
Step 2: Clean And Prepare The Handlebar
Leftover glue, dirt, or old rubber can stop new grips from fitting well.
- Wipe the bar with a clean rag and rubbing alcohol.
- Remove any sticky residue. Use a bit of alcohol or degreaser.
- Let it dry completely. Wet handlebars can cause grips to slip later.
A clean surface is key. Even a little oil from your hands can make new grips move or spin when you ride.
Step 3: Install New Handle Grips
The method depends on the type of grips you’re using.
Installing Slip-on Grips
Slip-on grips can be hard to push on dry. Here’s how to get them on easily and safely:
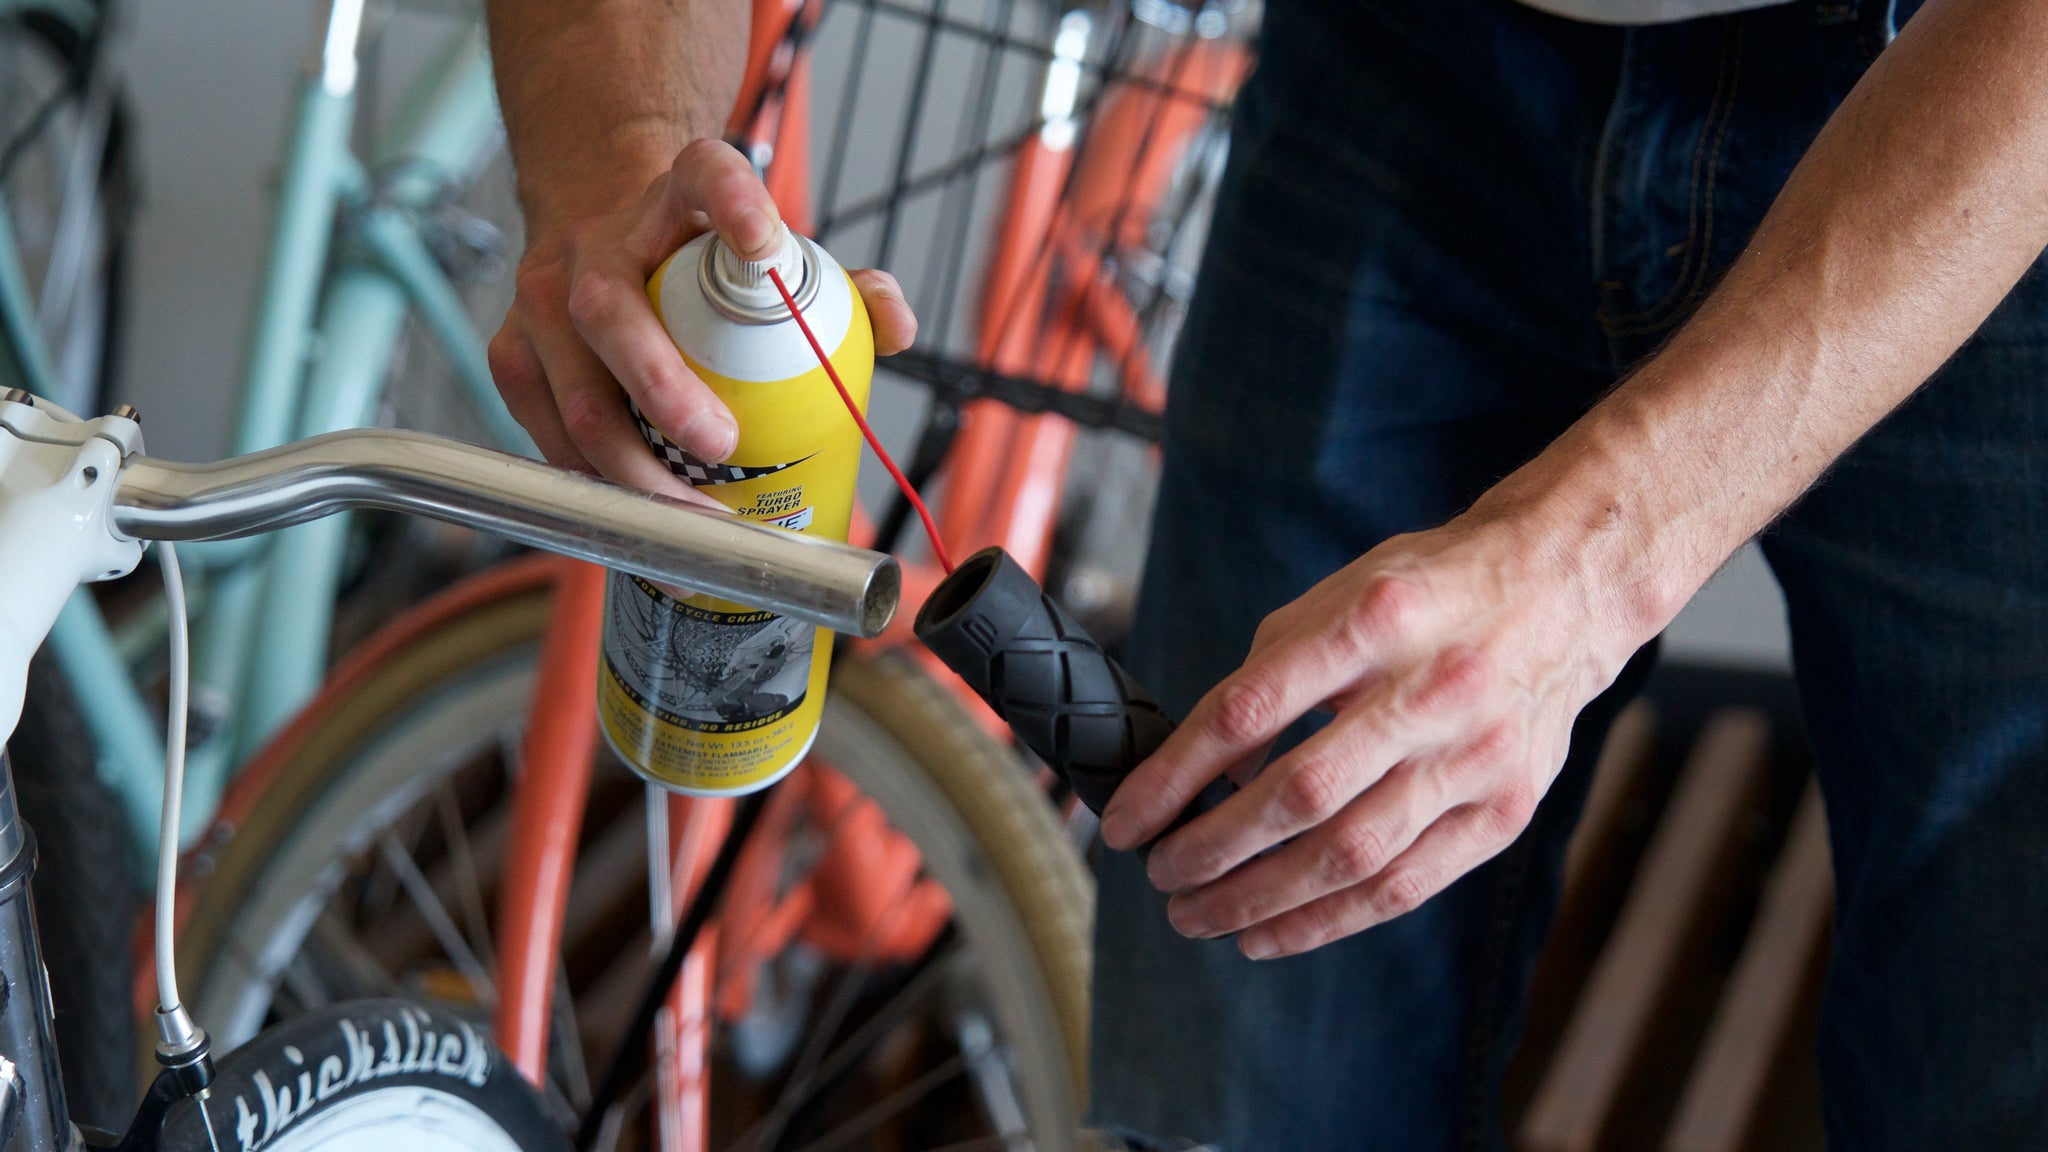
- Apply rubbing alcohol inside the grip and on the handlebar. This acts as a temporary lubricant and dries quickly, locking the grip in place.
- Start the grip on the bar. Push and twist at the same time. If it’s very tight, use compressed air between the grip and bar to “float” the grip on.
- Align patterns or logos before the alcohol dries. You have about 30 seconds.
- Let it set. Wait at least 10-20 minutes for the alcohol to evaporate before riding.
Avoid using oil or grease—they make grips slippery and unsafe.
Installing Lock-on Grips
Lock-on grips are quicker and easier:
- Slide the grip onto the handlebar. Make sure the clamp ring (or rings) are on the outside.
- Adjust the grip position. Align logos, patterns, or ergonomic shapes for your natural hand position.
- Tighten the locking bolts. Use an Allen wrench and tighten until snug, but don’t over-tighten or you might strip the bolt.
- Check for movement. The grip should not spin or slide.
Some lock-on grips have two bolts per grip. Tighten both evenly.
Comparison Of Slip-on Vs Lock-on Grips
Here’s a simple breakdown of the main differences:
| Feature | Slip-On Grips | Lock-On Grips |
|---|---|---|
| Installation Time | Medium (5–15 min) | Fast (2–5 min) |
| Security | Can slip if not installed well | Very secure |
| Weight | Lighter | Heavier (due to lock rings) |
| Cost | Usually cheaper | More expensive |
| Reuse | Harder to remove and reuse | Easy to remove and reuse |
Credit: www.parktool.com
Step 4: Replace Bar End Plugs
Handlebars should always have bar end plugs for safety. They keep dirt out and protect you in a crash.
- Press the bar end plugs into the open end of the handlebar.
- Tap gently with a rubber mallet if needed, but don’t hit too hard.
Some grips come with built-in end plugs. If you ride a lot or race, check the plugs often—they sometimes pop out after a crash.
Step 5: Final Safety Checks
Before you ride, make sure your work is secure:
- Try twisting the grips. They shouldn’t move or spin.
- Check the locking bolts again if using lock-on grips.
- Look for gaps. The grip should sit flush with the bar end and brake/shifter levers.
- Wipe off any leftover alcohol or water.
A loose grip is dangerous. If you feel any movement, remove the grip and start again.
Common Problems And How To Fix Them
Even careful installation can run into problems. Here’s how to solve the most common ones:
Grips Are Hard To Push On
- Warm the grips in hot water for a few minutes to soften them.
- Use compressed air to help slide them on.
- Double-check for leftover glue or tape on the handlebar.
Grips Slide Or Spin
- Remove the grip, clean the bar, and reinstall with rubbing alcohol.
- For very stubborn spinning grips, use a small amount of hairspray. It acts as a glue when dry.
- Avoid using oil or WD-40.
Lock-on Bolts Won’t Tighten
- Check if the bolt is stripped or the clamp is bent.
- Replace damaged parts if needed.
- Clean any dirt or grit from the threads.
Grips Are Too Long Or Short
- If too long, move brake/shifter levers outward a little, or trim the grip (only with rubber grips, not lock-ons).
- If too short, make sure the grip is fully pushed on.
Tips To Make Your Grips Last Longer
- Keep your hands and grips clean. Dirt acts like sandpaper and wears grips faster.
- Store your bike out of the sun. Sunlight can harden and crack rubber.
- Check for tears or loose ends after crashes or falls.
- Don’t use harsh chemicals to clean grips. Mild soapy water is best.
If you ride in wet or muddy conditions, consider grips with extra texture or patterns for better hold.
Credit: www.purecycles.com
Real-world Example: Replacing Grips On A Mountain Bike
Let’s say your mountain bike grips are old and slippery. You choose new lock-on grips with a soft rubber surface and double locking rings. After removing the old grips and cleaning the bars, you slide on the new grips, align the ergonomic shape to fit your thumb, and tighten both bolts.
The whole process takes about 10 minutes. On your next ride, you notice less hand pain and more control over rough trails. This small upgrade can boost your confidence and enjoyment instantly.
Table: Popular Grip Materials And Their Features
Here’s a look at common grip materials and what they offer:
| Material | Comfort | Durability | Best For |
|---|---|---|---|
| Rubber | Good | Excellent | All-round use |
| Foam | Very good | Medium | Mountain biking |
| Gel | Excellent | Medium | Long rides, comfort |
| Leather | Good | High (if cared for) | Classic bikes, style |
Mistakes Beginners Often Make
Even confident riders sometimes make these errors:
- Not cleaning handlebars before installing new grips.
- Using oil or grease as lubricant (makes grips unsafe).
- Not waiting for glue or alcohol to dry before riding.
- Over-tightening lock-on bolts (can strip the threads).
- Forgetting bar end plugs, which can cause injuries.
One less obvious mistake: some riders don’t check if the grip length matches their bar. This can cause shifting or brake levers to be out of reach.
Comparison: Diy Vs Bike Shop Installation
Some riders wonder if it’s better to do this at home or pay a pro. Here’s a quick look:
| Factor | DIY | Bike Shop |
|---|---|---|
| Cost | Just the grips ($10–$40) | $10–$30 extra for labor |
| Time | 10–20 minutes | 1–2 days (if busy) |
| Skill Needed | Basic tools, simple steps | None (done by mechanic) |
| Learning | Learn a new skill | None |
Most riders find it easy to do at home. If you’re unsure or your bike has special handlebars, a shop can help.
Extra Insights For Success
- Try grips with end collars if you have sweaty hands—these lock down tighter.
- Use isopropyl alcohol instead of water for slip-on grips—it dries fast and leaves no residue.
- Save your old grips as backups, or use them for other tools like garden tools.
Changing your bike handle grips is a simple, satisfying upgrade that can transform your rides. With the right grips and proper installation, you’ll have better comfort, control, and confidence on every journey.
Frequently Asked Questions
How Long Do Bike Handle Grips Last?
Most grips last 1–3 years, depending on how often you ride and the weather. If you notice cracks, slipping, or loss of cushioning, it’s time to replace them.
Can I Use Any Handle Grips On My Bike?
Not always. Grips come in different diameters and lengths. Make sure the grip matches your handlebar size—most bikes use 22.2 mm bars, but check before buying.
What’s The Best Way To Clean Bike Grips?
Use mild soap and water. Avoid harsh chemicals, which can dry out or crack the rubber. Clean grips last longer and feel better.
Why Do My Grips Keep Slipping?
Slipping is usually caused by oil, sweat, or leftover glue on the bar. Remove the grip, clean the bar well, and reinstall using rubbing alcohol or grip glue.
Is It Worth Getting Lock-on Grips?
If you ride off-road, in wet conditions, or want easy maintenance, lock-on grips are a great investment. They’re secure and simple to change.
For more bike maintenance tips and grip options, visit BikeRadar’s buyers guide.