Putting a water bottle holder on your bike might sound simple, but doing it right means you’ll always have water when you need it. Whether you ride for fun, fitness, or daily commuting, staying hydrated is essential. Many bikes don’t come with bottle holders, or maybe you want to add a second one. The good news is that installing a bottle cage is a quick project you can do at home, often with just a few basic tools.
This guide walks you through everything: choosing the right holder, checking your bike, installing step-by-step, and handling common issues. You’ll also see real-life tips and solutions for bikes without pre-drilled holes. By the end, you’ll be ready to ride farther and safer, with your water bottle always within reach.
Why A Water Bottle Holder Matters
It’s easy to overlook the importance of a water bottle holder until you’re thirsty and there’s nowhere to put your drink. Dehydration makes rides harder and can even be dangerous in hot weather. Having a bottle cage means you can drink without stopping, helping you perform better and feel more comfortable.
Many riders also add holders for long trips or for carrying other things—like a thermos, energy drinks, or even a small speaker. The design you choose affects your convenience and bike style, so it’s worth spending a few minutes understanding your options.
Types Of Water Bottle Holders
Not all holders are the same. Understanding the main types helps you pick one that works for your bike and riding style.
| Type | Material | Mounting Method | Best For |
|---|---|---|---|
| Standard Cage | Aluminum, Plastic | Bolts to frame | Most bikes |
| Side-Entry Cage | Plastic, Carbon | Bolts to frame | Small frames, kids’ bikes |
| Adjustable Holder | Plastic, Metal | Clamps or straps | Non-standard frames |
| Handlebar/Seatpost Mount | Plastic, Aluminum | Clamps | Folding bikes, e-bikes |
Key Things To Consider
- Bottle size: Standard cages fit 500–750 ml bottles. Larger bottles may need an adjustable holder.
- Frame space: Full-suspension or small frames might not have much room.
- Weight: Lighter materials matter for racing or long rides.
- Ease of access: Side-entry cages are easier for tight spaces.

Credit: www.purecycles.com
Tools And Materials Needed
Before starting, gather the right tools. Most installations only need simple items.
- 4mm or 5mm Allen key (hex wrench)
- The water bottle holder (cage)
- Bolts (usually included with new cages)
- Screwdriver (for some clamp-style holders)
- Measuring tape
- Mounting straps or adapters (if your bike has no holes)
- Threadlocker (optional, prevents bolts from loosening)
Having everything ready saves time and reduces frustration. Some bikes have bolts already installed in the frame—don’t lose them!
Checking Your Bike: Do You Have Mounting Holes?
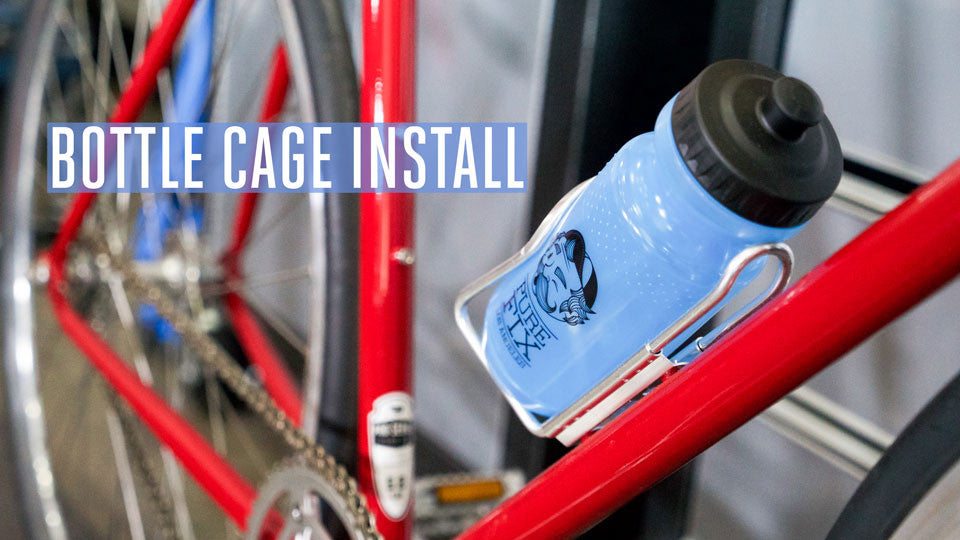
Most modern bikes come with two threaded holes on the down tube or seat tube. Look for small, often silver or black, holes in the frame. They may have bolts in them already. If you find them, you’re in luck—the installation is straightforward.
If there are no holes, you’ll need special adapters or clamp-on bottle holders. Don’t worry, solutions exist for almost every bike, including folding bikes, kids’ bikes, and some vintage models.
Credit: www.purecycles.com
Step-by-step Installation: Using Pre-drilled Holes
If your bike has mounting holes, follow these steps for a solid, rattle-free installation.
1. Remove The Bolts
Use the Allen key to carefully unscrew the bolts from the frame. Put them somewhere safe.
2. Align The Cage
Hold the bottle cage against the holes. Make sure the opening faces upward (or sideways for side-entry cages).
3. Insert Bolts
Place the bolts through the cage holes and into the frame. Tighten them by hand first to avoid cross-threading.
4. Tighten Securely
Use the Allen key to tighten the bolts. They should be snug but not over-tight—too much force can strip the threads.
5. Check For Movement
Give the cage a gentle wiggle. It should not move. If it does, tighten a bit more.
6. Test With A Bottle
Slide your bottle in and out to make sure it fits smoothly and doesn’t rattle.
Practical Tip
If you ride rough roads, consider using a small drop of threadlocker on the bolts. This keeps them from loosening over time.
Installing Without Pre-drilled Holes
No holes? No problem. Several creative solutions let you add a water bottle holder even to bikes not designed for one.
Clamp-on Mounts
These use a metal or plastic band to hold the cage. They’re strong and don’t damage the frame if installed correctly.
- Open the clamp and fit it around your chosen tube (down tube or seat tube).
- Tighten the clamp with a screwdriver or Allen key. Don’t overtighten—plastic mounts can crack.
- Attach the bottle holder to the clamp with the included screws.
- Test for stability.
Strap-on Mounts
Velcro or rubber straps wrap around the frame. These are quick and lightweight but not for heavy bottles.
- Place the holder where you want it.
- Wrap the straps tightly.
- Check that the cage does not slide or twist.
Adapters
Some brands make special adapters for bikes with non-round tubes or suspension frames.
- Follow the instructions provided with the adapter.
- These usually require a bit more setup but give a secure fit.
| Mounting Solution | Pros | Cons | Best For |
|---|---|---|---|
| Clamp-On | Strong, reusable | Heavier, may scratch paint | Metal frames |
| Strap-On | Lightweight, fast | Less stable | Temporary use, kids’ bikes |
| Adapter | Custom fit | Costly, sometimes tricky | Odd-shaped frames |
Common Mistake
Many riders overtighten clamps or straps, which can damage the paint or even dent thin frames. Tighten just enough to prevent movement, but no more.
Positioning Your Water Bottle Holder
Correct placement makes a big difference for comfort and safety.
- Down tube: Most common. Easy to reach while riding.
- Seat tube: Good for a second bottle or if the down tube is crowded.
- Handlebar/Stem: Useful for folding bikes or small frames.
- Under the down tube: For extra bottles on touring bikes, but watch out for mud and debris.
If you have only one spot, the down tube is usually best. For multiple holders, make sure bottles don’t block cables or pedals.
Choosing The Right Water Bottle Holder
Selecting a cage is about more than just looks. Here’s what matters most:
1. Material
Aluminum is strong and affordable. Carbon fiber is light for racing, but pricier. Plastic works for most casual riders.
2. Bottle Security
Make sure the cage holds your bottle tightly, especially if you ride on bumpy roads.
3. Weight
For most, a few grams don’t matter. For racers, every gram counts.
4. Ease Of Access
Side-entry cages help if your frame is small or you have bags attached.
5. Style And Color
Pick a style that matches your bike, but don’t sacrifice function for looks.
Example
A mountain biker may want a tough, metal cage that won’t break, while a road racer might choose a light carbon fiber model.
Credit: www.reddit.com
Adding A Second Water Bottle Holder
Long rides or hot weather often require more water. If your bike has two sets of mounting holes, add a second cage on the seat tube. If not, use a clamp or adapter for a handlebar or behind-the-seat mount.
Carrying two bottles can make a big difference on rides over 20 km or in summer heat. Just make sure both holders are secure and easy to reach.
Caring For Your Bottle Holder
A little maintenance keeps your cage working well:
- Check bolts monthly—they can loosen from vibration.
- Clean the holder regularly, especially after muddy rides.
- Inspect for cracks in plastic or carbon cages.
- Lubricate bolts with a tiny drop of oil if they squeak.
A neglected holder can drop your bottle mid-ride, which is dangerous and annoying.
Upgrading Your Setup: Advanced Options
Some riders go beyond basic bottle cages for more convenience or style.
- Insulated holders: Keep drinks cold longer.
- Quick-release cages: For fast bottle changes in races.
- Integrated tool storage: Some cages have built-in compartments for tools or CO2 cartridges.
- Custom colors or designs: For personal flair.
These options are often found in higher-end bike shops or online. Choose what fits your needs and budget.
Real-world Tips And Insights
- Use the shortest bolts possible. Long bolts can poke inside the frame and cause damage.
- Test with your real bottle. Some cages fit only standard sizes—test before you ride far.
- Carry a spare bolt in your saddle bag. Bolts can loosen and fall out, especially on rough trails.
- Avoid very cheap plastic holders. They often crack or stretch, dropping bottles on bumpy rides.
- For carbon frames, use only the recommended torque when tightening bolts. Over-tightening can crush the frame.
Safety And Legal Considerations
In some cities, especially in hot countries, carrying water is not just smart—it’s required for certain events or long-distance rides. Make sure your setup doesn’t block brake cables or hit your knees while pedaling.
Also, avoid putting holders where bottles could fall and cause accidents. Periodically check your holder for cracks or loose bolts, especially before long rides.
Where To Buy And How Much To Spend
You can buy water bottle holders in local bike shops, outdoor stores, or online. Prices range from $5 for basic plastic cages to over $50 for carbon fiber or designer models. Most riders are happy with cages in the $10–$20 range.
If you want to compare options and see reviews, visit REI’s water bottle cage guide for more information.
Frequently Asked Questions
How Do I Know If My Bike Can Take A Water Bottle Holder?
Most modern bikes have two threaded holes on the down tube or seat tube for bottle cages. Look for these small holes—often with bolts in them—on your frame. If your bike has them, almost any standard holder will fit. If not, use clamp or strap-on adapters.
Can I Install A Bottle Holder On A Kid’s Bike?
Yes, but kid’s bikes often lack mounting holes and have smaller frames. Use a clamp-on or strap-on holder, and check that the bottle doesn’t interfere with steering or pedaling. Side-entry cages or handlebar-mounted holders are often best.
What If My Water Bottle Rattles Or Falls Out?
Choose a cage that matches your bottle size. Test the fit before riding. If it’s loose, try gently squeezing a metal cage or add a rubber band around the bottle. Avoid very lightweight plastic holders if you ride rough trails.
Is It Safe To Drill Holes In My Bike Frame For A Bottle Cage?
It’s not recommended. Drilling can weaken the frame and may void your warranty. Instead, use clamp-on or strap-on holders. Only skilled mechanics should consider drilling, and only on steel frames—not aluminum or carbon.
Can I Use Any Water Bottle?
Most holders fit standard cycling bottles (500–750 ml). Some larger bottles may not fit. Test with your actual bottle before buying. For odd-shaped or insulated bottles, look for adjustable or oversized cages.
Putting a water bottle holder on your bike is a small project that brings big benefits. With the right tools and knowledge, you can stay hydrated safely and ride longer—no matter what bike you ride.