Taking your bike with you by car opens new possibilities for adventure. Whether you plan to ride scenic trails far from home or simply need to transport your bike for repairs, knowing how to put a bike on a car is essential.
Many beginners worry about damaging their bike or car, or feel confused by the many rack options. With clear steps, practical tips, and the right tools, you can transport your bike safely and efficiently. This guide will help you understand every method, avoid common mistakes, and choose the best solution for your needs.
Understanding Your Options
There are three main ways to carry a bike on a car: roof racks, trunk-mounted racks, and hitch racks. Each has advantages and fits different situations.
Roof Racks
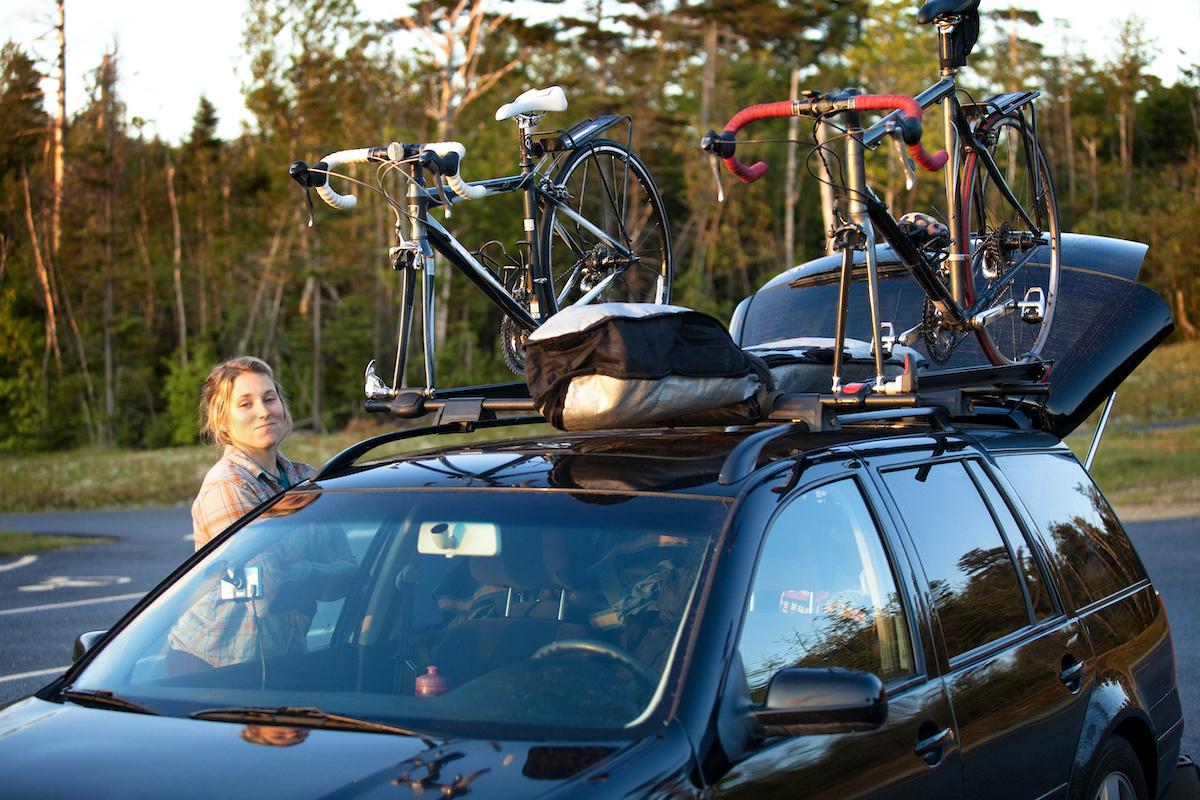
A roof rack attaches to the car’s roof, usually using crossbars. Bikes are secured upright, either by the wheels or the front fork. This method keeps your trunk free and allows you to carry other gear, but lifting the bike overhead can be difficult for some.
Trunk-mounted Racks
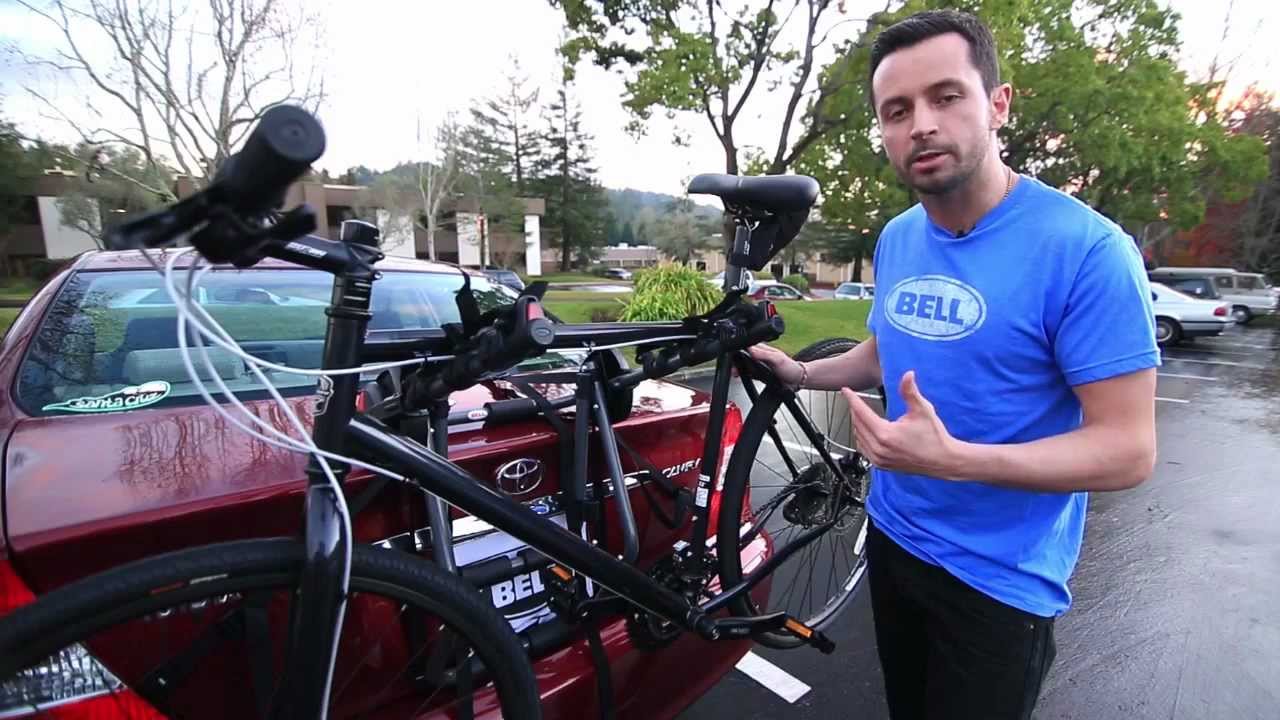
Trunk-mounted racks are popular because they’re affordable and easy to install. They use straps and hooks to grip the trunk or hatch. These racks are portable and can be moved between vehicles, but may block your license plate or rear view.
Hitch Racks
A hitch rack connects to your car’s trailer hitch. It usually holds bikes by the frame or wheels and can carry multiple bikes. Hitch racks are sturdy and keep bikes at a comfortable height for loading, but require your car to have a hitch receiver.
Choosing The Right Rack For Your Car
Not every rack fits every car or every need. Consider these factors before buying:
- Car type: Compact cars may not support heavy roof racks or large hitch racks.
- Bike type: Some racks fit road bikes better, while others are designed for mountain or e-bikes.
- Budget: Trunk racks usually cost less, while hitch racks and roof systems are more expensive.
- Number of bikes: Some racks carry one bike, others four or five.
- Frequency of use: Heavy users may want a permanent roof or hitch solution.
Here is a simple comparison of the three main rack types:
| Rack Type | Pros | Cons | Typical Price Range |
|---|---|---|---|
| Roof Rack | Doesn’t block trunk, fits many bike types | Hard to lift, increases car height | $150–$500 |
| Trunk Rack | Affordable, portable | May block rear view, limited security | $50–$200 |
| Hitch Rack | Easy to load, carries multiple bikes | Requires hitch, higher cost | $100–$600 |
Preparing Your Bike For Transport
Before you put your bike on your car, a few preparations help protect both your bike and your vehicle.
- Clean your bike: Dirt and grit can scratch your car or bike frame. Wipe off mud and dust.
- Remove accessories: Take off water bottles, pumps, lights, or GPS devices to prevent loss or damage.
- Check tire pressure: Low tires can bounce more during travel, increasing the chance of damage.
- Secure loose parts: If your pedals, wheels, or seat are loose, tighten them before loading.
- If needed, remove front wheel: Some racks require removing the front wheel. Practice this at home if you haven’t done it before.
Step-by-step: Putting A Bike On A Roof Rack
Roof racks are common but need careful handling. Here’s how to do it safely:
- Install the roof rack: Follow the rack manufacturer’s instructions. Make sure crossbars are tight and racks are properly aligned.
- Check the rack fit: Before lifting your bike, make sure the rack is secure and not moving.
- Lift the bike: Stand close to your car. Grip the frame and fork (not wheels) for better control.
- Place the bike on the rack: Align the bike with the rack channel. If using a fork-mount, remove the front wheel and lock the fork into the rack.
- Secure the bike: Use all straps and locks. Check that the frame and both wheels are firmly held.
- Recheck everything: Gently shake the bike. If it moves, tighten the straps or clamps.
- Don’t forget height: Your car is now much taller. Watch for low bridges, garages, or drive-throughs.
Non-obvious tip: Mark your dashboard with a note about the bike on the roof. Many people forget and drive into a garage, causing damage.
Step-by-step: Using A Trunk-mounted Rack
Trunk racks are quick to set up but need attention to avoid scratches.
- Place the rack on the trunk: Center it, making sure foam pads touch the car’s paint.
- Attach hooks: Fasten all hooks to the trunk edges or hatch. Pull straps tight.
- Test the rack: Press down gently. The rack should not slide or shift.
- Load the bike: Lift the bike, place the top tube onto the rack arms. If your bike is a women’s or step-through frame, use a frame adapter.
- Secure the bike: Attach all straps around the frame and wheels. Confirm the bike doesn’t swing.
- Check visibility: Make sure your license plate and lights are not blocked. If they are, move the rack or use a plate relocation kit.
Practical insight: Always retighten straps after a short test drive. Trunk racks can loosen as the car flexes.
Step-by-step: Using A Hitch Rack
Hitch racks are strong and easy for heavy bikes, but require careful installation.
- Install the hitch rack: Slide it into the hitch receiver. Tighten the bolt or pin as directed.
- Adjust support arms: Open or tilt the rack as needed.
- Lift your bike: Hold the frame securely. For heavy bikes, get help.
- Place the bike on the rack: Set the frame or wheels into the cradles.
- Strap or clamp the bike: Use all provided restraints. For multiple bikes, space them to avoid contact.
- Lock the bike: Use built-in locks or a separate cable for extra security.
- Test movement: Shake the rack and bike. Everything should feel solid.
Extra tip: If carrying e-bikes or heavy mountain bikes, check the rack’s weight limit. Overloading can damage your car’s hitch or suspension.
Inside The Car: When You Don’t Have A Rack
If you don’t have a rack, you can sometimes fit a bike inside your car.
- Fold down rear seats: Most sedans and hatchbacks allow this. Lay a blanket or mat to protect your car.
- Remove wheels: Taking off one or both wheels makes the bike much shorter.
- Turn handlebars sideways: Loosen the stem bolt and rotate the bars if needed.
- Secure the bike: Use straps or bungee cords to prevent movement during the drive.
This method works best for short trips and smaller bikes. However, it can be messy if your bike is dirty, and it may not fit in all cars.
Common Mistakes And How To Avoid Them
Many people make avoidable errors when putting a bike on a car. Here are some to watch out for:
- Loose straps or clamps: Always double-check before driving.
- Damaged paint: Place padding or soft material between the rack and car.
- Forgetting the bike is on the roof: Place a visible reminder in your car.
- Overloading the rack: Never exceed the rack or car’s recommended weight.
- Blocking lights or license plate: This can result in a traffic ticket.
- Not locking the bike: Theft is common in parking lots. Always use a lock.
Credit: www.youtube.com
Comparing Rack Types For Different Needs
To help you choose, here’s how the racks compare for common scenarios:
| Situation | Best Rack Type | Why |
|---|---|---|
| Family trip with several bikes | Hitch Rack | Can carry 2-5 bikes securely |
| Solo mountain biker | Roof Rack | Doesn’t block trunk, fits most bikes |
| Budget user, short trips | Trunk Rack | Low cost, easy to move between cars |
| No rack, small car | Inside Car | Only option, but not always practical |
Safety Checks Before Driving
Once your bike is on the car, always do a final safety check:
- Tug each strap or clamp to confirm tightness.
- Shake the bike and rack. There should be no movement.
- Check visibility in all mirrors.
- Make sure your license plate and brake lights are visible.
- Listen for unusual noises during the first few minutes of driving.
- After 10–15 minutes, stop and recheck everything.
Pro insight: Weather can affect straps and plastic parts. In rain or snow, check for slipping or loosening.

Credit: www.wikihow.com
Additional Tips For Safe And Easy Transport
- Use a bike cover: If you expect rain or mud, a cover protects your bike and keeps your car clean.
- Drive carefully: With a roof rack, your car handles differently in wind and at high speeds.
- Check local laws: Some regions require visible license plates, special lights, or permits for bike racks.
- Keep tools handy: Carry a multi-tool, extra straps, and a tire pump for emergencies.
- Practice loading/unloading: Do a dry run at home so you’re not rushed when it matters.
When To Seek Professional Help
If you feel unsure, ask for help at a local bike shop. Many shops will install racks or show you the proper way to load a bike. This can prevent damage and give you confidence for future trips. Some car dealers also sell racks designed for your specific car model.
For detailed, manufacturer-approved tips, check out guides from resources such as REI Co-op.
Credit: www.siroko.com
Frequently Asked Questions
How Many Bikes Can I Put On My Car At Once?
Most racks carry between one and five bikes. Hitch racks are best for multiple bikes. Always check the rack’s and your car’s weight limits before loading.
Will A Bike Rack Damage My Car?
If installed correctly, modern racks are designed to protect your car. However, dirt or loose straps can cause scratches. Use padding and clean both the car and rack contact points regularly.
Can I Use A Bike Rack With An E-bike?
Yes, but e-bikes are heavier than standard bikes. Use a hitch rack rated for heavy weights, and never overload your car’s hitch. Lifting an e-bike onto a roof rack is not recommended.
Is It Legal To Block My License Plate With A Bike?
In many places, blocking the plate is illegal. Use a rack that keeps the plate visible, or buy a relocation kit. Check local traffic laws to avoid fines.
Can I Drive Through A Car Wash With A Bike Rack?
No. Remove the bike and rack before entering a car wash. The brushes and water pressure can damage both your bike and the rack.
Putting a bike on a car doesn’t have to be stressful. With the right rack, careful preparation, and regular safety checks, you can enjoy cycling adventures wherever the road takes you. Remember to always prioritize safety, protect your equipment, and double-check everything before starting your journey.