Replacing a broken spoke on your bike might seem difficult, but with the right steps, you can do it yourself and keep your wheels running smoothly. Riding with a damaged spoke is risky—it can lead to more broken spokes and even a bent wheel.
Learning how to replace bike spokes not only saves money but also helps you understand your bike better. This guide will walk you through every detail, from the tools you need to the final adjustments, so you can confidently fix a spoke and get back on the road.
Understanding Bike Spokes And Why They Matter
The spokes on your bike connect the hub (center) of your wheel to the rim (outside edge). They keep the wheel strong and perfectly round. If a spoke breaks, the wheel can become weak or wobbly. Most bikes have between 28 and 36 spokes per wheel. Each spoke helps share your weight and the forces as you ride, especially over bumps or when you turn.
Many new riders believe a single broken spoke is not a big deal. In reality, ignoring it can quickly lead to more damage, as extra pressure moves to the nearby spokes. Fixing a spoke early keeps your wheel in good shape and stops bigger problems before they start.
Tools And Materials Needed
Before you begin, gather the right tools and parts. This makes the job smoother and prevents mistakes.
- Replacement spoke: Match the length and thickness of your old spoke.
- Spoke nipple: This small nut threads onto the spoke at the rim.
- Spoke wrench: A special tool for tightening or loosening spoke nipples.
- Adjustable wrench: For removing the wheel.
- Screwdriver: Some spoke nipples are easier to start with a flathead.
- Tire levers: To take the tire off the rim.
- Bicycle pump: To refill the tire.
- Lubricant: A drop on the nipple helps prevent seizing.
- Wheel truing stand (optional): Helps check the wheel for straightness. If you don’t have one, you can use your bike frame.
Beginner Tip: Most spoke replacements do not need you to remove the whole cassette or disc brake. But if the broken spoke is on the gear or brake side, you may need a cassette removal tool or lockring tool.

Credit: www.youtube.com
Removing The Damaged Spoke
- Take off the wheel: Open the quick-release lever or loosen the axle nuts. Remove the wheel from the bike.
- Deflate the tire: Let all the air out. This makes it easier to remove the tire and rim tape.
- Remove the tire and tube: Use tire levers to carefully pull the tire off. Take out the inner tube and set it aside.
- Take off the rim tape: This thin strip covers the spoke holes inside the rim. Peel it back where the broken spoke is.
- Remove the broken spoke: Unscrew the spoke nipple using the spoke wrench or screwdriver. Pull out the broken spoke from the hub.
Practical Insight: If the spoke broke near the hub, you may have to push the remains out through the hub flange. If it broke near the rim, the nipple may still be in place—keep it for reuse if it’s not damaged.
Choosing The Right Replacement Spoke
Not all spokes are the same. Using the wrong size can make your wheel weak or hard to true (make straight). Here’s how to pick the correct spoke:
- Length: Measure an old spoke from the tip to the end of the threads.
- Gauge (thickness): Most common is 14 gauge (2.0 mm), but some bikes use 15 gauge (1.8 mm).
- Material: Stainless steel is strong and rust-resistant; cheaper bikes may use plain steel.
If you’re unsure, take the old spoke to a bike shop for a match. Getting the length wrong by even 2-3 mm can cause problems.

Credit: road.cc
Installing The New Spoke
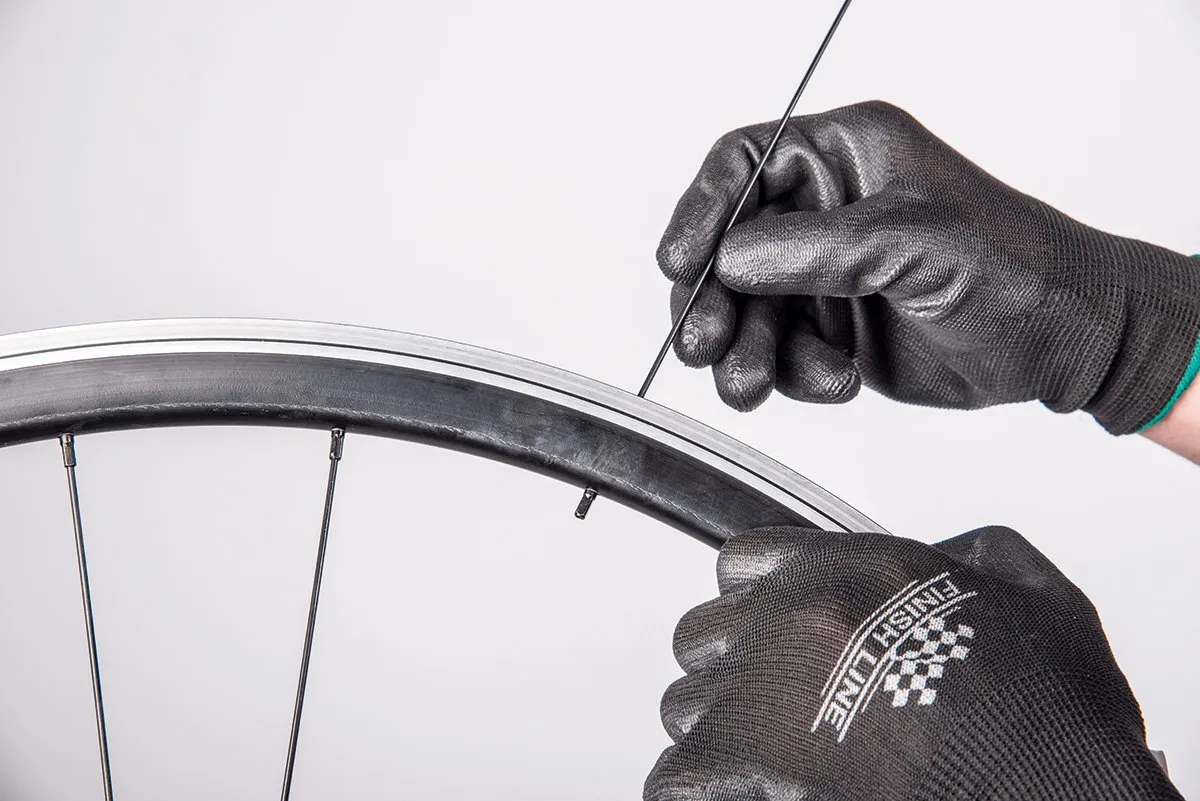
- Insert the new spoke: Start at the hub and thread it through the same holes and pattern as the old one.
- Lace the spoke: Weave it over and under the other spokes, copying the pattern on your wheel. Most wheels use a 3-cross or 2-cross pattern.
- Attach the nipple: Put a drop of lubricant on the threads, then screw the nipple onto the spoke from inside the rim. Use a screwdriver at first, then finish with the spoke wrench.
- Tighten the spoke: Turn the nipple until the spoke is snug but not too tight. The tension should match the nearby spokes.
Important Detail: If the spoke hole is on the gear side or disc brake side, you might need to remove the cassette or rotor to reach it. This is a common step that beginners overlook and find frustrating.
Truing The Wheel
After replacing the spoke, your wheel may be out of shape (not perfectly straight). Truing means adjusting the spoke tension to correct this.
- Mount the wheel: Put the wheel back on the bike or a truing stand.
- Check for wobbles: Spin the wheel and watch the gap between the rim and the brake pads (or use a fixed pointer). Look for left-right movement (side-to-side).
- Adjust tension: Turn the spoke wrench 1/4 turn at a time. Tighten the new spoke to pull the rim toward that side; loosen the opposite spoke if needed.
- Check roundness: Look for hops (up-down movement) in the rim. Adjust spokes near the problem area.
- Fine-tune: Make small adjustments and re-check often. Too much change can make the wheel worse.
Data Insight: A properly tensioned spoke should feel firm when squeezed between your thumb and finger. Most home mechanics use “feel,” but professionals use a tension meter for exact results.
Reassembling The Wheel
- Replace rim tape: Cover the spoke holes to protect the tube from sharp edges.
- Reinstall the tube and tire: Fit the tube into the tire, then push both onto the rim by hand. Avoid pinching the tube.
- Inflate the tire: Pump to the recommended pressure, found on the tire sidewall.
- Check for bulges or pinches: Make sure the tire sits evenly on the rim.
- Install the wheel on the bike: Secure it with the quick-release or axle nuts. Spin the wheel to make sure it’s straight.
Safety Checks Before Riding
Even a small error when replacing a spoke can lead to problems. Before you ride:
- Spin the wheel: It should not rub the brakes or wobble.
- Check spoke tension: Squeeze pairs of spokes; they should feel similar to the others.
- Listen for clicks: New spokes sometimes “bed in” and may creak. Re-check after your first ride and retighten if needed.
- Test ride: Start with a short, slow trip. Check the wheel again afterward.
Non-obvious tip: New spokes may stretch a little after the first few rides. Re-check tension after 50–100 km to prevent future breaks.
Credit: www.cyclist.co.uk
Common Mistakes And How To Avoid Them
- Wrong spoke length: Always measure carefully or ask a shop for help.
- Skipping the rim tape: Leaving it off can cause a flat tire.
- Over-tightening: Too much tension can warp the rim or break more spokes.
- Ignoring the spoke pattern: Always follow the original lacing pattern.
- Not truing the wheel: Even a small wobble can get worse if not fixed.
- Forgetting to lubricate: Dry spoke nipples can seize and make future repairs hard.
When To See A Professional
Replacing one or two spokes is a good DIY project. However, if you notice:
- Multiple broken spokes
- A rim with a large dent or crack
- Trouble keeping the wheel true
- Unusual noises from the wheel
…it’s best to visit a qualified bike mechanic. Sometimes, a wheel needs complete rebuilding or replacing. Professionals have tools like tension meters and truing stands for perfect results.
Cost And Time Estimates
- DIY spoke replacement: 30–60 minutes, $2–$5 per spoke
- Bike shop repair: $15–$30 per spoke (labor), plus parts
You can save money by learning, but sometimes the peace of mind from expert work is worth it.
Comparing Spoke Types
Understanding spoke types can help you choose the right replacement and know when an upgrade is worth it.
| Type | Material | Typical Use | Cost |
|---|---|---|---|
| Plain gauge | Steel | Budget bikes | Low |
| Butted (double/triple) | Stainless steel | Mid/high-end bikes | Medium |
| Aero/bladed | Stainless steel/alloy | Racing/road bikes | High |
Non-obvious insight: Butted spokes are thicker at the ends and thinner in the middle. This makes them lighter, but still strong where needed. They can also absorb road shocks better than plain gauge spokes.
Comparing Rim And Hub Side Repairs
Not all spokes are equally easy to replace. Here’s how repairs differ based on location:
| Spoke Location | Difficulty | Extra Steps Needed |
|---|---|---|
| Non-drive side (left) | Easy | No extra tools |
| Drive side (right, gears) | Harder | Remove cassette |
| Disc side (front, brakes) | Harder | Remove disc rotor |
If you plan to ride far from home, it’s wise to carry a spare spoke, spoke wrench, and a multi-tool. Many long-distance cyclists even carry a “fiber spoke” for emergency repairs.
Preventing Future Spoke Damage
Keeping your wheel strong starts with good maintenance:
- Check spoke tension: Do this every few months.
- Clean your wheels: Dirt and salt can cause rust.
- Avoid deep potholes: Sudden hits break spokes.
- Keep tires inflated: Soft tires let the rim hit the ground.
- Replace worn rims: A thin rim can cut into spokes.
For more on spoke technology and wheel building, you can read at Wikipedia.
Frequently Asked Questions
How Do I Know Which Spoke To Buy?
Measure the length and thickness of a good spoke from your wheel. If you’re unsure, take it to a bike shop for help. Most wheels use 14-gauge spokes, but check your bike’s manual or look for markings on the old spoke.
Can I Ride With A Broken Spoke?
It’s possible for a short distance, but not safe. Riding with a missing or broken spoke puts extra stress on the others and can quickly lead to more damage or a collapsed wheel.
What If I Can’t True The Wheel After Replacing The Spoke?
If the wheel still wobbles after your best effort, the rim might be bent or the spoke tension is not balanced. Take the wheel to a professional mechanic for a full assessment.
Do All Bikes Use The Same Spoke Size?
No. Spoke length and thickness vary by wheel size, type, and design. Road, mountain, and children’s bikes can all use different spokes. Always match the original size for your bike.
Is It Worth Replacing Just One Spoke, Or Should I Do More?
If only one spoke is damaged, you can replace just that one. But if you notice several broken or loose spokes, it may be time for a full wheel rebuild or a new wheel.
Replacing bike spokes is a useful skill for any cyclist. With practice, the process gets faster and easier. Proper spoke maintenance keeps your bike safe, your rides smooth, and your wheels strong for years to come.