Figuring out how to transport a recumbent bike in a car can feel like trying to fit a small canoe through your back door. The long wheelbase, laid-back geometry, and unusual frame shape make these bikes trickier to load than traditional uprights. Most sedans and hatchbacks won't swallow a fully assembled recumbent, but with the right approach you can avoid buying a hitch rack or renting a van.
The typical long-wheelbase recumbent stretches 65 to 75 inches end to end, while a standard sedan trunk opening measures only 40 to 48 inches wide and 35 to 45 inches deep. That gap explains why you'll almost always need some disassembly or creative angling. Let's walk through the frame types, vehicle options, and step-by-step loading methods that actually work.
Image source: Web (Bing) / health.ne.jp (Web image (fair-use with source credit))
Quick Answer
Most recumbent bikes fit inside a car only with partial disassembly. Remove the front wheel and the seat to shorten overall length. Fold down your rear seats and angle the frame diagonally through the cargo opening.
Long-wheelbase models may also need boom separation if your vehicle offers a take-apart frame joint. Hatchbacks, wagons, and SUVs handle this more easily than sedans. Protect your upholstery with blankets and secure the bike with straps so it doesn't shift during turns.
Why Recumbent Bikes Are Trickier to Transport Than Upright Bikes
Upright bikes stand vertically and fit neatly on roof or hitch racks. Recumbents lie low and long. The seat frame, steering tiller or handlebar cluster, and extended front boom all create awkward clearances that make external racks less practical.
Most platform-style hitch racks won't cradle a recumbent seat mesh or hold the frame securely. Roof racks demand heavy lifting and still struggle with the bike's unusual profile. That leaves internal transport as the most practical solution, but the geometry creates three main challenges.
First, the wheelbase often exceeds your car's cargo depth by 20 to 30 inches. Second, the seat frame sticks up and catches on door openings or roof liners. Third, the chain run on many recumbents stretches from front chainrings to rear derailleur through an enclosed tube, so you can't simply hang the bike by its frame without risking chain damage or grease transfer.
Measure First: Know Your Bike's Dimensions and Your Car's Cargo Space
Grab a tape measure before you start taking things apart. Measure your recumbent's overall length from the front tire contact patch to the rear axle. Write down the seat-back height and the width across the widest point, usually the handlebars or seat frame.
Next, measure your car's cargo area with the rear seats folded flat. Note the opening width at the narrowest point, the vertical clearance from floor to roof, and the diagonal distance from one rear corner to the opposite front corner. That diagonal dimension matters more than you'd expect because you'll angle the bike to gain a few extra inches.
Compare your bike length to your car's cargo diagonal. If the bike is within six inches of that diagonal measurement, you'll likely need to remove the front wheel and possibly the seat. If the gap is larger, full disassembly or boom separation becomes necessary.
Knowing these numbers in advance saves you from discovering mid-load that the bike simply won't fit.
Which Recumbent Frame Type You Have (And Why It Matters)
Recumbent bikes fall into three wheelbase categories, and each handles transport differently. Understanding your frame type helps you pick the fastest disassembly path.
Long-Wheelbase (LWB) Recumbents
Long-wheelbase models place the front wheel well ahead of the cranks, creating a stable ride and relaxed steering. Total length typically runs 65 to 75 inches. These bikes offer comfortable touring geometry but present the biggest transport challenge.
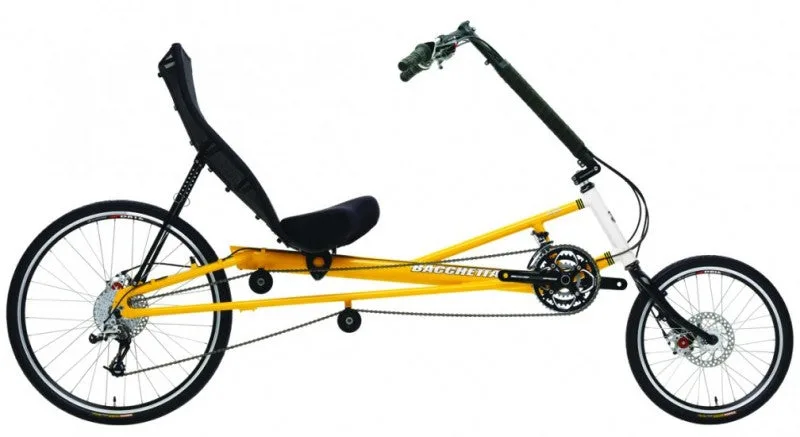
Image source: Bing (Web (fair-use with source credit))
Most LWB frames require at least front-wheel removal, and many need seat removal or boom separation to fit inside a standard SUV. If your bike features a take-apart joint near the bottom bracket, you can split the frame into two manageable sections. Without that joint, you'll rely on clever angling and a vehicle with fold-flat rear seats.
Short-Wheelbase (SWB) Recumbents
Short-wheelbase bikes tuck the front wheel behind or directly under the cranks, reducing overall length to 60 to 68 inches. The compact footprint makes these easier to load. Many SWB models fit diagonally in a hatchback or wagon with only the front wheel removed.
The shorter boom means less frame to wrestle through door openings. You'll still need to protect the seat mesh and manage the chain, but the reduced length eliminates one major headache.
Compact Wheelbase and Folding Recumbents
Compact wheelbase recumbents push length down to 55 to 62 inches by shrinking the space between wheels even further. Some manufacturers also offer folding models with hinged frames or removable boom sections designed specifically for car transport.
Folding recumbents collapse to half their riding length in under two minutes. If you're shopping for a new bike and car transport matters, this category solves most problems before they start. As of 2026, several brands build take-apart models that fit in a sedan trunk without removing wheels.
Which Cars Work Best for Internal Recumbent Transport
Vehicle choice makes a bigger difference than you might expect. The key factors are rear-seat fold capability, cargo depth, and door-opening dimensions.
Hatchbacks and station wagons rank as the easiest platforms. Their wide liftgates and fold-flat rear seats create a long, uninterrupted load floor. A typical wagon offers 55 to 70 inches of cargo length with seats down, enough for most SWB and CWB recumbents with minimal disassembly.
SUVs and crossovers provide excellent cargo volume but vary widely in usable length. Measure carefully because some compact SUVs sacrifice depth for passenger space. Full-size SUVs and those with third-row fold-flat seating easily accommodate LWB frames.
Minivans dominate for sheer interior space. With second- and third-row seats stowed, you'll have 90-plus inches of flat floor. Many recumbents fit fully assembled in a minivan, requiring only a few bungee cords for stability.
Sedans present the toughest scenario. The trunk opening restricts width and vertical clearance, and the rear seatback rarely folds completely flat. You'll need full disassembly and precise angling.
Some sedan owners route the front section through the trunk pass-through into the rear seat area to gain diagonal length, but it's awkward and time-consuming.
The Three Main Transport Methods: Full Assembly, Partial Disassembly, and Full Breakdown
Your transport method depends on your vehicle size and available time. Each approach trades convenience for space efficiency.
Full assembly transport works only in large vans or trucks with enough room to roll the bike straight in. No tools required, and you're riding again the moment you reach your destination. The downside is you need a vehicle most cyclists don't own.
Partial disassembly removes one or two components to shorten the bike just enough to fit. Front-wheel removal is the most common step, followed by seat removal if needed. This method takes five to ten minutes and requires only basic tools.
It's the sweet spot for most hatchbacks and SUVs.
Full breakdown separates the frame at the boom joint or removes both wheels, the seat, and sometimes the handlebars. You'll invest 15 to 20 minutes in disassembly and slightly longer on reassembly. Use this approach when driving a sedan or transporting multiple bikes in one vehicle.
Experienced recumbent owners often develop a personal routine that balances speed with their specific car dimensions. The first time takes longer as you figure out clearances and angles. After a few trips, you'll streamline the process into a repeatable sequence.
Step-by-Step: Transporting Without Disassembly (When Your Car Allows It)
Roll the bike up to your open hatchback or liftgate and eyeball the diagonal clearance. If you're driving a minivan or large SUV, you may be able to load the entire bike without removing anything.
Tilt the bike slightly so the front wheel enters first at a 30- to 45-degree angle. Guide the seat frame through the opening while keeping the rear wheel on the ground outside. Once the front half clears the roof liner, pivot the bike to align it diagonally across the cargo floor.
Push the rear wheel in last and adjust the angle so the bike rests on both wheels and the seat frame. Use blankets or towels under contact points to prevent scratches. Secure the frame with bungee cords or ratchet straps attached to cargo tie-downs.
This method works best in vehicles with at least 75 inches of diagonal cargo space. If the bike binds or you're forcing it, stop and switch to partial disassembly. Damaging the seat mesh or scraping the door jamb isn't worth saving two minutes.
Step-by-Step: Partial Disassembly for Sedans and Smaller Cars
Partial disassembly cuts your bike's length by 20 to 30 inches, enough to fit most hatchbacks and some sedans. The front wheel comes off first because it's the quickest single change that buys the most space.
Removing the Front Wheel
Flip the bike upside down or lean it against your car's bumper. If your front hub uses a quick-release skewer, open the lever and unscrew the opposite side a few turns. Slide the wheel out of the fork dropouts.
If your bike has thru-axles or bolt-on hubs, you'll need a hex key or wrench. Loosen the axle completely and pull it free. Set the wheel aside and keep all hardware in a zip-lock bag taped to the frame so nothing rolls under the car.
With the wheel removed, your LWB bike drops from 72 inches to roughly 50 inches. That's enough for most SUVs and wagons when angled diagonally.
Removing the Seat
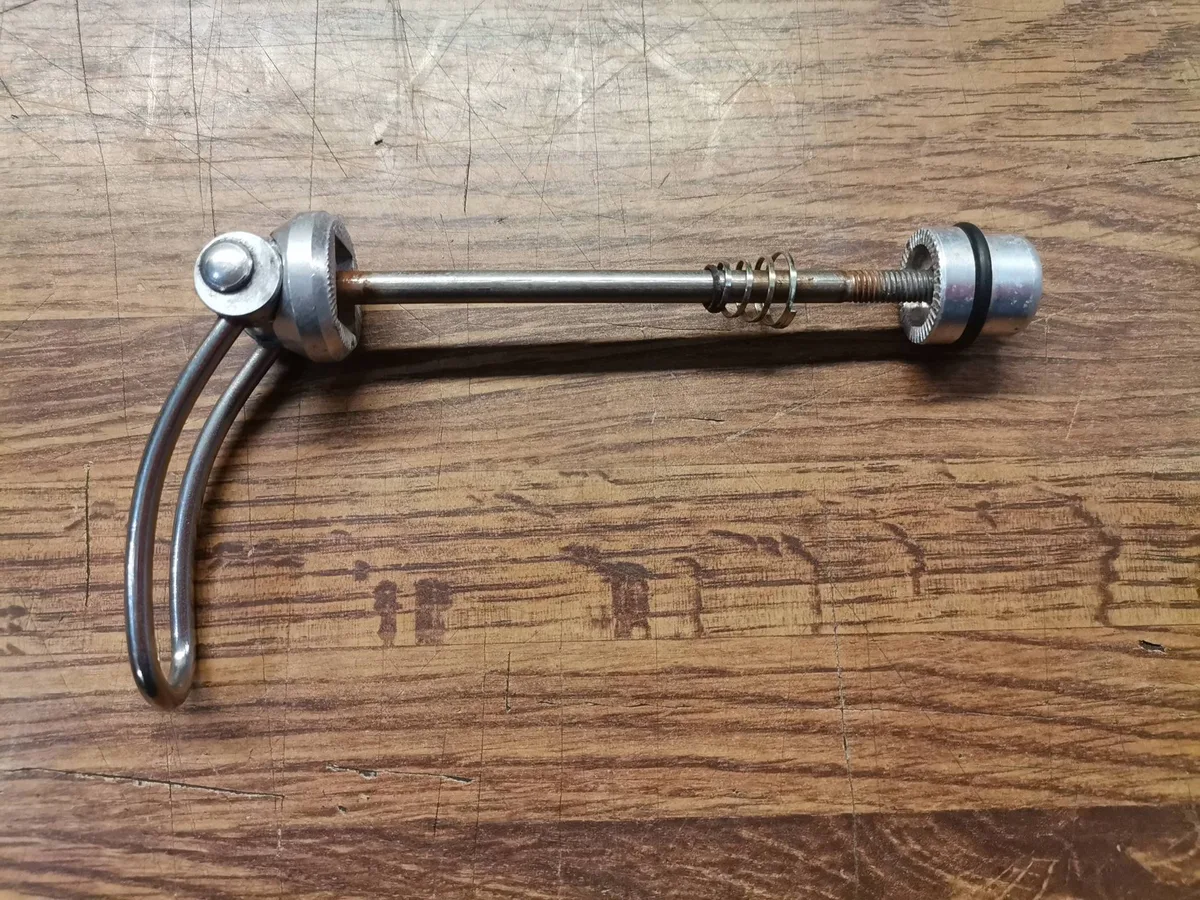
Image source: Bing (Web (fair-use with source credit))
The seat frame typically attaches to the main frame with two or four bolts accessible from underneath. Locate the mounting hardware and use the correct hex key or socket to loosen each bolt. Some seats use quick-release clamps that snap open with a lever.
Lift the seat straight up and away from the frame once all fasteners are free. The seat back is wider than most door openings, so removing it prevents jamming and reduces the bike's vertical profile by eight to twelve inches.
Wrap the seat in a towel or blanket and place it in the rear footwell or on top of the folded frame. You'll reassemble it in reverse order at your destination.
Separating the Boom (Frame Take-Apart Models)
Take-apart recumbents feature a clamp or coupling joint near the bottom bracket that splits the frame into two pieces. This design is common on touring models built for airline travel or compact car storage.
Loosen the clamp bolts with an Allen wrench until the joint slides apart. The front boom section (cranks, chainrings, and front derailleur) separates from the rear triangle (seat mast, rear wheel, and cassette). You'll now have two manageable pieces instead of one long frame.
Before separating, note how the chain routes through any idler pulleys or guides. You may need to remove the chain from the chainring to avoid tangling. Some riders prefer to wrap the chain loosely around the boom and secure it with a zip tie rather than fully disconnecting it.
Loading Angles and Door Clearance: Getting the Bike Inside Without Damage
The trickiest moment comes when you thread the frame through your car's door or liftgate opening. The seat frame, handlebars, and rear derailleur all catch if you come in straight.
Start with the front end angled upward at about 45 degrees. Slide the boom or fork through the opening first, aiming for the far corner of the cargo area. Once the front third is inside, rotate the bike to bring the seat frame through at a similar angle.
Watch the rear derailleur as you push the rear wheel in. It hangs below the frame and snags easily on weatherstripping or the liftgate lip. Tilt the bike slightly to lift the derailleur above the threshold.
If the seat back won't clear the roof liner, you've confirmed you need seat removal. Don't force it. Back the bike out, pull the seat, and try again.
Managing the Chain During Transport
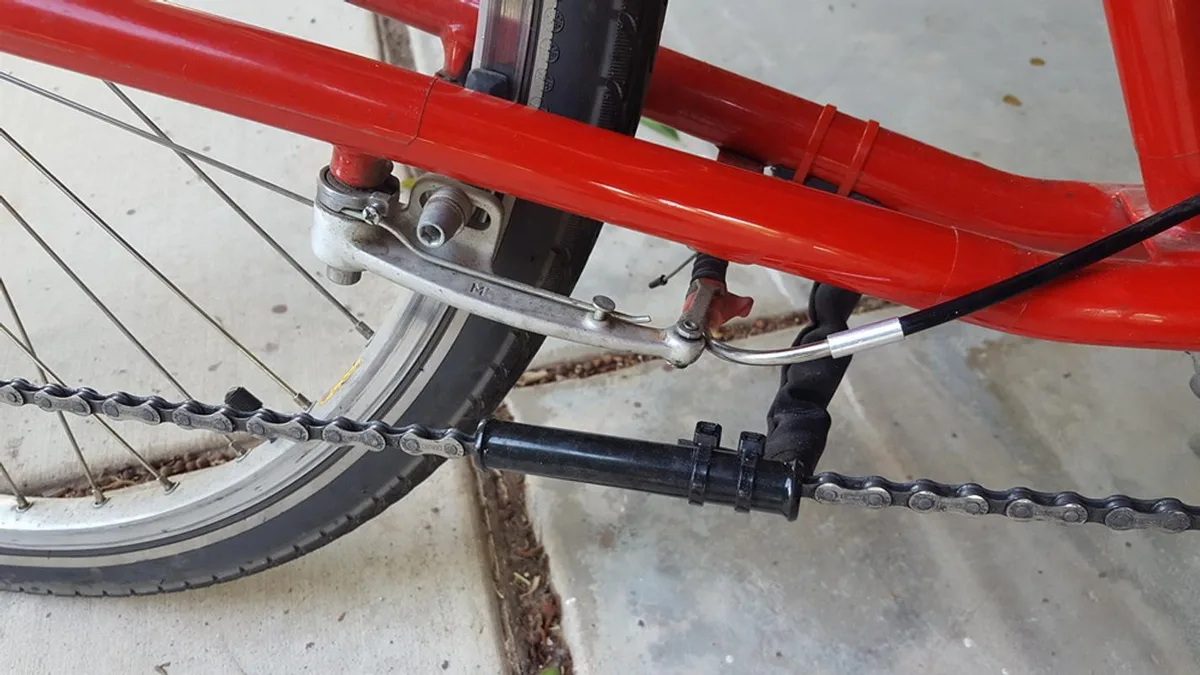
Image source: Bing (Web (fair-use with source credit))
Recumbent chains run longer than upright bikes, often stretching four to six feet from chainring to cassette. Many models use an enclosed chain tube to keep the chain aligned and protect it from road debris.
When you remove the front wheel or separate the boom, the chain loses tension and can slip off the chainring or fall out of the tube. If you're only removing the front wheel and leaving the frame intact, the chain usually stays put.
For boom separation or full disassembly, drape the loose chain over the boom or wrap it loosely around the bottom bracket. Secure it with a zip tie or Velcro strap so it doesn't dangle and rub grease onto your upholstery.
Some riders carry a small rag or paper towel to wrap the chain section that might contact the car interior. This prevents grease stains and keeps the drivetrain clean for reassembly.
If your chain has a master link, you can disconnect it entirely and store the chain in a plastic bag. Reinstalling a master link at your destination takes under a minute with a pair of pliers or a quick-link tool.
Protecting Your Car Interior and Bike Components
Blankets, towels, or foam pipe insulation prevent scratches on both sides. Lay a moving blanket across your cargo floor before loading the bike. This cushions the frame and catches any dirt or grease that transfers during loading.
Wrap the derailleur in a small towel and tuck it against the frame. The derailleur hanger bends easily if the bike shifts during transit. A bit of padding keeps it safe.
Cover the chainrings with a rag or a plastic chainring guard if you're transporting the bike with cranks attached. Chainring teeth can puncture upholstery or scratch plastic trim panels.
If you've removed the seat, protect the mesh from sharp edges on the frame or cargo area. Seat mesh tears are common when a loose seat slides around during hard braking.
Use cardboard scraps or pool noodles to fill gaps between the bike and the cargo walls. This prevents the frame from pivoting or sliding side to side when you take corners.
Securing the Bike So It Doesn't Shift While Driving
A loose bike becomes a projectile in a sudden stop. Even a 30-pound frame can cause injury or damage if it flies forward.
Loop bungee cords through the frame triangle and hook them to cargo tie-down anchors built into your vehicle's floor or sidewalls. Cross the cords in an X pattern for better hold. Avoid stretching bungees to their maximum length because they lose tension over bumps.
Ratchet straps offer more secure hold but require careful tensioning. Over-tightening can crush thin-wall tubing or bend the seat frame. Snug the strap until the bike doesn't move when you shake it, then stop.
Place heavier items like your helmet or tool bag against the bike to wedge it in place. The goal is to eliminate all movement in any direction.
Check your rearview mirror visibility before driving. If the bike blocks your view, reposition it or use your side mirrors exclusively. Some states require clear rear visibility by law, so verify local regulations if the bike sits high in the cargo area.
Tools You'll Need and How to Pack Them
A basic multi-tool with hex keys covers most recumbent disassembly tasks. Sizes 4mm, 5mm, and 6mm handle seat bolts, wheel axles, and boom clamps on the majority of frames. Toss in a 15mm wrench if your bike uses bolt-on axles instead of quick-release skewers.
Pack the tools in a small pouch and store it inside the bike frame or in your car's door pocket. You'll need them again at your destination for reassembly. A zip-lock bag works fine for collecting loose hardware like bolts, washers, and quick-release skewers during disassembly.
Carry a rag for wiping grease off your hands and a roll of paper towels in case the chain drips. A tire pump belongs in the car too, since some riders deflate tires slightly to reduce overall bike height during loading.
What About Recumbent Trikes?
Recumbent trikes sit wider and heavier than two-wheel models, making internal car transport much harder. Most trikes measure 30 to 36 inches across the rear axle, too wide for sedan trunks and tight even in SUVs.
Some folding trikes collapse the frame and tilt the wheels inward, reducing width to around 20 inches. These models fit in larger hatchbacks and minivans with seats folded. Non-folding trikes almost always require a trailer or external rack unless you're driving a full-size van.
If you own a trike and need to transport it regularly, consider a hitch-mounted platform rack rated for the extra weight or invest in a small utility trailer. Internal transport works only for compact folding models in large vehicles.
Common Mistakes That Damage Bikes or Cars
Forcing the bike through a too-small opening bends derailleur hangers and tears seat mesh. If it doesn't fit smoothly, stop and remove another component. Replacing a ripped seat costs more than five minutes of extra disassembly.
Skipping protective padding lets metal frame tubes scratch plastic trim and upholstery. Grease from the chain transfers to fabric seats and floor mats, creating stains that won't wash out. A single towel prevents hundreds of dollars in cleaning or repair bills.
Leaving the bike unsecured turns it into a hazard during emergency braking. Even a moderate stop can send a 35-pound frame sliding forward into the back of your seat. Always strap it down before driving.
Losing small parts like quick-release skewers or seat bolts happens when you set them on the ground during disassembly. Use a bag or magnetic tray to keep hardware together. Searching a parking lot for a dropped bolt wastes time you'd rather spend riding.
When Internal Transport Won't Work: Rack Alternatives
If your bike won't fit inside even with full disassembly, or you're transporting multiple recumbents, external racks become necessary. Hitch-mounted platform racks handle recumbent geometry better than roof or hanging racks.
Look for a rack with adjustable wheel trays and no top tube clamp. The Thule EasyFold XT and Kuat NV 2.0 both accommodate recumbent frames when you remove the seat. The low-slung profile fits on the wheel trays, and tie-down straps secure the frame without needing a traditional top tube.
Roof racks require heavy lifting and won't work with recumbents that exceed the rack's length limit. Trunk-mounted racks designed for upright bikes rarely hold recumbent frames securely. Stick with hitch platforms or internal transport.
Reassembly at Your Destination: Getting Back on the Road Quickly
Reverse your disassembly sequence to put the bike back together. Start with the boom if you separated it, then install the seat, and finish with the front wheel.
Tighten all bolts to manufacturer specs using your multi-tool. Seat bolts typically torque to 8 to 10 Newton-meters, while axle bolts need 12 to 15 Newton-meters. If you don't have a torque wrench, snug each bolt firmly without over-tightening.
Check the chain routing if you removed or loosened it during transport. Make sure it runs through any idler pulleys and tension guides in the correct sequence. Spin the cranks a few times to confirm smooth shifting before you ride.
Inspect the derailleur alignment by shifting through all gears. If the chain skips or makes noise, the derailleur may have shifted during transport. A quick barrel-adjuster tweak usually fixes minor cable tension issues.
Real-World Transport Scenarios by Vehicle Type
Sedan (Standard Trunk)
Most sedans require full disassembly with both wheels, seat, and boom removed. Even then, you'll thread components through the trunk pass-through into the rear seat area. Expect 15 to 20 minutes each direction for loading and reassembly.
Hatchback or Station Wagon
Hatchbacks handle SWB and CWB recumbents with front-wheel and seat removal. LWB models need boom separation. Load time drops to 8 to 12 minutes once you've practiced the routine a few times.
SUV or Crossover
Full-size SUVs accommodate most LWB bikes with only front-wheel removal. Compact crossovers fall between hatchbacks and full-size models. Measure your diagonal cargo length to know which category your vehicle fits.
Minivan
Minivans transport nearly any recumbent fully assembled. Fold the rear seats, roll the bike straight in, and secure it with straps. This is the easiest vehicle type for recumbent owners.
Frequently Asked Questions
Can I transport a recumbent bike in a sedan?
Yes, but you'll need full disassembly. Remove both wheels, the seat, and separate the boom if your frame allows. Thread the main frame through the trunk pass-through into the rear seat area for extra diagonal length.
Do I need tools to disassemble my recumbent for transport?
Most bikes need a multi-tool with 4mm, 5mm, and 6mm hex keys. Some models use quick-release clamps that require no tools. Check your seat mounts and axle type before your first trip.
Will my recumbent fit if I fold down the rear seats?
Measure your car's diagonal cargo length with seats folded. Compare that to your bike's overall length minus the front wheel. If the diagonal exceeds the bike length by six inches, it'll fit with basic disassembly.
How do I keep the chain from falling off during transport?
Wrap the chain loosely around the boom or bottom bracket and secure it with a zip tie. If your bike has a master link, disconnect the chain entirely and store it in a plastic bag.
Can I transport two recumbent bikes in one car?
Only in large minivans or SUVs with full disassembly of both bikes. Stack frames carefully with padding between them. Most owners find a hitch rack easier for multi-bike transport.
Is it safe to drive with a recumbent blocking my rear view?
Only if you have clear side-mirror visibility. Some states require an unobstructed rear view by law. Reposition the bike lower in the cargo area or use your mirrors exclusively if rear visibility is blocked.